
Forms Overview
Form Builder collects visitor information and runs submission actions.
Add a Form
- Open your page in Breakdance.
- Click Add > Forms > Form Builder to add a form to the page.
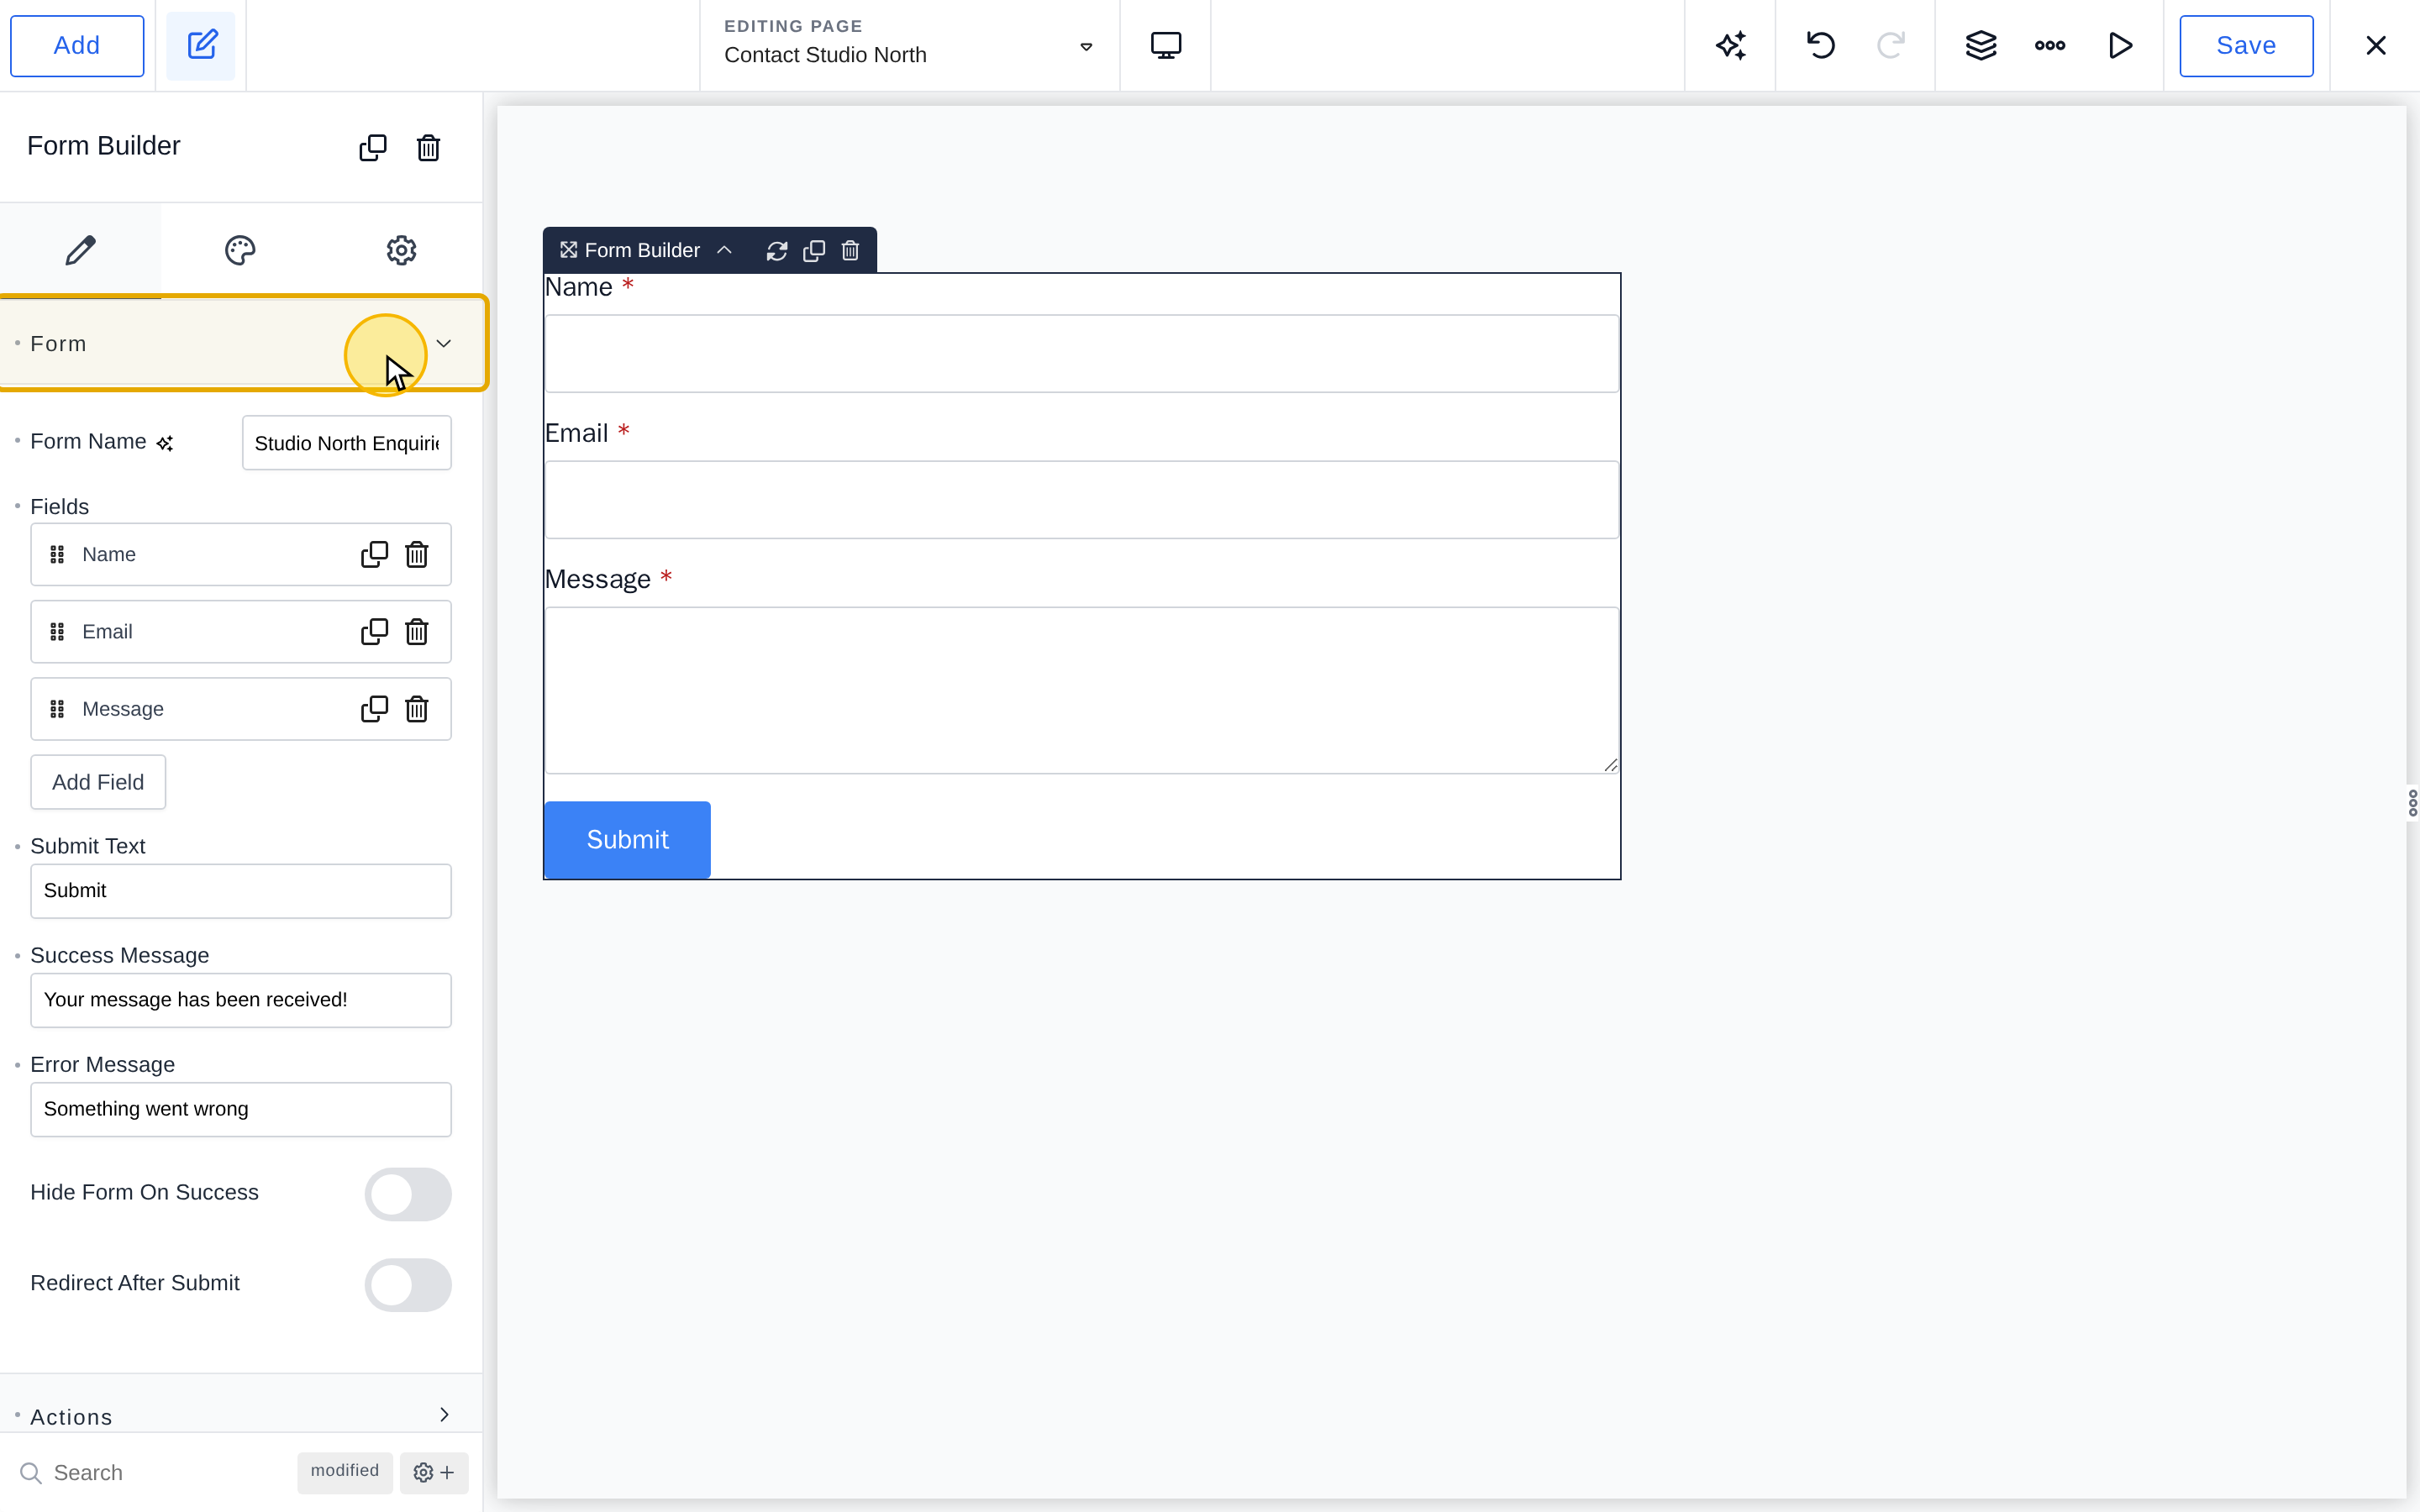
The default form includes Name, Email, and Message fields. Customize these fields and configure what happens when someone submits the form.
Customizing Form Fields
Select the form, then open Form > Fields in the Content tab. Add, remove, or reorder fields, and edit their labels, types, and options. Under each field’s Advanced settings, you can set placeholder text, default values, and whether an answer is required.
See Form Fields for the available field types and settings.
Form Actions – Using the Submitted Data
Actions determine what happens when someone submits your form. You can send emails, save submissions in WordPress, connect to email marketing services, or send data to a webhook.
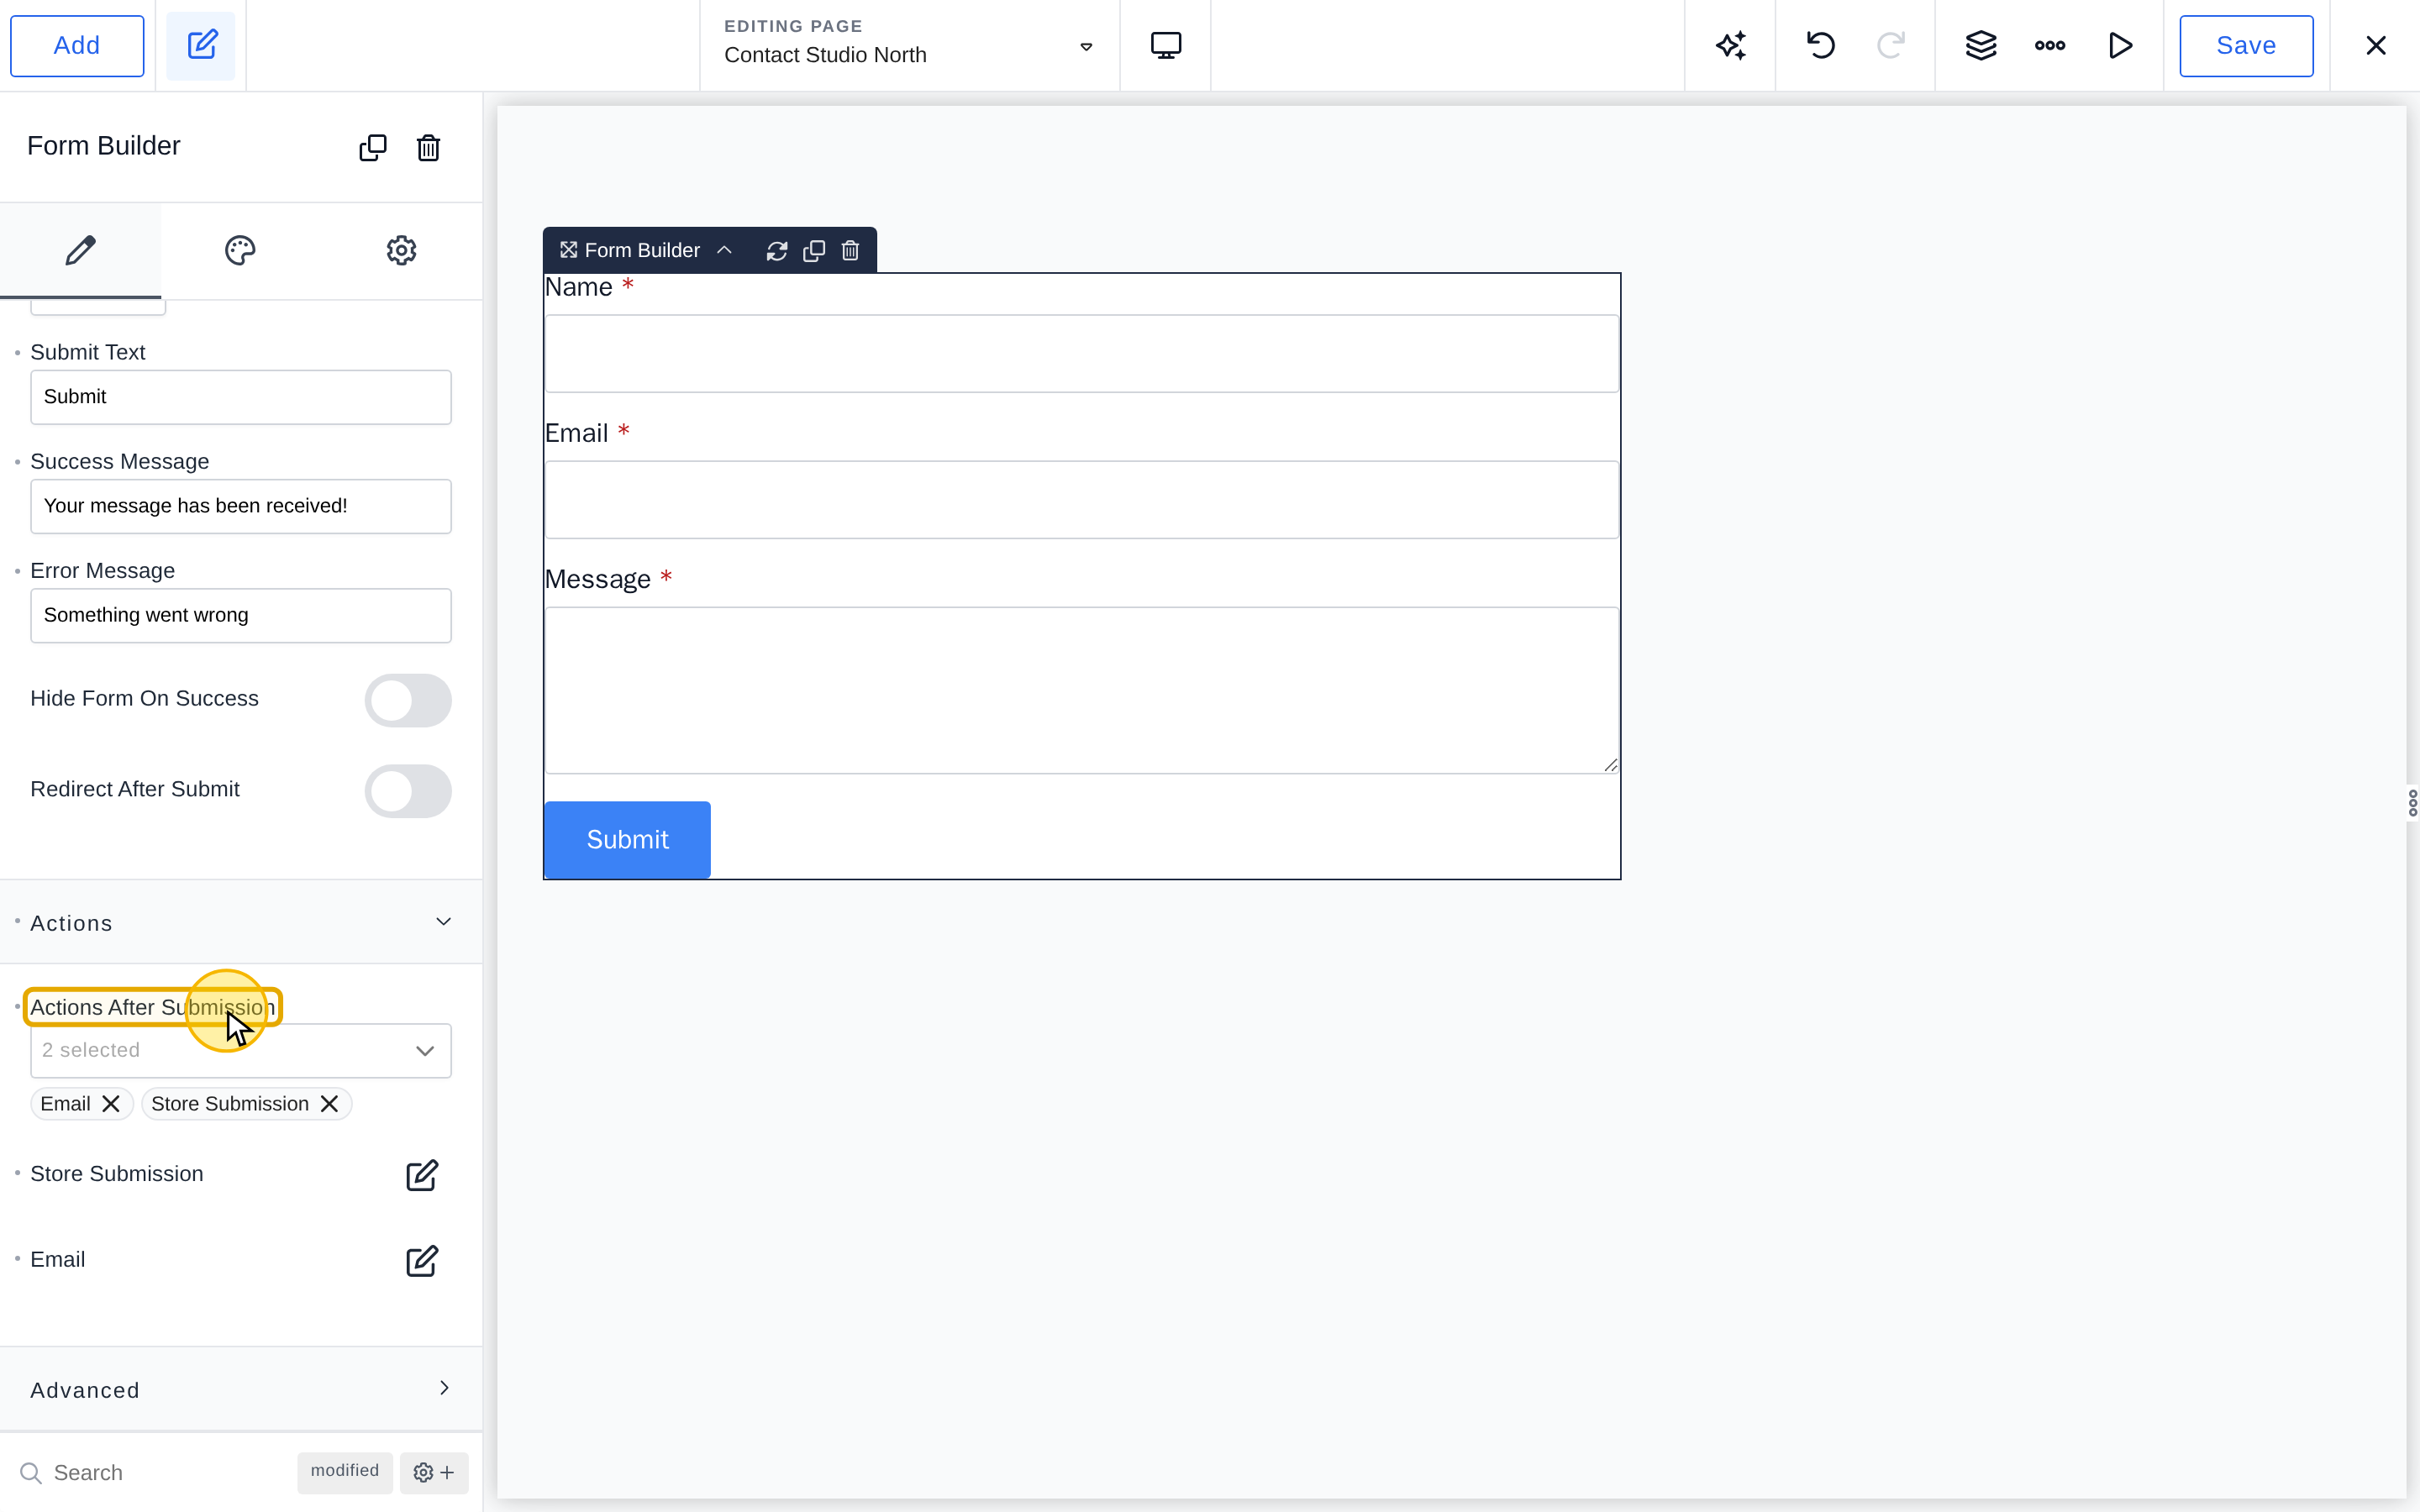
From the Content tab, open Actions > Actions After Submission. Select the actions you want to run, then configure their settings.
New forms include Email and Store Submission. Check the email recipient before using the form.
See Actions Overview for all available actions and integrations.
Testing Your Form
- Save your changes and open the page on the front end.
- Submit a test entry and check that each configured action produces the expected result, such as an email arriving or a contact appearing in your marketing service.
- If Store Submission is enabled, find the entry under Breakdance > Form Submissions in WordPress.