November 27, 2024
Do you want to know how to easily import WooCommerce products with attributes into your store?
Product attributes are an important aspect of WooCommerce product listings. They enhance the customer’s shopping experience by making it easy to filter through products available in your store. Adding WooCommerce products and their attributes manually can be extremely time-consuming. It can also lead to product data inconsistencies and unnecessary errors that confuse customers looking to purchase items from your store.
In this article, we will show you how to import WooCommerce products with attributes using the WP All Import plugin. This will save you time and help streamline your product inventory management process.
WooCommerce product attributes are specific characteristics of your products that make it easy for customers to find exactly what they need when shopping in your store.
They include features such as product size, color, material, brand, etc., which enable filtering through products in a WooCommerce store, so customers can make purchases aligned with their preferences.
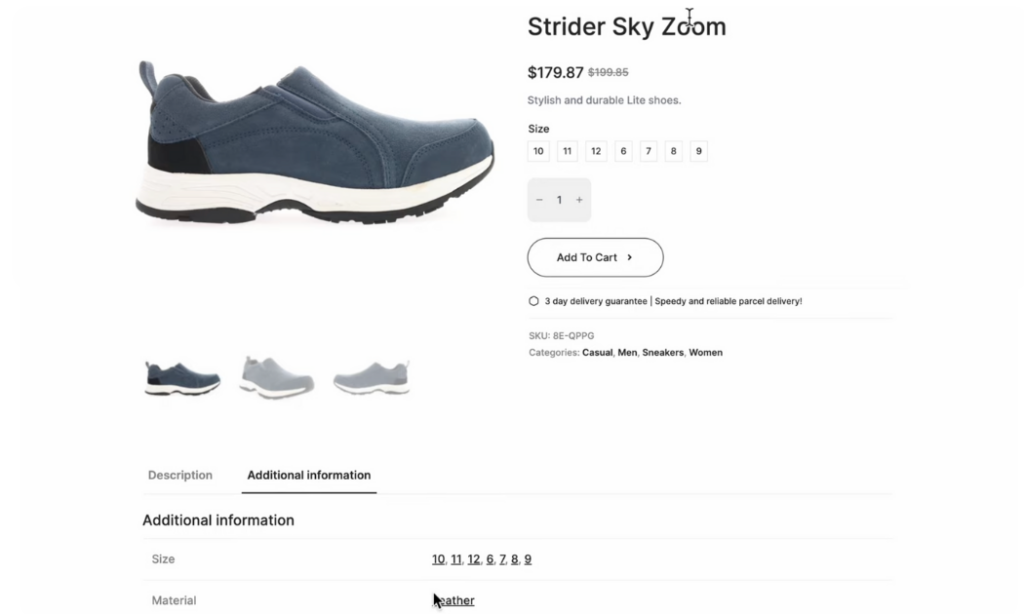
Product attributes are especially useful for selling products with variations. This saves you the stress of creating individual products for each size, color, material, etc. your store offers. Additionally, they help boost your products’ SEO by improving keyword targeting and enabling them to be displayed as rich snippets when relevant.
WooCommerce product attributes are generally a powerful way to create richer product listings that are easy for customers to navigate, enhancing the shopping experience and increasing conversions.
Now that we know what WooCommerce product attributes are, let’s jump into how to import products with attributes!
In this section, we will show you how to import WooCommerce products with attributes using the leading WooCommerce and WordPress import plugin – WP All Import.
WP All Import is the best WooCommerce import plugin for seamlessly importing all WooCommerce product types, with attributes, within minutes.
The plugin provides a drag-and-drop mapping interface and a simple 5-step import wizard that makes the import process easy, even for beginners. You can import WooCommerce products with attributes from CSV, Excel, Google Sheets, or XML files, regardless of the file size or structure.
With the WP All Import plugin, you can access many other great import features to enhance your product import process and simplify your store operations. These features include:
With the WP All Import plugin, you are always assured of efficiency and ease in your WooCommerce product import processes. This makes it our preferred choice for importing WooCommerce products with attributes.
To start the import process, you must first purchase and download the WP All Import plugin and its WooCommerce Import Add-On to get started.
Once you have done this, install the WP All Import plugin first, by going to your WordPress admin dashboard and navigating to Plugins › Add New Plugin › Upload Plugin › Choose File › Install Now › Activate Plugin. The plugin will immediately be installed and ready to use on your website.
Follow the same steps to install the WooCommerce Import Add-On. After this, you will be ready to create your first import of WooCommerce products with attributes.
To create a new WooCommerce product import, go to All Import › New Import from your WordPress dashboard menu. This will bring you to the New Import screen with options to specify how you want to load your product import file.
WP All Import allows you to add your import file in three ways. You can upload the file from your PC, download the file from a URL or FTP/SFTP, or use a file that you have previously uploaded.
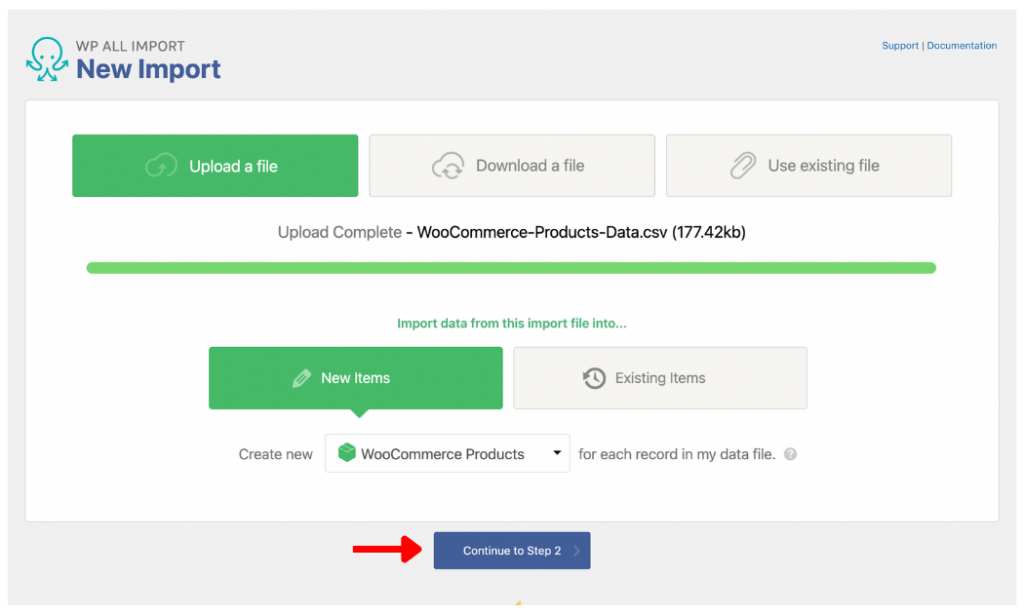
Load your import file using any of the provided methods.
The New Items option appears next, letting you specify the import type. Select WooCommerce Products and click Continue to Step 2 to proceed.
On the Review Import File screen, WP All Import offers a convenient way to review the product data you uploaded to be sure that everything has been detected correctly. You will see a notification of the number of rows that will be imported. You can use the gray left and right arrows provided to navigate between records and thoroughly review the data.
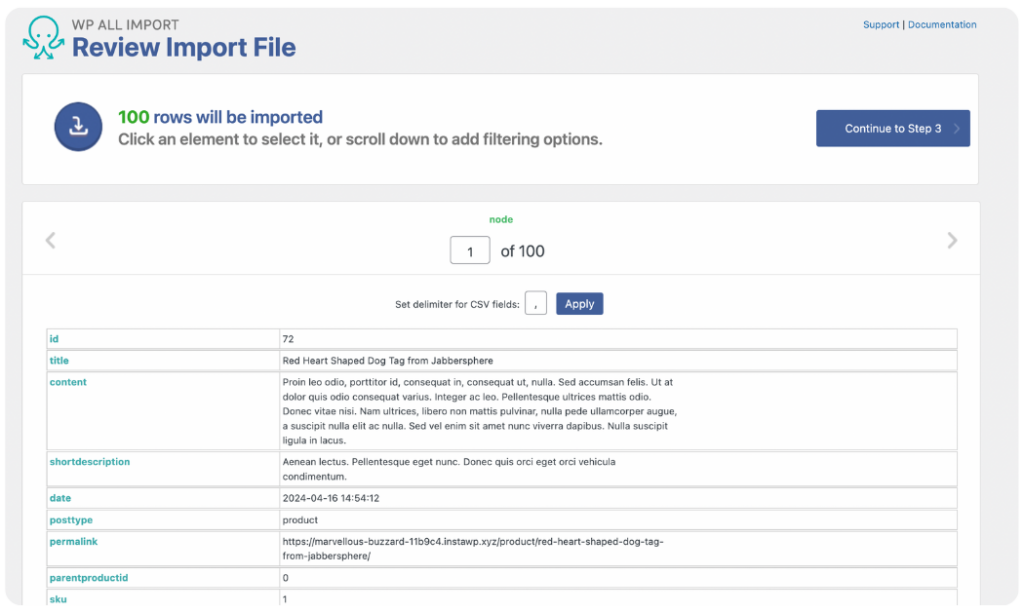
Scroll down the page to see the Manage Filtering Options panel. This panel lets you apply filters if you only want to import specific products from your import file to your WooCommerce store.
You can filter using any import file element, including product attributes. For example, if your product file contains some products with their attributes specified and some without, you can choose to import only products with attributes. You will do this by selecting the attribute column name as the Element and setting “is not empty” as the Rule. Then click Add Rule › Apply Filters to XPath, and the filter will be created.
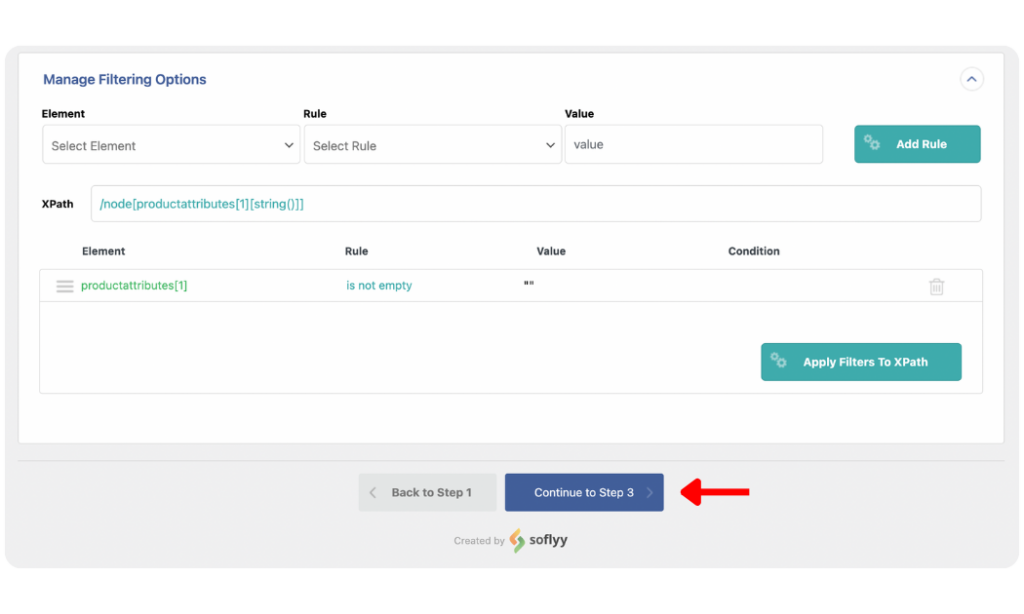
Note that you will need to specify a Value for most filters. However, it is not required for the “is not empty” and “is empty” rules. You can also add multiple filters if needed.
Once you have reviewed your uploaded data and added relevant filters, click Continue to Step 3.
The Drag & Drop screen is where the most important steps of the WooCommerce product import process happen.
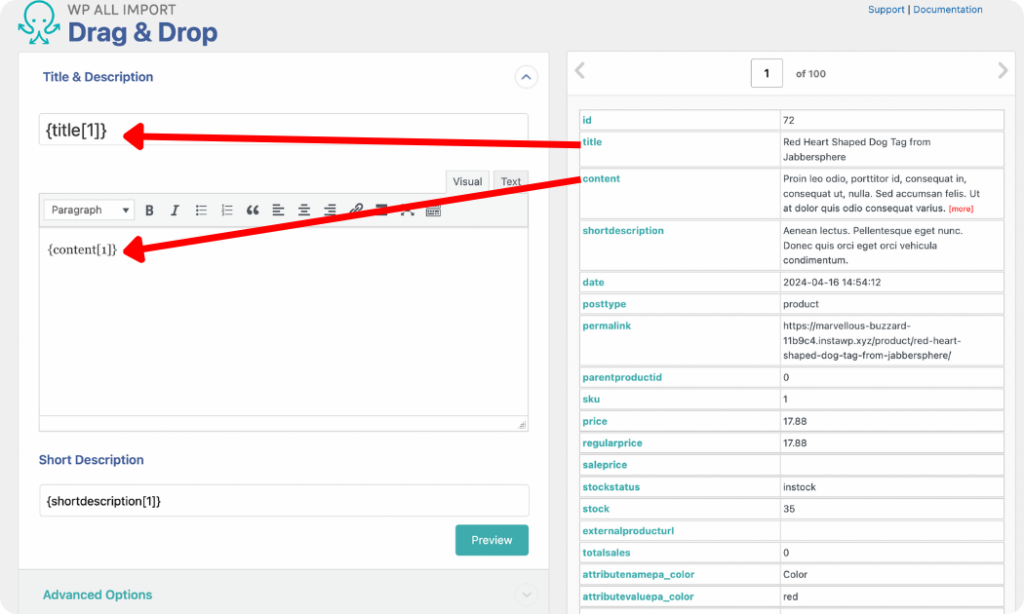
WP All Import provides a convenient drag-and-drop data mapping interface to simplify the product import process for users at any experience level. The mapping fields are listed on the left, while the incoming product data is in a table on the right.
Start by mapping your products’ title and description in the Title & Description panel. Simply drag the relevant elements from your incoming data table and drop them in the mapping fields provided.
The WooCommerce Add-On panel contains all the tabs for mapping the standard WooCommerce product details, including product attributes.
The first step is to specify the Product Type. WP All Import lets you import simple, variable, grouped, and external/affiliate products.
Once you have chosen your Product Type, the relevant tabs will be displayed, allowing you to map your product data into the appropriate fields. You can map the product SKU, Regular Price, and Sale Price from the General tab which is opened by default. Simply drag and drop the relevant elements into the provided fields.
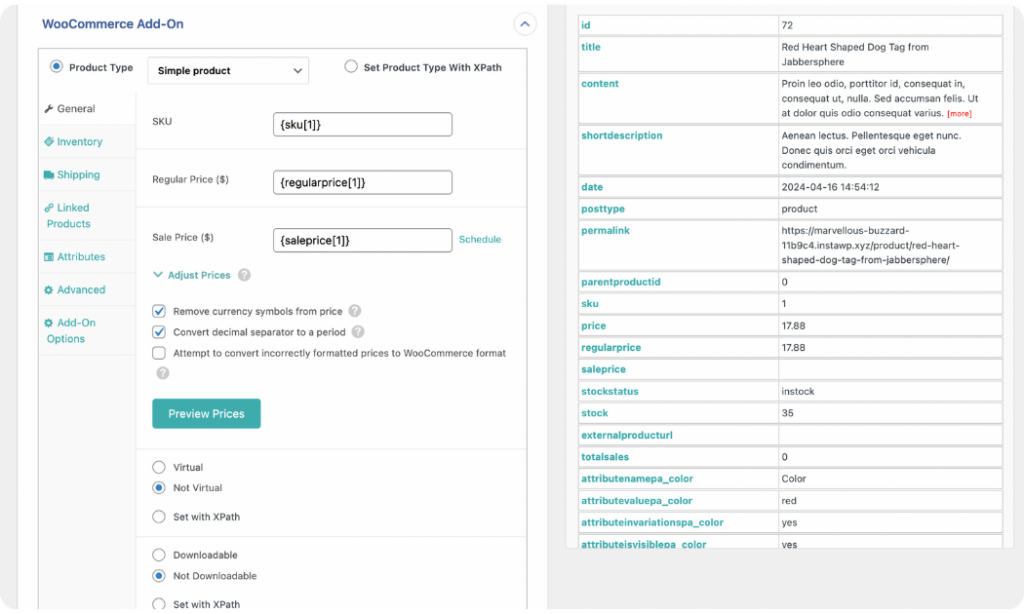
You can follow the same mapping technique to map product fields in the Inventory, Shipping, Linked Products, Advanced & Add-On Options tabs.
We will focus on the Attributes tab the most for this article.
Open the tab and click the Add Attribute link to create a new Name and Value input field for each attribute you want to import.
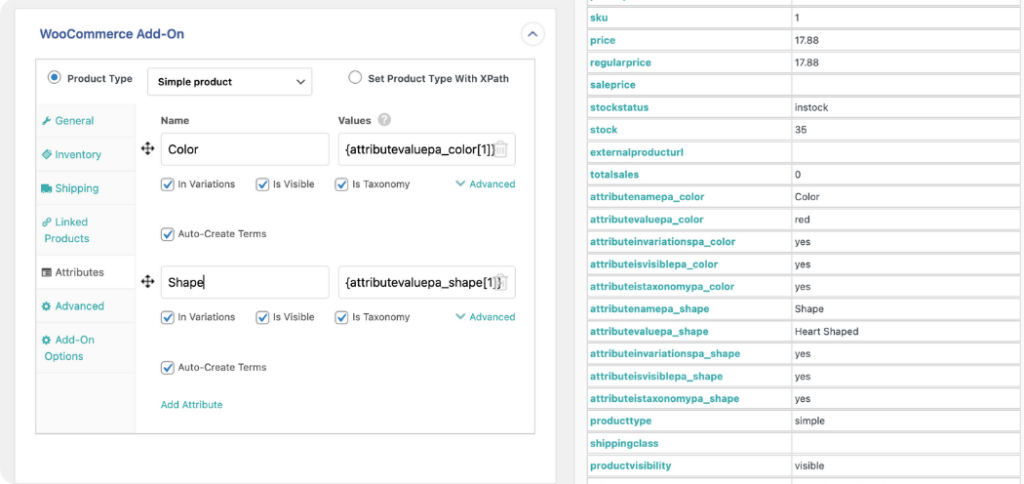
Next, enter the attribute’s Name and drag and drop the incoming data element containing the value for the attribute into the Value field. If you have already created attributes in your store, enter the exact attribute name to ensure the imported value is correctly linked.
WP All Import provides Advanced options for each attribute you create, to define how they should be imported. These are:
You can define all options dynamically by enabling the Set with XPath selection.
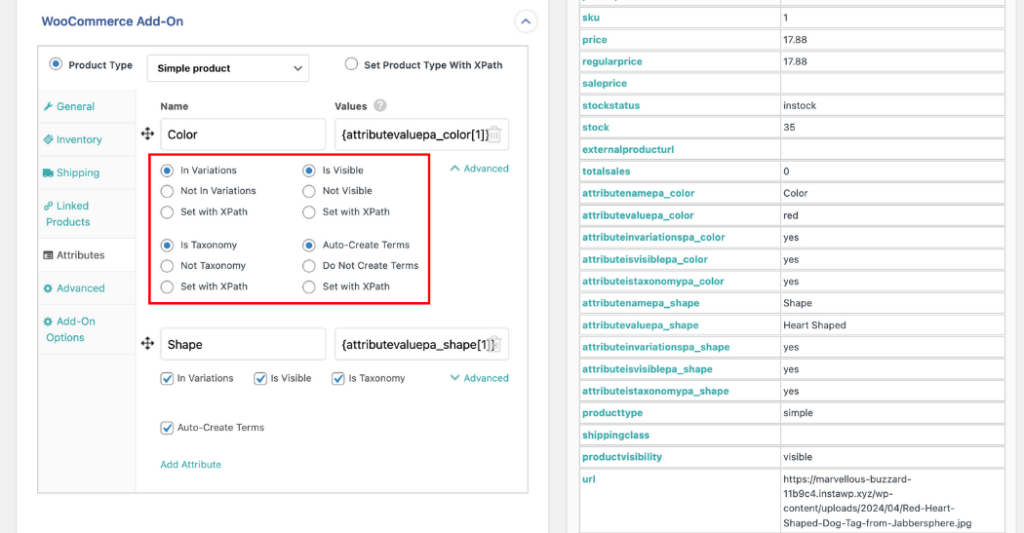
Once you have created all your product attributes, you will see a Link all variations checkbox towards the bottom of the Attributes tab. It is unchecked by default, but you can select it only if the data for your variations is stored in a single row within a column, and you want WP All Import to auto-generate variations for various combinations of your product attributes.
That’s it! You have successfully mapped your product attributes.
The Images panel provides options to map your WooCommerce product images.
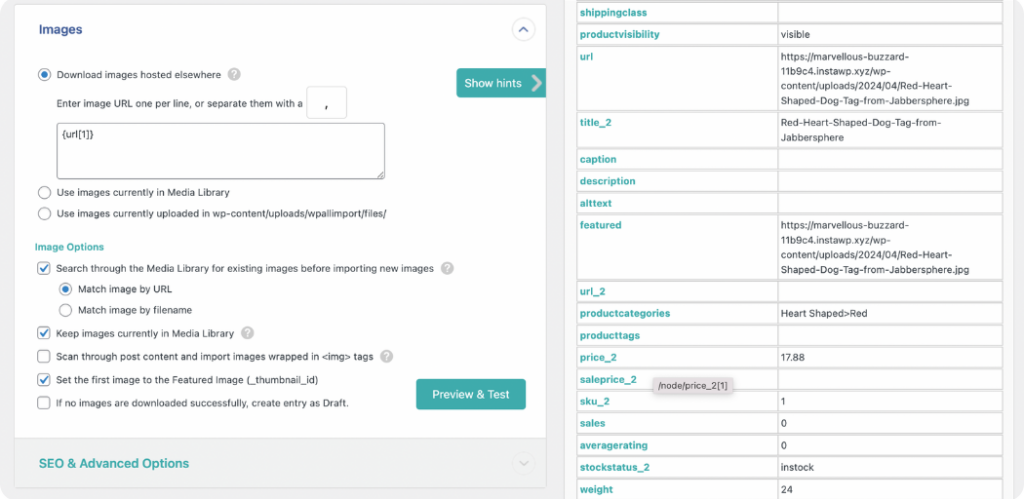
WP All Import lets you import your product images from any external source. You can download images from an external URL, use images already in your Media Library, or use images uploaded within a folder in your website’s backend.
To learn more about mapping product images, check out our guide on Importing WooCommerce Products with Images.
In the Custom Fields panel, you can import your product custom fields by specifying a Name and Value for each custom field.
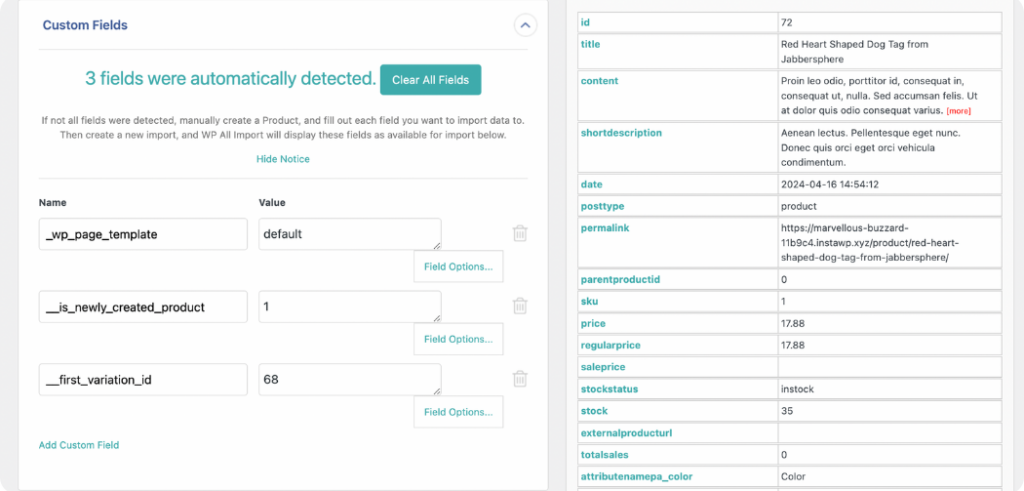
You can learn more about it in our importing custom field data to the WooCommerce products guide.
The Taxonomies, Categories, Tags panel has fields for mapping your Product Category and Product Tag based on various options.
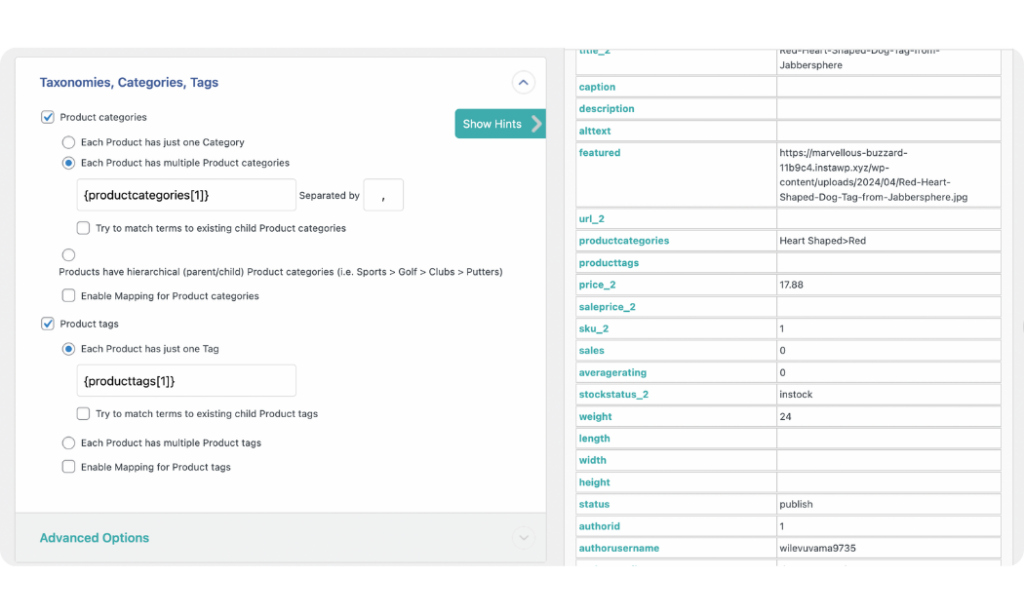
For more details on mapping this section, read our guide on how to Import WooCommerce Products with Categories guide.
Once you finish mapping all relevant fields, click Continue to Step 4 at the bottom of the screen to proceed to the next step.
The Import Settings screen provides additional options to configure how your product import should run.
Click the Auto-detect button to create a Unique Identifier for your import. The Unique Identifier is important as it helps WP All Import correctly link the records in the current import to those in an updated file if you re-run the import. This prevents duplicates and keeps your product data clean.
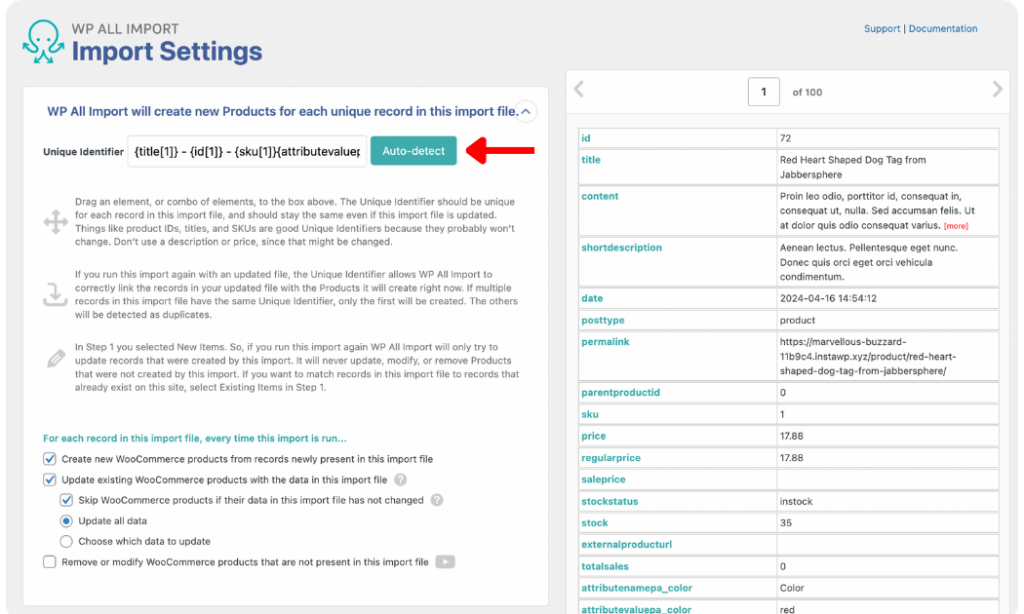
There are additional settings within the panel that you can leave as default or change if needed.
Scrolling down the screen will reveal the Scheduling Options and Configure Advanced Settings panels. Within the Scheduling Options panel, you will find settings to schedule your product imports to run automatically at specific times and days of the week. You can learn more about import scheduling from WP All Import’s documentation.
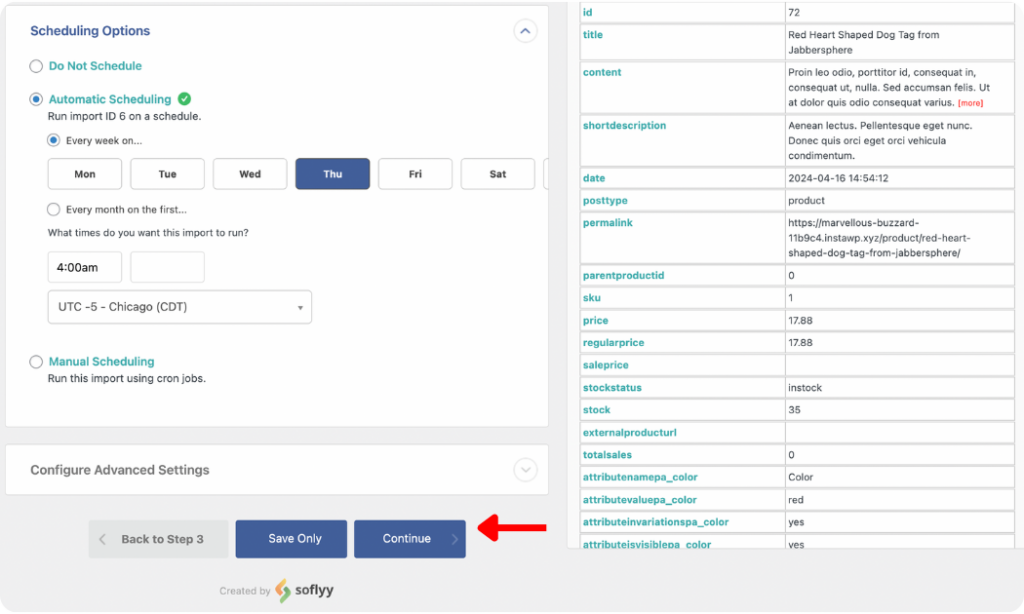
The Configure Advanced Settings panel provides settings for optimizing the speed of your import. The default selections work for most imports, but you can tweak it if necessary.
Once done, click Continue to move to the next step.
We’ve now reached the final step of importing WooCommerce products with attributes!
On the Confirm & Run screen, WP All Import provides a high-level summary of all the import settings you have applied. This lets you double-check that you have applied the correct settings for your import to run without glitches.
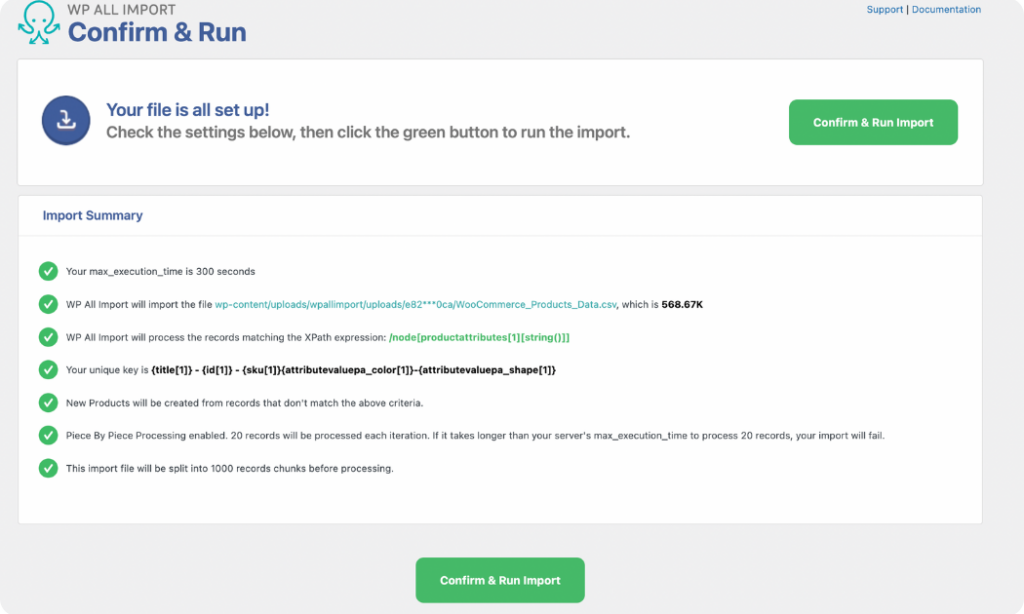
If you notice any mistakes, you can go back to change the settings. Otherwise, proceed with the import by clicking the Confirm & Run Import button.
The import process will start immediately and should be completed within minutes. Once it’s complete, you will see an Import Complete notification.
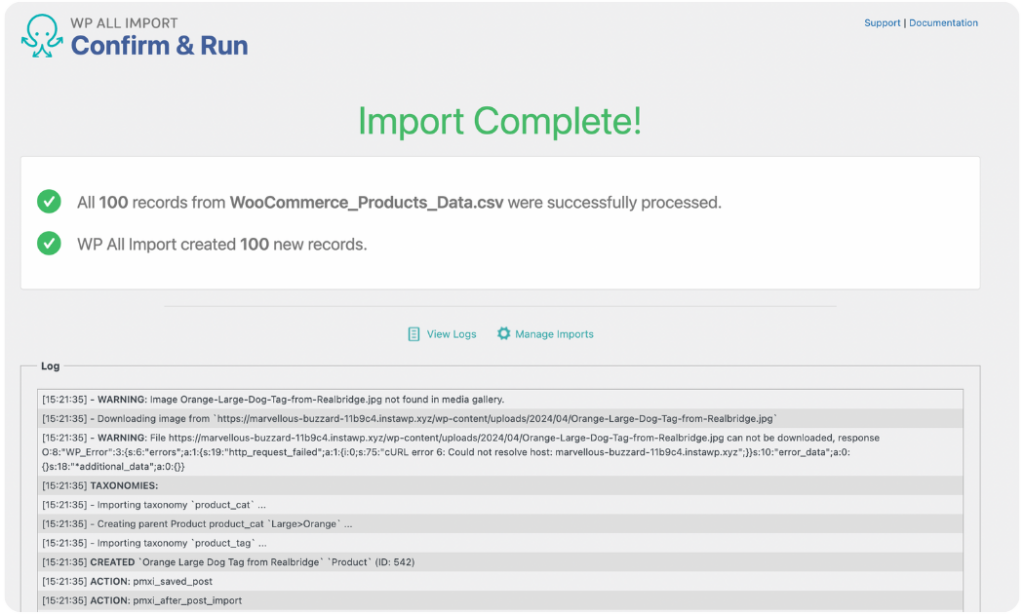
Check that your products and their attributes were imported successfully by navigating to Products › All Products and clicking a few products to review the imported data.
To import products with custom fields in WooCommerce, you need to have the WP All Import plugin and its WooCommerce Import Add-On installed on your site.
You can import variable products into WooCommerce with the WP All Import plugin and its WooCommerce Import Add-On.
Bulk importing products into WooCommerce is easy using the WP All Import plugin. Every product import executed with the plugin is a bulk upload of products to your WooCommerce store. You also get access to advanced import features such as filtering, which allows you to import a subset of your products, and automatic scheduling, which lets you bulk import products on specific days and times of the week.
To export and import products in WooCommerce, download and install the WP All Import & WP All Export plugins on your site.
Get maximum flexibility with unlimited licensing and domain activations.
Get your money back within 60 days of purchase, no questions asked. It's risk-free!
We offer premium support to ensure the ultimate customer experience.
For a limited time, we're offering an unlimited site license for just $199.99/year. Buy now to lock in this price.