
October 28, 2024
Do you have a huge list of products in Excel and wondering how to import those to WooCommerce?
If yes, then we feel your pain. It can become really tedious when you have hundreds, maybe thousands of products to import with a tight deadline. If you are to do this task manually, it will take forever. While Excel is a great tool to compile your product data, you really need a solution to automatically import the products from your Excel spreadsheet.
In this article, we are going to provide you with a step-by-step guide on how to import products from Excel to your WooCommerce store with a very powerful tool. With WP All Import, you can import thousands of products from your Excel spreadsheet in minutes.
You may wonder why we don’t recommend the built-in importer WooCommerce comes with. Well, it’s just not as powerful and convenient.
The default product importer in WooCommerce lacks some crucial features. For example, it only supports CSV files. That means, if you have an Excel (.XLSX or .XLS) file, you are out of luck.
It doesn’t support images from external sources either. It makes the process time-consuming, as you need to already have the images in the WordPress media library before you start importing your products.
WooCommerce’s import-export suite doesn’t work well with custom fields either. It does support variable products, but the process may seem confusing to many users.
This is why you need to choose the right plugin for importing your products from Excel to WooCommerce.
It is crucial to choose a good plugin to make your product import process hassle-free. There are quite a few WooCommerce product import plugins that support Excel files, and WP All Import is the best in the bunch.
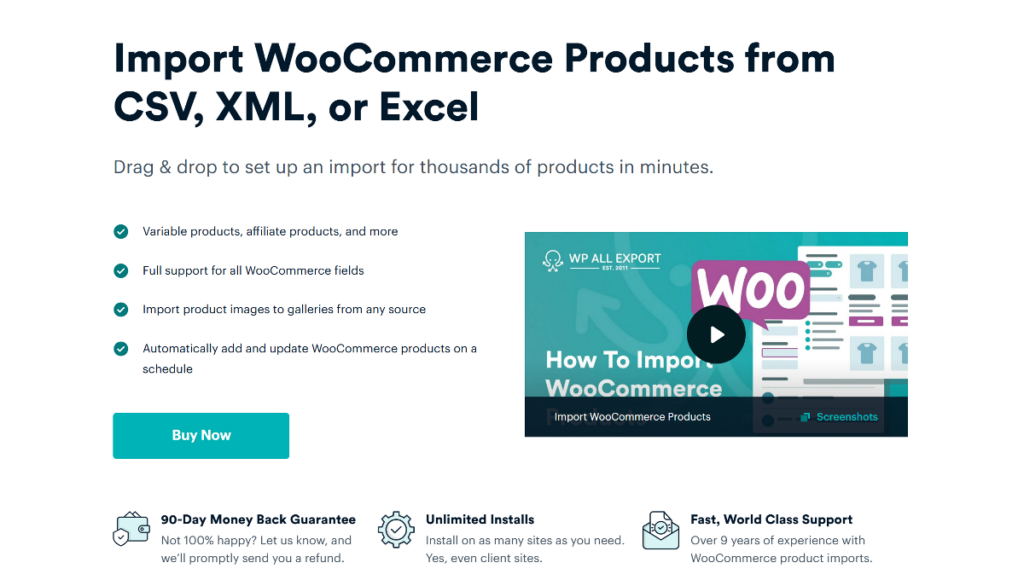
We prefer WP All Import over the other tools due to its ease of use and flexibility. It has a very convenient drag-and-drop interface that allows the user to import exactly the data they want. Despite being so simple, WP All Import is a really powerful tool. It comes with lots of customization and filtering options. You can even schedule your imports on a daily, weekly, or monthly basis with this highly capable plugin.
Here are the key features of WP All Import:
We’ll be using WP All Import to import products from your Excel file to WooCommerce as it’s the most efficient tool. In the following section, we’ll provide you with a step-by-step guide.
In this step-by-step guide, we’ll explain everything you need to know to import products to your WooCommerce store from Excel files using WP All Import. Starting from installing and activating the plugin, we’ll guide you through the entire drag-and-drop process. We’ll also touch on some advanced features of WP All Import that might interest you.
Let’s start!
To import products to your WooCommerce store, you need to install WP All Import.
First, you need to purchase the Import Pro Package, which costs $199/yr and comes with unlimited installs. It comes with the WooCommerce Import Add-On, which will allow you to import products to your store, including variable products.
After making your purchase, download the latest version of the plugin from WP All Import’s customer portal.

Now it’s time to install the plugin to WordPress. Login to WordPress and go to Plugins › Add New. Select Upload Plugin and upload the Zip file you just downloaded. Then simply click on the Install Now button. Activate the plugin, and you can start importing!

To start the import process, you need to upload your Excel file to WP All Import.
In the main WordPress menu, navigate to All Import › New Import.
You’ll see multiple options to import your WooCommerce product data. Select Upload a file.
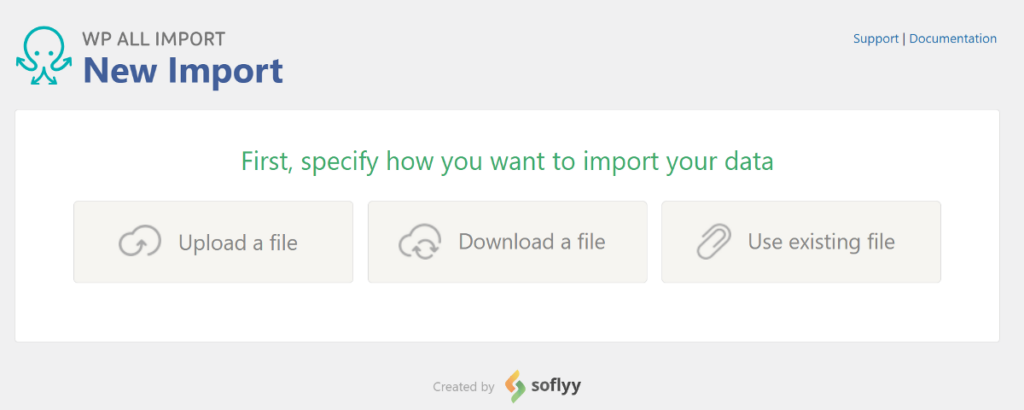
The other two options are Download a file and Use existing file. With the Download a file option, you can add a file from a URL or an FTP/sFTP server. Point to be noted, you can use this option to add Spreadsheet files from Google Sheets or Dropbox. The Use existing file option lets you use an existing file you previously uploaded.
Upload your Excel file, and choose WooCommerce products in the dropdown below. WP All Import also supports CSV or XML files.
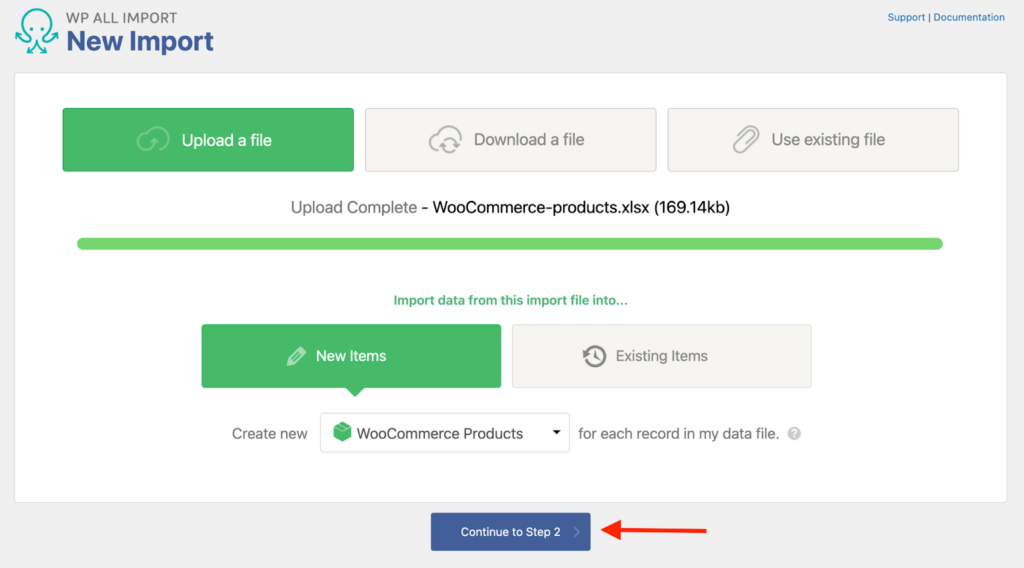
Next, Click Continue to Step 2 to move to the next step.
You’ll now see the Review Import File Screen. It will show the number of products you are going to import and display the data in a table. This allows you to check if the data you uploaded is correct.
This step also allows you to filter the data to modify your import even further. You may not want to import every product from your Excel file, and this is where WP All Import’s powerful filtering process comes in handy.
Let’s see how to apply filtering rules.
First, you need to select the column based on which you want to filter the products. Let’s take the following example, where we want to import products with valid images.

You need to set up filtering rules to import the exact products you want. You can do this in the Rule selection box. For our example, we’ll select is not empty. This means that we’ll import products where the Image_URL element has data.

For most filters, you need to specify a Value. For example, if you want to filter products that cost more than $50, you need to choose greater than in the Rule selection box and put 50 in the Value field.
For our example, a Value is not needed.
Click the Add Rule button.
The filter you created will then appear in the lower section. Click Apply Filters to XPath to apply the filter.

Your filter will then be applied to your import.
WP All Import allows you to add more than one filter rule. For multiple filter rules, you need to connect them using the logical operators AND(&&) and OR(||).
The AND(&&) operator filters out the products that satisfy both rules, and the OR(II) operator filters out the elements that satisfy either of the rules.
Here’s an example where we filtered products with images that cost more than 50.

Click Continue to Step 3 when you are done reviewing your import file and applying your filter rule/s.

In the next step, you’ll find the Drag & Drop screen. Here, you can build and configure the import template. It’s really easy to use the drag-and-drop mapping interface to import your product data.
From the right of the screen, drag and drop the import elements to the relevant import fields on the left.
Now we’ll look at some different panels to map WooCommerce product information.
The Title and Description section is pretty much self-explanatory. Here, we mapped the product names, descriptions, and short descriptions from the right panel to the relevant fields.

Then comes the most important part of the mapping process. Below the Title and Description section, you’ll find the WooCommerce Add-On section.
Expand the WooCommerce Add-On section next.
This is the section where you need to define the Product Type. It’s set as Simple Product by default, but you can change it to different product types, including grouped, external, and variable products. You can even set your preferred product type with XPath.
Below Product Type, you’ll find several tabs to configure your import. We’ll describe some of the most frequently used tabs.
The General Tab is selected by default. It includes general product information such as SKU, sale price, regular price, tax status, and more.

The Inventory tab includes the settings related to stock availability.

The Attributes tab lets you add different attributes like color, size, shape, etc.

The other tabs let you configure shipping, linked products, and advanced settings.
If you want to learn how to configure the WooCommerce Add-On for variable products, we have a separate article on importing variable products to WooCommerce.
The Images section lets you set up how you want to import the product images. You can import images from multiple sources — images hosted elsewhere, images currently in the Media Library, and images currently uploaded in wp-contents/uploads/wpallimport/files/.

Among the other sections, Custom Fields is noteworthy. With WP All Import, you can import custom fields to any theme or plugin, including WooCommerce.
Once you are done setting up the template, Continue to Step 4.
At this step, you’ll see the Import Settings screen, which includes some additional settings to optimize your import further.
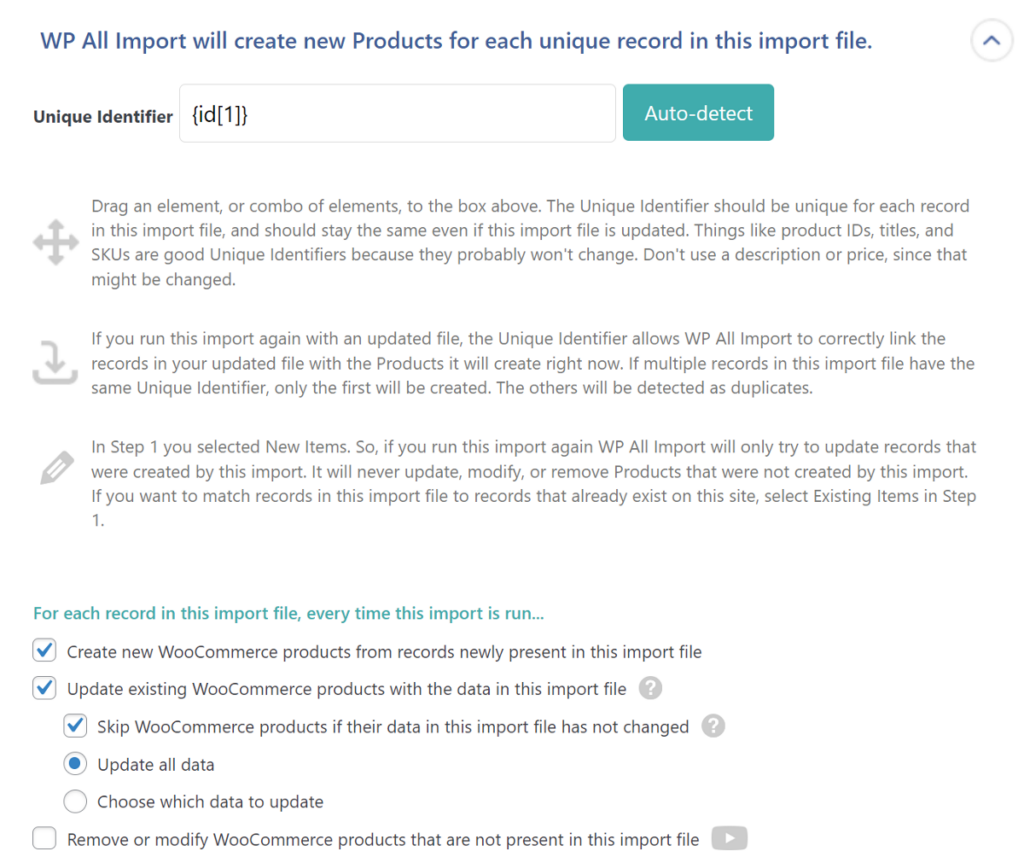
To begin with, you’ll need to first set a unique identifier for your import. A unique identifier is usually an element that’s unique for every product. For example, if every product in your Excel file has a unique SKU, then the SKU is a unique identifier. This is important as it allows you to prevent duplicate product entries in your store.
You can click the Auto-detect button to automatically select it or use the drag-and-drop interface to set it manually.
Below it, you’ll find two more panels – Scheduling Options and Configure Advanced Settings.
You can automatically run your import on a daily, weekly, or monthly basis with the Scheduling Options. We’ll talk about it in detail in a later part of the article.
In Configure Advanced Settings, you can control how WP All Import splits your file into chunks and processes your import.

Click Continue to move to the final step.
You’ll see the Confirm and Run screen. This is the final step of the product import process. Here, WP All Import will display a summary of the import you are about to run.

Click Confirm & Run Import to start the import. When the import is done, WP All Import will show you a summary of the new products that have been created, or if any of the existing products got updated. You’ll also be able to see the number of skipped products in case your Excel file has any missing information.

To review if your products were imported properly, go to Products › All Products in the WordPress menu. You should check the product data tab of some products at random to confirm the import.
There you go! You imported products from Excel to WooCommerce successfully!
WP All Import includes tons of advanced features to customize your product import from Excel. With these advanced features, you can automatically schedule your imports, handle variable products, import custom fields and product attributes, and more.
Let’s take a look at some of the advanced features that WP All Import offers.
With WP All Import, you can schedule product imports to WooCommerce on a daily, weekly, and monthly basis.
This requires you to additionally purchase Automatic Scheduling which costs $19/month for unlimited sites.
If you don’t want to pay extra money, you can use cron jobs to schedule imports for free. However, this option is more suitable for a bit more advanced users.
Schedule import doesn’t work for Excel files stored on your computer. For this, you’ll need to create a product import that uses a URL or FTP/SFTP site as the data source. The easy way is to upload your Excel file to Google Drive and add the public link in the first step of the import.
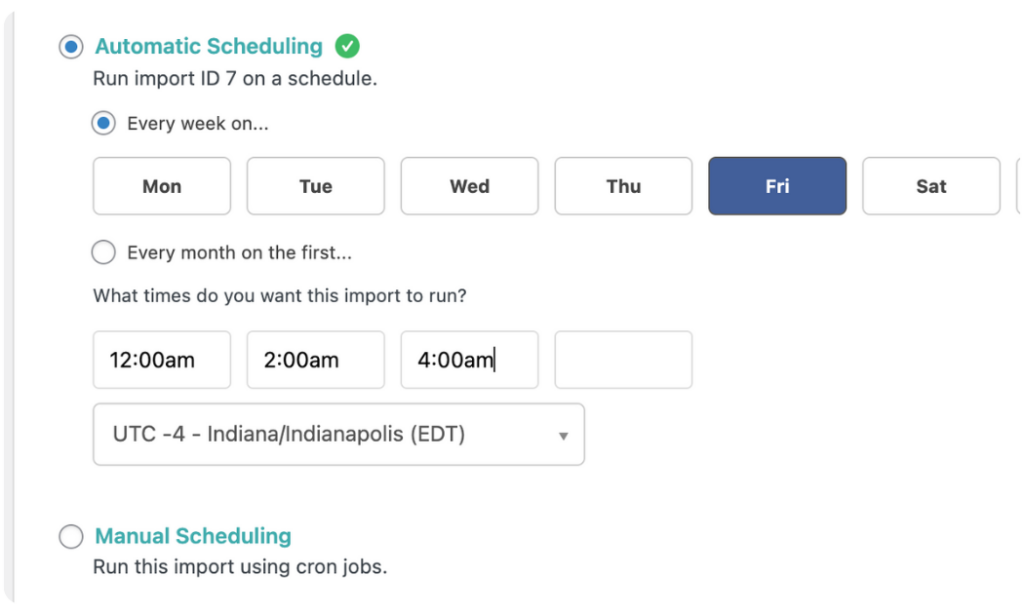
To enable automatic recurring import, navigate to the Import Settings screen and click Scheduling Options. You will then see the following window.
Select the days of the week you want the automatic import to run. You can also schedule your imports on a monthly basis. Next, select the time and timezone you want the import to run. And, that’s it! The scheduling is all set to run the day and time you specified.
Learn more about how to automatically import products into WooCommerce.
WP All Import can help you import custom fields and product attributes.
To import custom fields, you need to expand the Custom Fields section in the Drag & Drop screen and click the See Detected Fields button.

From here, you can map the relevant import data elements to their corresponding custom fields, if applicable.

For details, read How to Import Custom Fields to WooCommerce Products.
To import product attributes, go to the Attributes tab of the WooCommerce Add-On section. Then use the Add Attribute link to create one attribute for every attribute that you intend to import. An attribute consists of two fields: Name and Values.
Provide the names and values for each attribute, and simply set the options for each attribute.
Creating names and values for each attribute is fairly simple. Just enter the name of the attribute in the Name field, and drag and drop the suitable incoming data element into the Values field.

If you need to import data for an attribute that already exists in your store, make sure the name exactly matches the name or slug of the existing attribute.
To learn more, read How to Import Product Attributes in WooCommerce.
Importing variable products can be a bit tricky, as you would ideally want to import multiple variations of the same product without messing things up. With WP All Import, importing variable products from Excel files is quite easy.
On the mapping step, go to WooCommerce Add-on and select Variable Product as your Product Type.

Go to the Variations tab to link multiple product versions together to form a variable product.
Variable products have single parent products with multiple child variations.
For example, a T-shirt might have three color variations- Red, Green, and Blue. You can import Excel files that include parent products along with their child variations.
With the Variations tab, you can specify how multiple product variations group into a single variable product. Usually, you’ll have one product variation per row for your Excel file.
Let’s take the following example:

There are two parent products with two variations each. The Excel file contains the parent products as well as the variations.
The variations are grouped with the parent products through the SKU and Parent SKU columns. Using the Parent SKU column, WP All Import can assign the variations to the parent product with an SKU that matches the variations’ Parent SKU.
Apart from Parent SKU, you can group variations through unique identifiers, product titles, and even child XML elements. WP All Import offers multiple options depending on how the parent-child relationship is structured in your import file.
In some cases, WP All Import will automatically create parent products. For example, if you have different product variations with the exact same product title, WP All Import will group all these variations and automatically create a parent product.
Read this detailed guide on how to import variable products into WooCommerce.
Being able to import WooCommerce products from Excel files without any trouble helps e-commerce store owners a lot. With WP All Import, your product import experience will be convenient and fast.
WP All Import is one of the best plugins for WooCommerce product import, as most traditional import plugins only support CSV. WP All Import helps you avoid the hassle of converting your Excel file to CSV.
WP All Import is an affordable, effective solution to all your data import needs. Download WP All Import today!
You can easily import products to WooCommerce from Excel with WP All Import. Here are the steps:
Bulk uploading products to WooCommerce is very easy with WP All Import. Here are the steps:
You can export and import products in WooCommerce with capable plugins. WP All Import and WP All Export are the best plugins for exporting and importing WooCommerce products.
With WP All Import, you can easily import products with custom fields to WooCommerce. Here are the steps:
Get maximum flexibility with unlimited licensing and domain activations.
Get your money back within 60 days of purchase, no questions asked. It's risk-free!
We offer premium support to ensure the ultimate customer experience.
For a limited time, we're offering an unlimited site license for just $199.99/year. Buy now to lock in this price.