


October 23, 2024
Are you looking to add multiple products at once to your WooCommerce site?
If you’re launching a new eCommerce store or expanding your existing catalog, manually adding hundreds of products can be an overwhelming and time-consuming task. Fortunately, WooCommerce includes various plugins that streamline this process.
In this comprehensive guide, we’ll explore how to quickly bulk-import products using a WooCommerce import plugin. But before we look at the step-by-step guide, let’s first explore the best product import plugins available for WooCommerce.
To help you quickly import products into WooCommerce, here are some of the best plugins you should consider using.
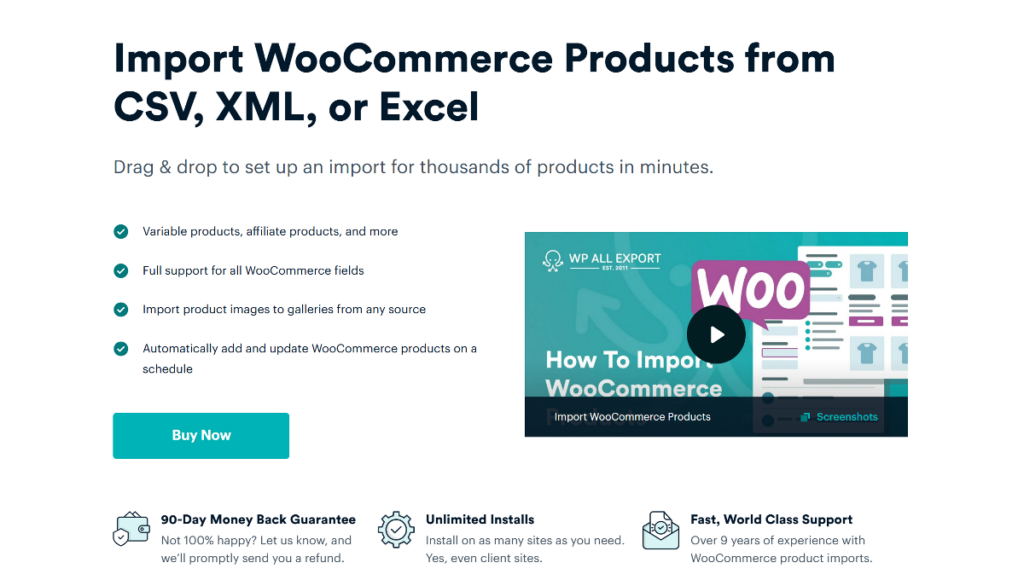
WP All Import is a powerful all-in-one WooCommerce import plugin. While there are plugins that specialize only in importing products, WP All Import supports all WooCommerce data types. The plugin features a user-friendly import wizard and a drag-and-drop mapping interface to make it easy, even for beginners, to quickly import multiple products into your store. It supports all product types, including variable products, and lets you upload CSV, Excel, Google Sheets, and XML files. Unlike other plugins, it doesn’t force you to follow a specific format while creating your import file and lets you edit it during the import process using the various built-in PHP functions.
WP All Import starts at $99/year and can be used on unlimited websites.
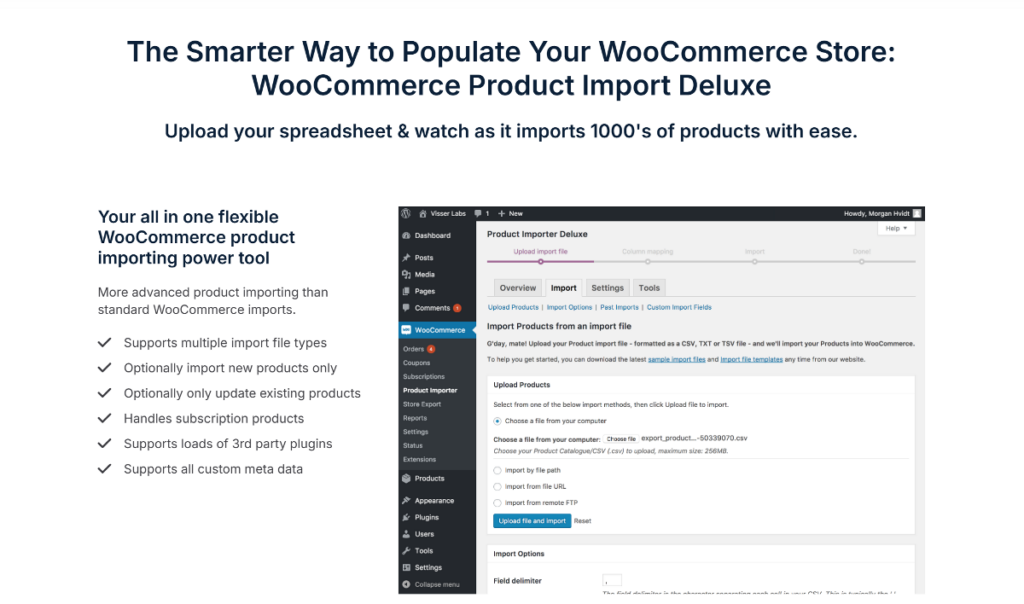
Product Importer Deluxe is part of the WooCommerce plugin package that focuses on the import and export of WooCommerce data. It includes automatic field mapping when the column names in your spreadsheet match WooCommerce product fields. It gives you flexible import options that let you skip specific rows, set import range, or control import speed to manage server load effectively.
Product Importer Deluxe comes in a package with a store exporter plugin and costs $158/year.
WooCommerce Product CSV Import Suite is developed by WooCommerce and supports importing products from a CSV file. It integrates and works seamlessly with various WooCommerce extensions. The plugin not only allows you to import products but also supports exporting them. However, one drawback is the strict requirements for CSV file formatting, which may require additional preparation of import data.
WooCommerce Product CSV Import Suite is available for purchase from the WooCommerce marketplace for $59/year.
Now that we’ve explored some of the best WooCommerce product import plugins, let’s look at the quick step-by-step guide on how to import products using WP All Import.
We’ve chosen this plugin for our tutorial due to its user-friendly interface, powerful features, and flexibility in handling various import scenarios.
Similar to any other premium WooCommerce plugin, you need to:
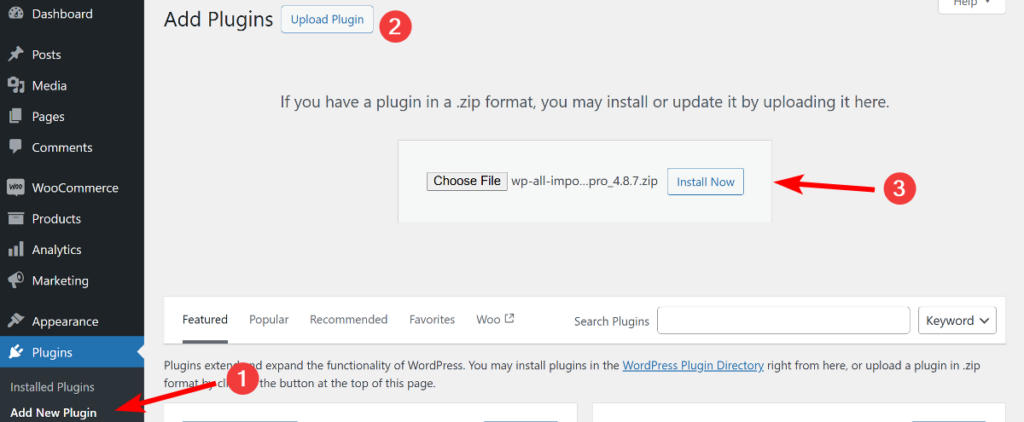
Once everything is set up, let’s walk you through the process of importing products using WP All Import.
To start the import process, move your mouse cursor to All Import in your WordPress navigation menu and click on New Import. WP All Import will give you three options to load your import file, which can be in CSV, Excel, and XML format.
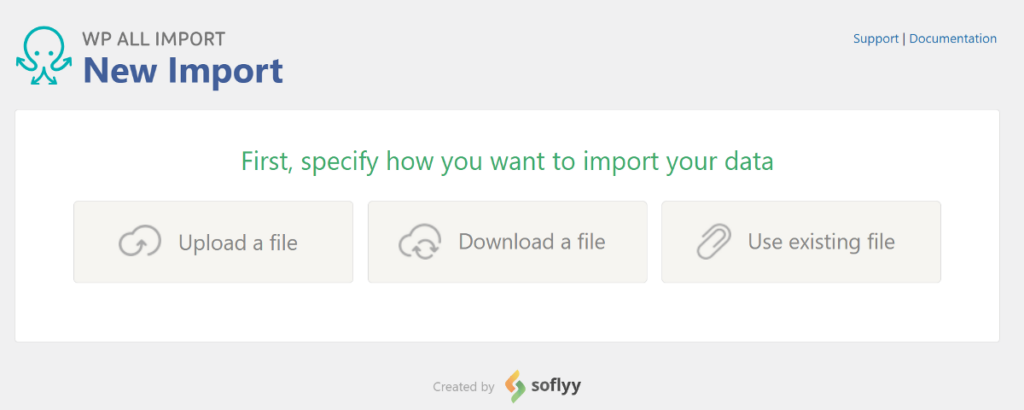
Choose your file by either uploading it from your computer, downloading it from a URL, or selecting an already uploaded file on your server. Once you’ve uploaded your file, WP All Import will automatically display the total records in your file.
Next, choose to import new items and select WooCommerce Products as the import type.
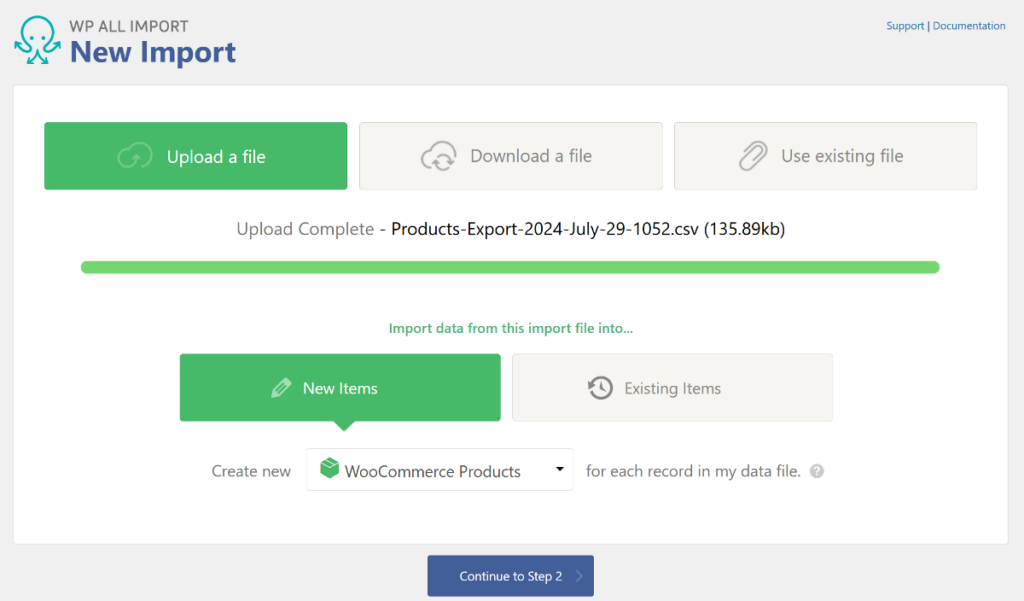
Click the Continue to Step 2 button to proceed to the next step.
In this step, WP All Import will show you a preview of the data in a table, with each row representing a unique product field. Take a moment to review the data using the two arrows on each side of the table and ensure it looks correct.
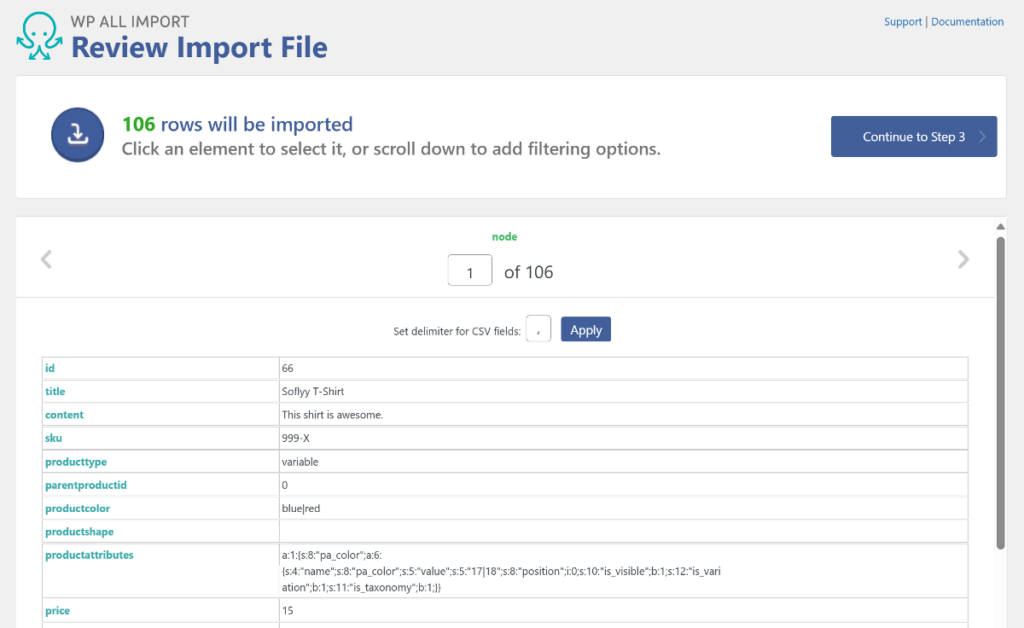
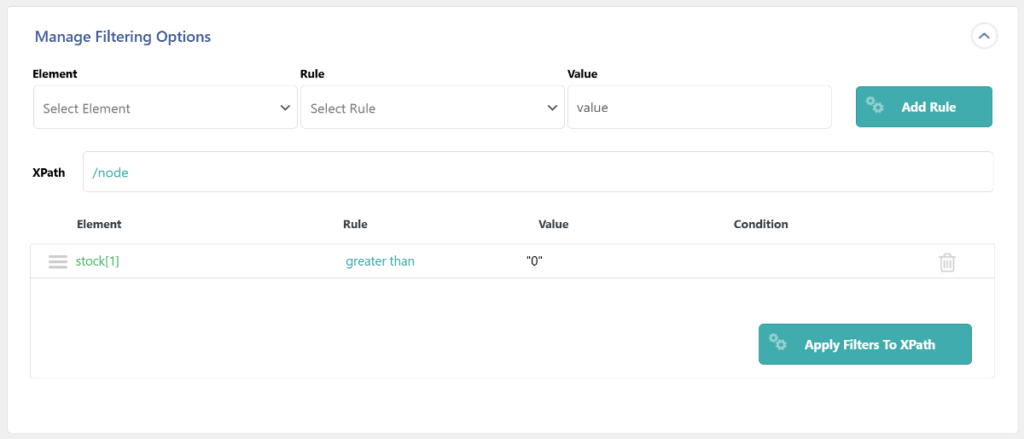
On this page, WP All Import also lets you apply filters to your import. For example, you might want to import only products with a stock greater than zero.
Expand the Manage Filtering Options panel and start adding your filter rules. Each rule consists of three fields. You can select the Element and Rule value from the dropdown, and for the Value field, enter the exact value you want to apply the filter by.
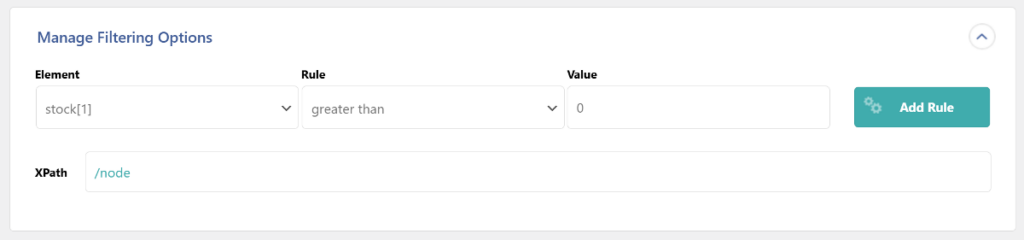
Then, click the Add Rule button and then click Apply Filter to XPath to apply your filter rule. This will update the total records at the top. You can also add multiple filter rules to the same import and combine them using AND and OR conditions.
This feature can be particularly useful for large imports or when you need to update only a subset of your product catalog.
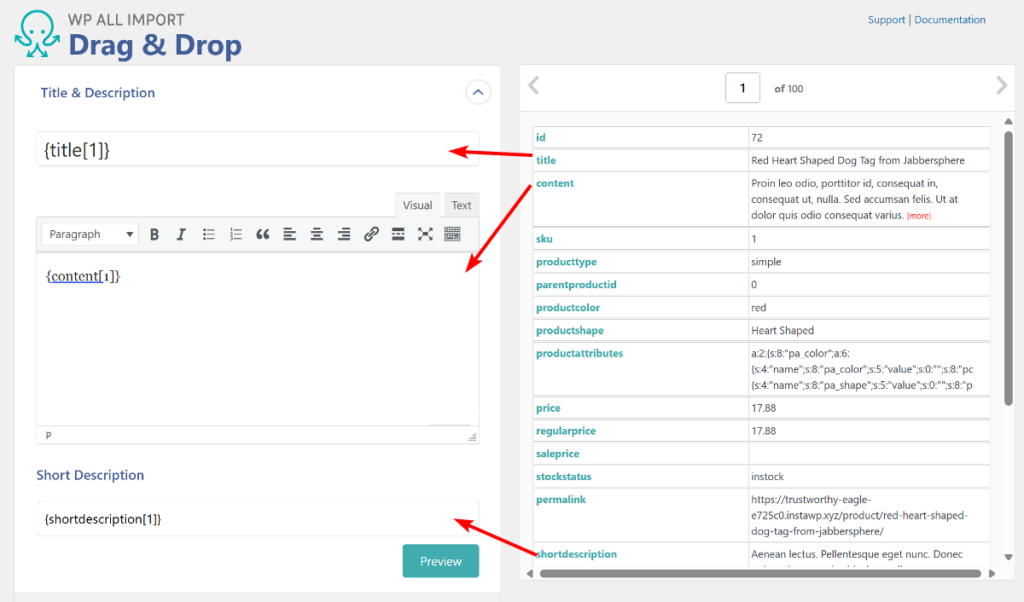
This is where all the magic happens. WP All Import presents you with a drag-and-drop interface to map your import data to WooCommerce product fields.
On the left, you’ll see the different WooCommerce fields categorized into different panels, and on the right, your import data is presented in a table.
To map the fields, simply drag elements from your data file to the corresponding fields on your left. You can start with essential details like product title, description, and short description.
To add other fields, expand the WooCommerce Add-on panel and you’ll see an interface similar to when you add a product manually in WooCommerce. It includes tabs for General, Inventory, Shipping, Linked Products, Attributes, and more.
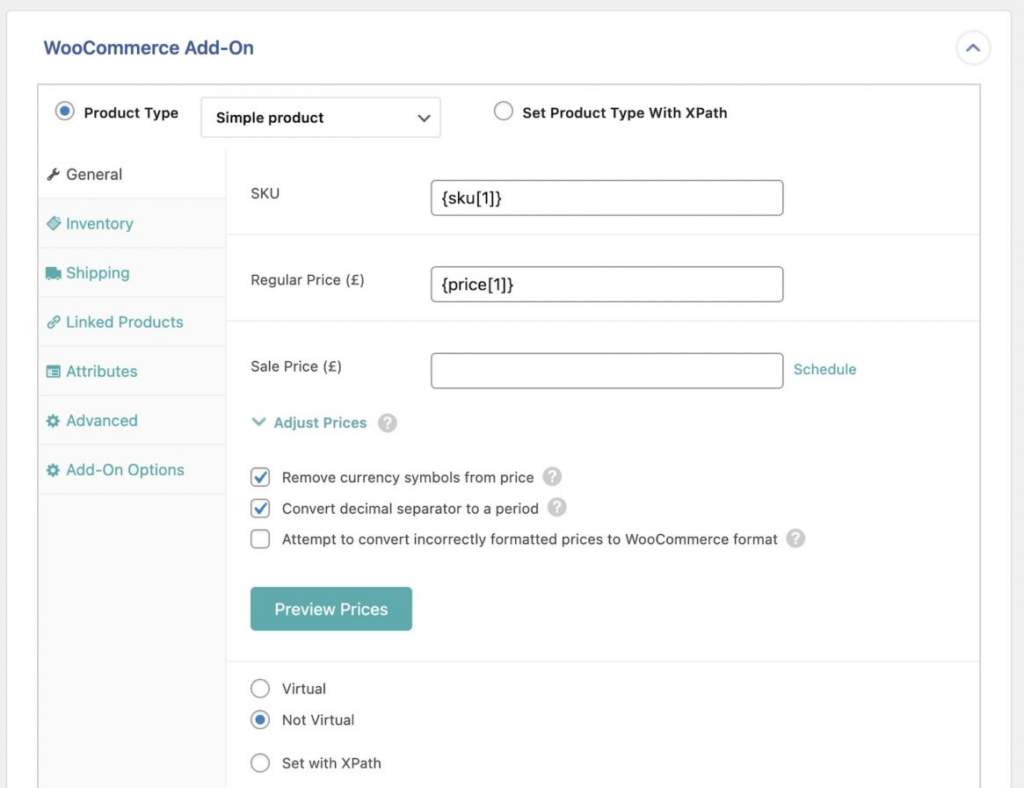
The first thing you’ll do here is to select the correct product type. WP All Import supports all popular product types such as Simple Products, Subscriptions, Grouped Products, External Products, Variable Products, and more.
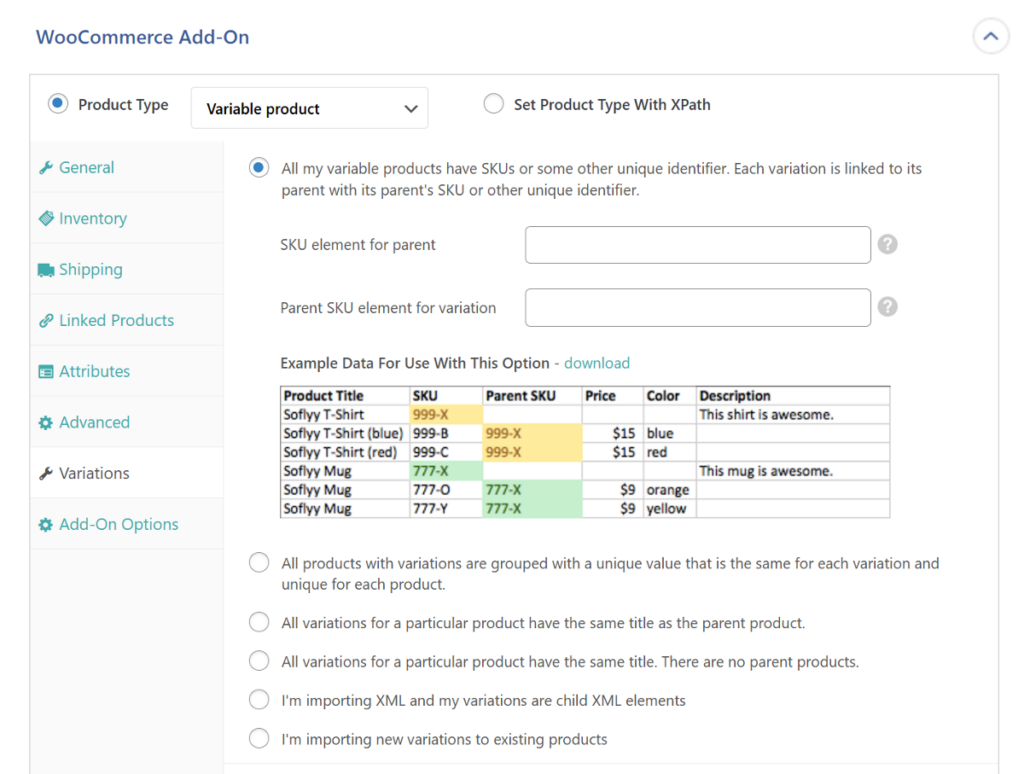
If you select the product type as Variable Product, a new variation tab is added to the interface. Go through each of the tabs and map relevant fields from your import file.
After you’ve mapped all the fields, click Continue to Step 4 to proceed ahead.
In this step, you’ll configure how WP All Import should handle your data during import.
The first setting is to set a unique identifier for your products. This is important to prevent duplicate product import and enable future re-running of the same import.
You can set the Unique Identifier automatically by clicking the Auto-detect button or manually by dragging the fields from the table. The auto-detect option is easy and works well most of the time.

The unique identifier panel also has other options which let you decide how the plugin should behave on subsequent imports; whether to create new products, update existing ones, or delete products no longer present in your import file.
The next panel is the Scheduling Options panel and it lets you set recurring imports. This is beneficial when you need to regularly import products without manual intervention.
The Scheduling Options doesn’t work when you upload a local file and you’ll need to either load the data from a URL or select the file from your server. To learn more, WP All Import has a documentation article that explains the scheduling option in detail.
There’s also an advanced settings panel, which lets you configure some import speed optimization settings and other additional import settings.
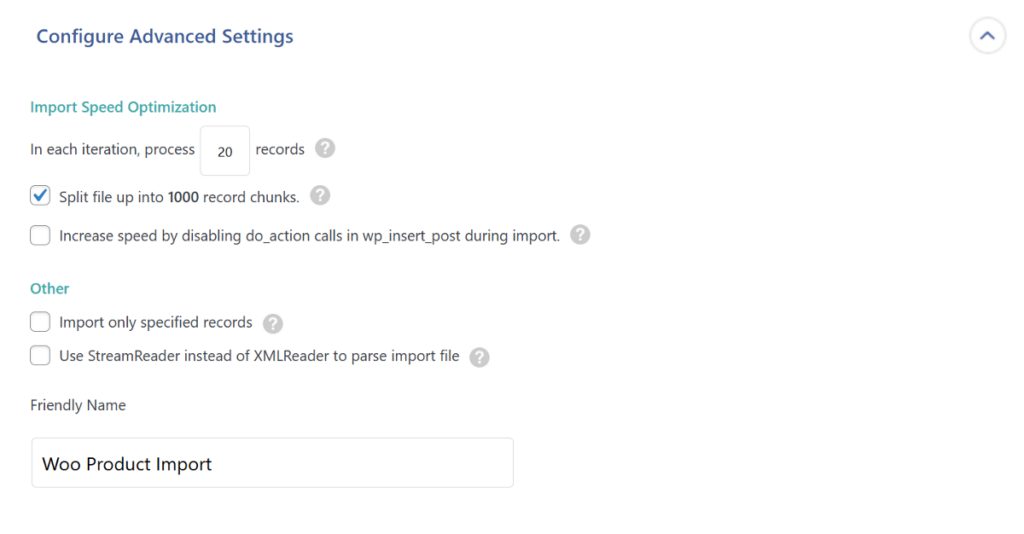
After configuring all of the settings, click the Continue button to move to the last step.
The final step is to review your import settings and run the import. WP All Import will present you with a summary of your import configuration. Take a moment to double-check everything before clicking the Confirm & Run Import button.
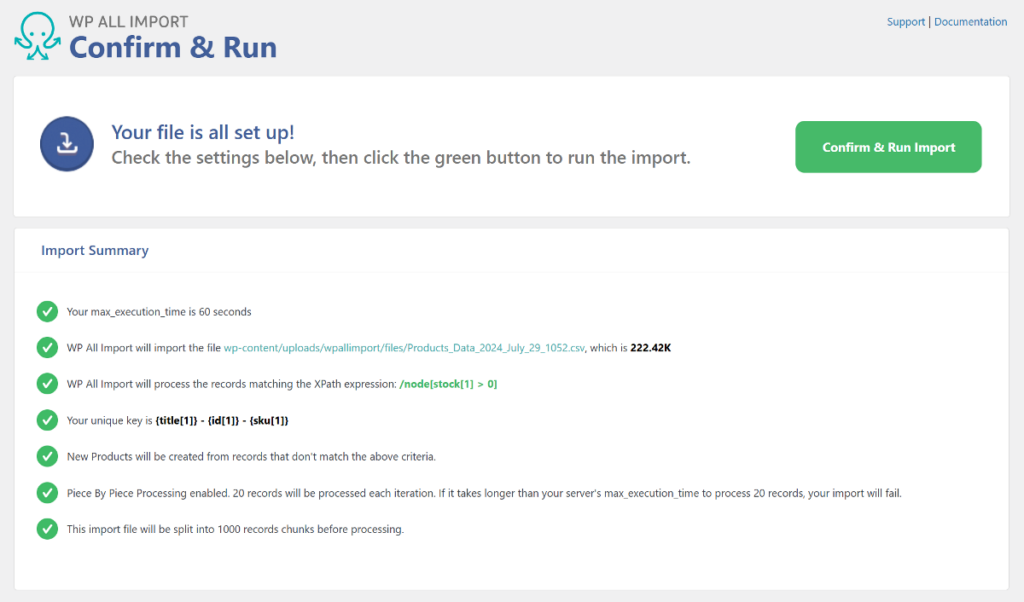
The plugin will then start the import process and start adding products to your WooCommerce store. The plugin may take a few minutes, especially for large imports or if you’re downloading many images. It shows a real-time progress bar with the number of products imported.
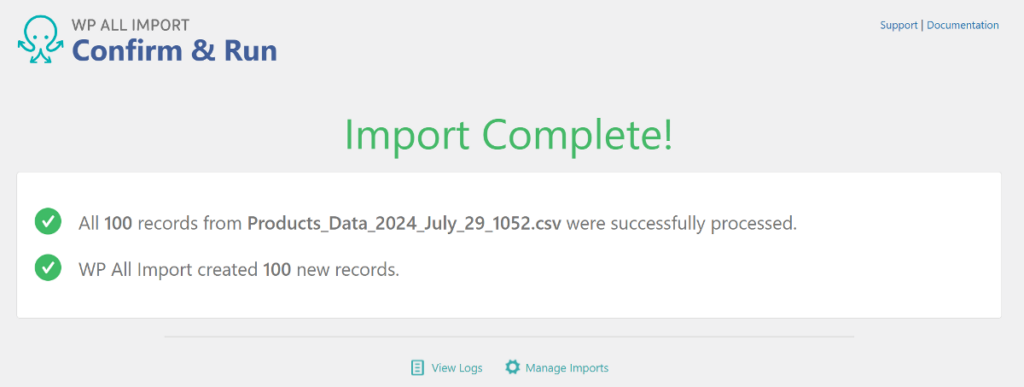
Once complete, you’ll see a confirmation screen with details about how many new products have been created and if any of the existing products have been updated.
After the import finishes, it’s important to verify your newly imported products. Navigate to the Products page in your WooCommerce dashboard to review the imported items.
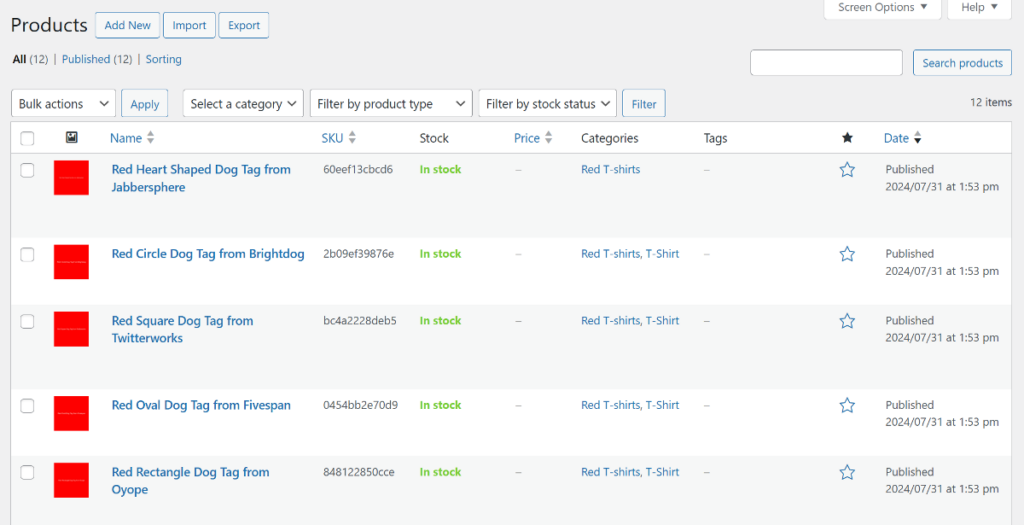
Check that all details, including variations, product images, and pricing, have been correctly added.
To import products from an Excel file, just select the Excel file as your import source in the All Import > New Import page. WP All Import will recognize the file format and will automatically adjust its interface accordingly.
WP All Import is a powerful all-in-one WooCommerce import plugin and it supports different data types including WooCommerce Orders. Go to All Import › All Import, upload your order data file, and select the import type as WooCommerce Orders. Follow the rest of the steps of the wizard to complete the import process.
Get maximum flexibility with unlimited licensing and domain activations.
Get your money back within 60 days of purchase, no questions asked. It's risk-free!
We offer premium support to ensure the ultimate customer experience.
For a limited time, we're offering an unlimited site license for just $199.99/year. Buy now to lock in this price.