
How to Import WooCommerce Products on a Schedule
In a lot of stores, the schedule for importing WooCommerce products involves a calendar reminder and whoever has a free half hour on Monday morning to run the import. That routine holds for months, right up until a holiday lands on a Monday and the product catalog falls a week behind.
We give that job to a plugin instead. WP All Import saves a WooCommerce product import once and repeats it on the schedule you set, downloading the latest file from its URL on every run. Its Automatic Setup maps the supplier’s columns to WooCommerce product fields in a single pass, so the first import is ready before the schedule ever comes into play.
In this guide, we set that import up from scratch and decide which fields each scheduled run is allowed to change, so new prices and stock levels reach the store without overwriting product descriptions you’ve manually edited.
What We’ll Cover
What Happens During a Scheduled WooCommerce Product Import
Say we schedule the import for 3 a.m. every Tuesday. At that time, the Automatic Scheduling service contacts the site, and WP All Import downloads whatever file currently sits at the supplier’s URL. It reads the file one record at a time and uses the import’s Unique Identifier to recognize products it created in earlier runs.
New records become new WooCommerce products, and records with changed prices or stock update the product they match. WP All Import skips any record whose data hasn’t changed since the last run, so a 5,000-row file with 40 edits updates only 40 products and leaves the rest alone. If the supplier drops a product from the file, the import deletes it or sets it to out of stock, depending on the settings we cover in Step 3.
- 3:00 a.m.File downloaded. WP All Import fetches the latest version of the file from its saved URL.
- Records matched. Each row is linked to a product from an earlier run through the import’s Unique Identifier.
- Products created and updated. New rows become new products, and rows with changed prices or stock update the product they match.
- Unchanged records skipped. Rows whose data matches the last run are left alone.
- Missing products handled. Products dropped from the file are deleted or set to out of stock.
WooCommerce’s own importer under Products › Import doesn’t run on a schedule. It can only process a CSV file when someone uploads it.
How to Schedule a WooCommerce Product Import With WP All Import
WP All Import schedules WooCommerce product imports from any file it can reach by URL or FTP/SFTP, and it repeats each import on the days and times you set. To show the setup, we’ll follow a tea and kitchenware supplier that keeps its product catalog in a Google Sheet and updates prices and stock there every week.
Step 1: Point Automatic Setup at a File URL
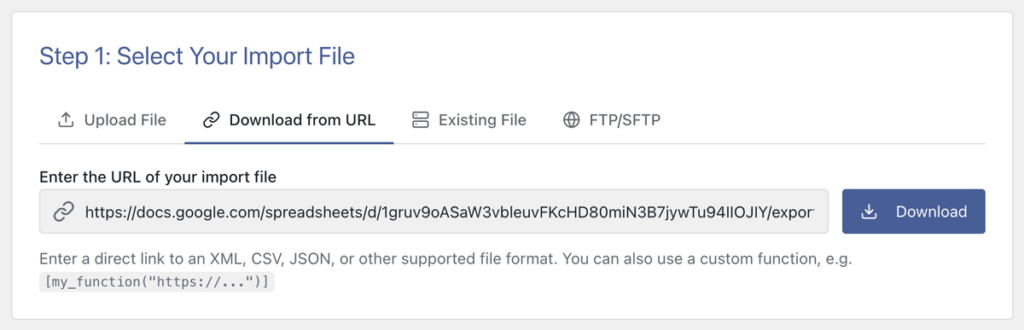
A scheduled import downloads its file all over again on every run, so it needs a link or server location that stays the same. Go to All Import › New Import, click Set up automatically, and pick the tab that matches where the file lives:
- Download from URL for a direct link to a CSV, XML, JSON or Excel file
- FTP/SFTP for a file the supplier uploads to a server
The link to our supplier’s sheet goes in the Download from URL tab. For Google Sheets, replace the end of the sharing link (/edit?usp=sharing) with /export?format=csv so WP All Import receives the sheet as a direct CSV file. Also set the sheet’s sharing to Anyone with the link.
Step 2: Let Automatic Setup Map the Product Fields
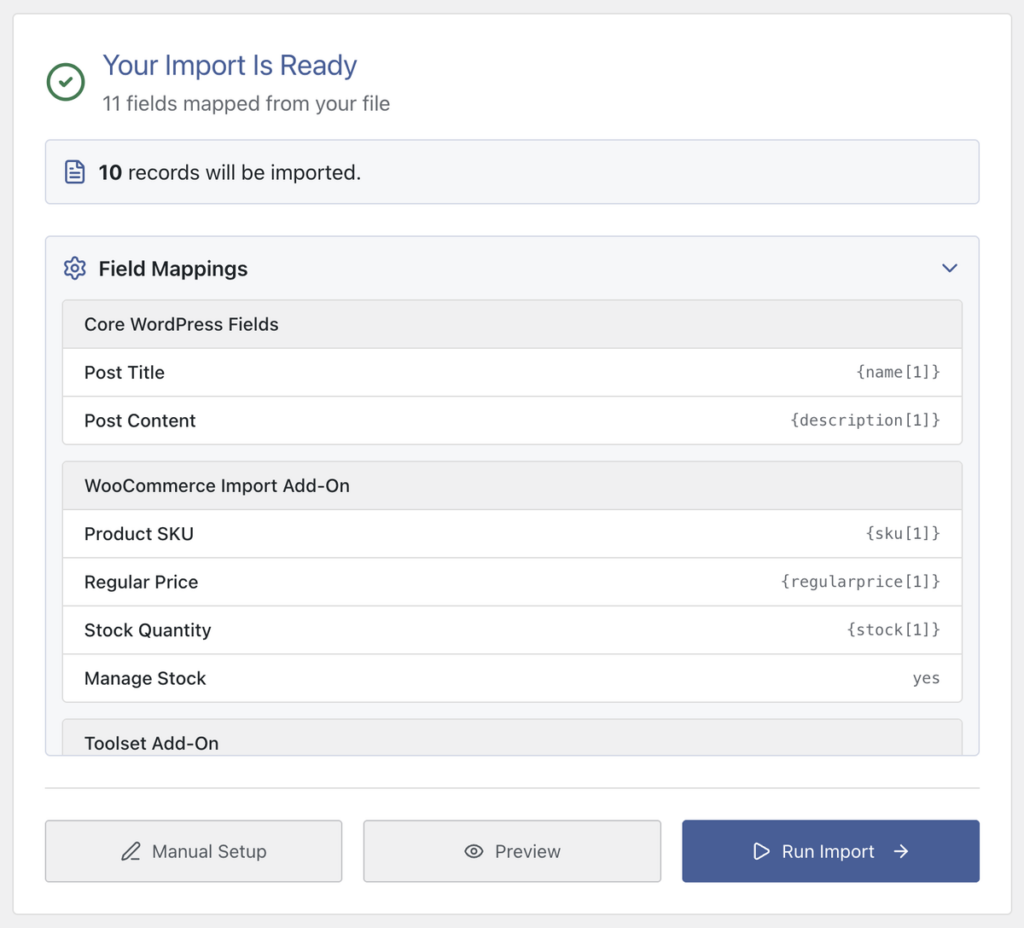
Choose WooCommerce › Products and click Start Automatic Setup. WP All Import’s Automatic Setup reads the file’s column headers and maps each one to its WooCommerce product field, so there’s no need for any drag-and-drop.
For our 10-product sheet, the Your Import Is Ready screen reported 11 fields mapped, and Manage Stock was already switched on for the stock column. Open Field Mappings to check the pairs, then click Run Import to create the products.
Step 3: Decide What Each Future Run Can Change
Go to All Import › Manage Imports and click Import Settings next to the new import.
- Unique Identifier: confirm it points to the SKU column. WP All Import uses it to connect each row to the product it created on an earlier run, as explained in Define Unique Identifier Correctly.
- Skip WooCommerce products if their data in your file has not changed: leave this ticked. How skipping works.
- Choose which data to update: tick only the fields the supplier controls. Our supplier edits prices and stock, so we ticked just those two.
- Remove or modify WooCommerce products that are not present in this import file: tick this box, choose Instead of deletion…, then set Change stock status of removed WooCommerce products to › Out of stock. More on this setting.
Click Confirm & Run Import to save the settings.

To test these rules, we rewrote one product’s description in WooCommerce, then changed a single price in the sheet and ran the import again. WP All Import updated that one product, skipped the other nine, and left the rewritten description exactly as we’d written it.
Setting dropped products to Out of stock instead of deleting them keeps their pages and reviews in place, so a product the supplier brings back returns to the store with its URL intact.
Step 4: Turn On Automatic Scheduling
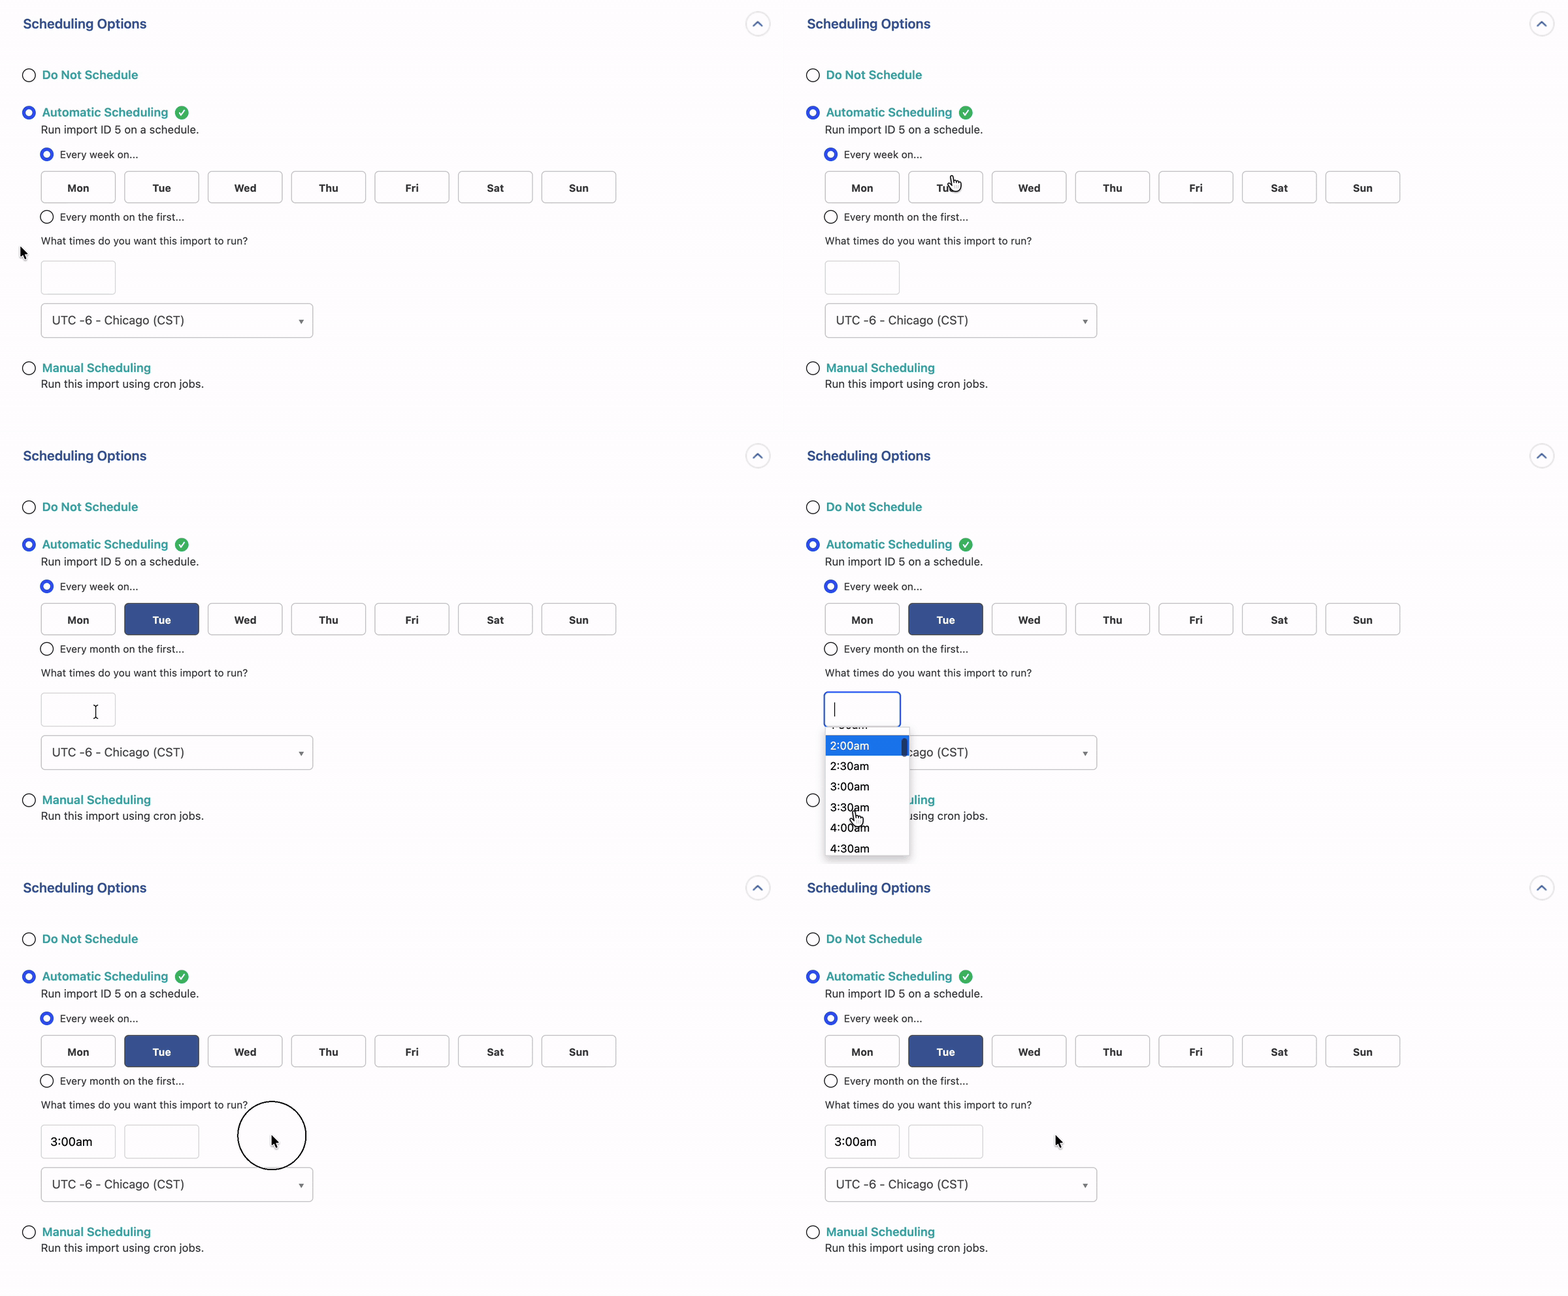
On Manage Imports, click Scheduling Options and select Automatic Scheduling. Pick Every week on… or Every month on the first…, click the days, and add one or more times under What times do you want this import to run? Our supplier updates its sheet on Monday evenings, so we set the import to run at 3:00 a.m. every Tuesday in our timezone, then clicked Save.
The Automatic Scheduling service contacts the site at each scheduled time and checks that the import finished. It costs $19 a month for unlimited imports on unlimited sites (setup guide). To run the same schedule from your own server, choose Manual Scheduling and set up cron jobs at no extra cost.
How Often Should a WooCommerce Product Import Run?
The right schedule for a WooCommerce product import is one that runs soon after the supplier updates its file. Our tea supplier edits its sheet on Monday evenings, so a 3:00 a.m. Tuesday run picks up every change before traffic hits that day. WP All Import’s Automatic Scheduling runs an import at several set times each day, on any day of the week, so stores whose data changes more frequently can schedule more runs.
| If the supplier updates the file… | Set Automatic Scheduling to… |
|---|---|
| Several times a day | Every week on…, all seven days, with a time after each update |
| Once a day | Every week on…, all seven days, with one time |
| Once a week | Every week on…, the day after the update |
| Once a month | Every month on the first…, the weekday after the update |
Extra runs cost very little. WP All Import skips any product whose data hasn’t changed, so a run between supplier updates finishes quickly and leaves the catalog as it is.
Conclusion
It’s safe to say that the Monday reminder we talked about at the start of this guide can now come off the calendar. A scheduled WooCommerce product import does the same job on its own timetable, matching each row in the supplier’s file to the product it created and changing only the fields you allow. Our tea supplier’s sheet now reaches the store every Tuesday at 3:00 a.m., and the products it drops go out of stock instead of staying on sale.
WP All Import imports WooCommerce products on a schedule without cron jobs or server access, updating only the product fields you select and skipping every product whose data hasn’t changed. Its Automatic Setup builds the first import from the file’s column headers, and the schedule itself is a single form on the Manage Imports screen. Automatic Scheduling costs $19 a month and covers unlimited imports on unlimited sites, so adding a second supplier later is simply one more saved import.
Common Questions About Importing WooCommerce Products on a Schedule
Does WooCommerce have a built-in way to schedule product imports?
No. WooCommerce does not have a built-in way to schedule product imports. Its importer under Products › Import runs only when someone uploads a CSV file manually. WP All Import adds scheduling to WooCommerce product imports, repeating a saved import from a file URL or FTP/SFTP location on the days and times you choose.
How do I import products into WooCommerce automatically every day?
You can import products into WooCommerce automatically every day with WP All Import’s Automatic Scheduling:
- Go to All Import › New Import, click Set up automatically, and add your file under Download from URL or FTP/SFTP.
- Choose WooCommerce › Products, click Start Automatic Setup, then click Run Import.
- Open All Import › Manage Imports, click Scheduling Options and select Automatic Scheduling.
- Choose Every week on… and select all seven days.
- Add a time under What times do you want this import to run? and click Save.
Can I schedule a WooCommerce import without cron jobs?
Yes. WP All Import’s Automatic Scheduling service lets you schedule a WooCommerce import without cron jobs. You set the days and times in the Scheduling Options form on the Manage Imports screen, and the service contacts your site to run the import at each scheduled time. It costs $19 a month for unlimited imports on unlimited sites.
How do I stop a scheduled import from overwriting my product descriptions?
To stop a scheduled import from overwriting your product descriptions, open the import’s Import Settings from All Import › Manage Imports. Select Choose which data to update and tick only the fields your supplier controls, such as price and stock. WP All Import then leaves product descriptions, along with every other field you didn’t tick, exactly as they are in WooCommerce.
What happens to products that are no longer in the supplier file?
What happens to those products depends on the Remove or modify WooCommerce products that are not present in this import file setting. With it switched off, they stay in the store unchanged. With it on, WP All Import can:
- Send removed products to the trash
- Change their status, for example to Draft
- Set custom fields on them
- Change their stock status to Out of stock
- Delete them