
The Fastest Way to Import Product Tags in WooCommerce
You have the product file open and the tag column is either empty or full of whatever the supplier wrote. WooCommerce gives you no way to fill that column in bulk. Products › Tags creates a term one at a time and leaves you attaching it to products by hand.
In this article, we’ll show you how to import WooCommerce product tags as part of a product import, and how to import a standalone tag list when the terms don’t exist yet. We’ll also cover which of the archive pages that import creates should be visible to Google.
What We’ll Cover
- Where Product Tags Live in WordPress
- Which WooCommerce Plugin Do You Need for Product Tag Import?
- How to Import Tags Alongside Your WooCommerce Products
- How to Import a Standalone Product Tag List
- Which Product Tag Pages Should You Let Google See?
- Final Thoughts: Fastest Way to Import Product Tags in WooCommerce
- Common Questions About Importing Product Tags in WooCommerce
Where Product Tags Live in WordPress
A product tag is a term inside a taxonomy called product_tag. WordPress keeps it in three tables: the name and slug in wp_terms, the taxonomy and product count in wp_term_taxonomy, and the link to each individual product in wp_term_relationships.
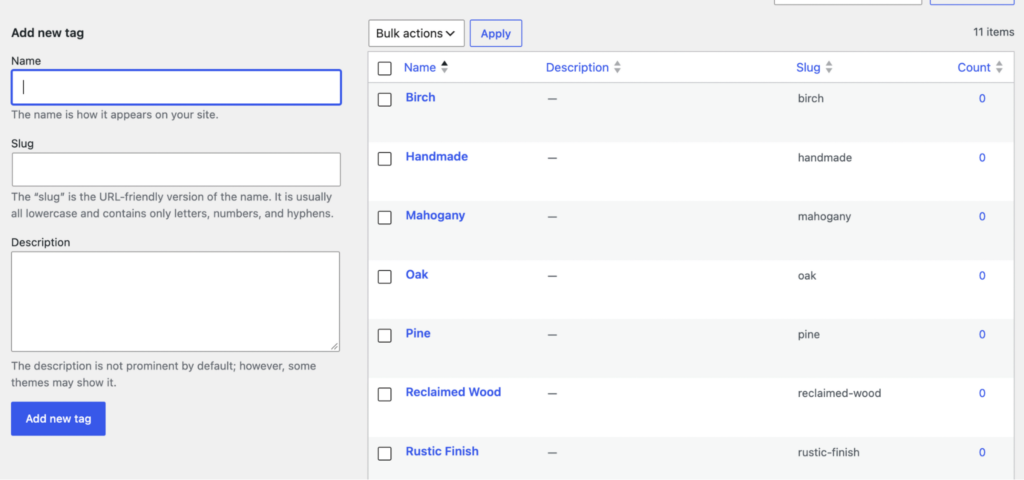
That split explains where a tag import goes wrong. A different spelling adds an unwanted row to wp_terms. A missing relationship row leaves the term existing while no product carries it, which is exactly what a standalone taxonomy import produces.
The import writes across all three tables. None of the admin screens show you the term ID, so the name and slug become the only thing your file can reliably use, and that is why matching on them decides whether a repeat import updates a tag or creates a second one.
Which WooCommerce Plugin Do You Need for Product Tag Import?
The built-in importer can attach tags. Upload a CSV with a Tags column and WooCommerce will create the terms and link them to those products in the same run, provided the file matches its template. What it won’t do is read a supplier’s own layout, keep the mapping for the next import, or check incoming tags against a list you prepared in advance. That last point is where tag lists usually come apart.
We use WP All Import here because it reaches tags from both directions: as a mapped field inside a product import, and as a taxonomy import when the tag list arrives on its own. It reads CSV, Excel, XML, and Google Sheets files, builds the mapping through Automatic Setup, and matches incoming names against terms already in the store, so a second run reuses tags instead of creating them again.

The work happens in the mapping screen, the same one you use for any product import. The tag column becomes a field alongside the rest, and nothing extra is needed beyond the WooCommerce Import Add-On that the product fields already rely on. Matching on SKU means a second run overwrites prices and tags rather than adding rows, so next month’s file can arrive in the same shape and still land correctly.
None of this touches the PHP editor or XPath, which exist for feeds that misbehave. Every value in that column is a plain name, and the import either recognises it or writes a new one.
How to Import Tags Alongside Your WooCommerce Products
A single run does two things at once: it creates or updates the products in the file, and it creates or attaches the tags those products carry. Both jobs finish together, so nothing needs a second pass through the admin afterwards. The steps below follow the order the automatic workflow moves in.
Step 1: Add the Tags to Your Product File
Tag values go in their own column, beside the titles and prices, with one cell per product and a comma between each value. Solid Oak, Small Spaces, Outdoor.

Copy the spellings from your approved list rather than from the supplier’s feed. The import takes whatever it finds in that cell, so the column is the last place you get to decide what your store ends up with. Keep the SKU or ID column in the file too, since that’s what lets the next import match existing products instead of writing new ones.
Step 2: Upload the File and Choose Products
Go to All Import › New Import and click Set up automatically.
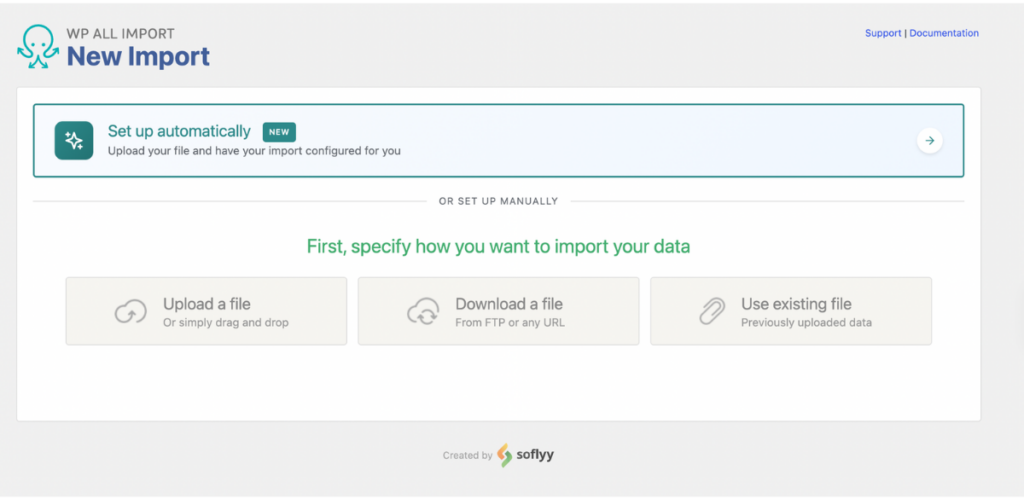
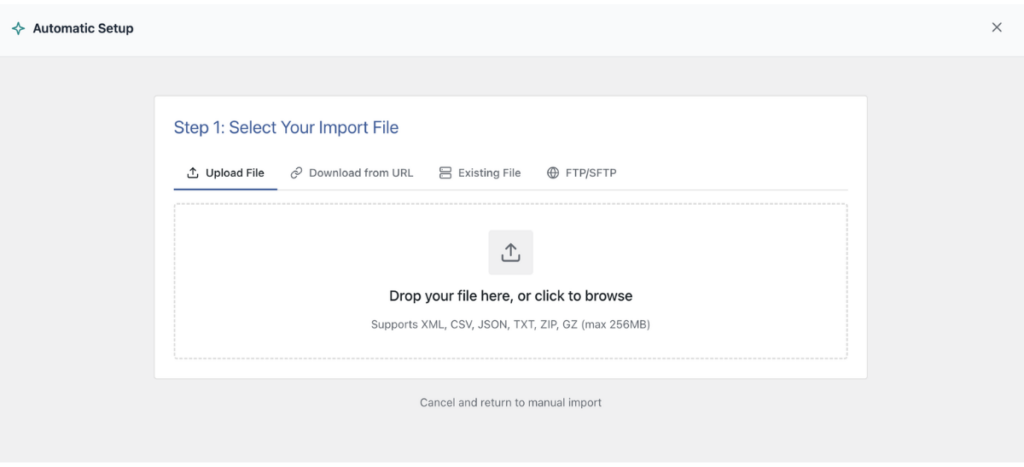
In the first step, add your file: drag it into the upload box, or pull it from a URL, an existing upload, or an FTP/SFTP server.
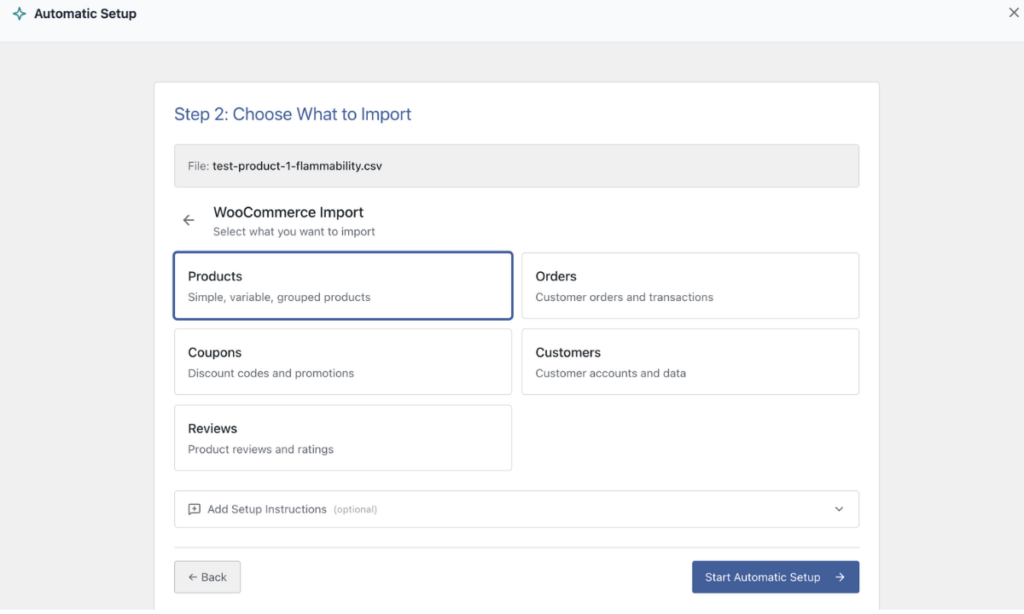
In the second step, choose WooCommerce, then Products, and click Start Automatic Setup.
The plugin reads the header row, works out which column holds the tags, and pairs it with the Tags field on its own. There is no drag-and-drop screen in this workflow. A progress screen runs while it analyses the file, then Your Import Is Ready shows the detected import type, the record count, and how many fields were mapped.

Step 3: Check the Mapping, Then Run the Product Import
Expand Field Mappings and confirm your tag column sits against Tags. If a different field got mapped by mistake, click Manual Setup. The template editor opens with the automatic mapping already filled in, so you correct the one field and leave the rest.

Expand the Taxonomies, Categories, Tags group in the template and confirm your column sits in the Product tags field.
Select Each Product has multiple Product tags, since a single cell holding Solid Oak, Small Spaces, Outdoor carries three. Make sure the separator matches the file, then leave the mapping as it is.
Open Products › Tags in a second tab and note the term count. Then click Run Import and read the summary: six unique tags across 300 products should add six terms, not 300.
Every term the import creates gets a page at /product-tag/term/. On a Breakdance site those archives inherit the Shop Page & All Product Archives template, so the new pages match the rest of the shop without a separate design.
How to Import a Standalone Product Tag List
Not every store starts with products in hand. A migration, a rebrand, or a new site often begins with a list of terms that should exist before anything uses them. That is what the taxonomy import is for.
Start the import the same way as before: All Import › New Import, then Set up automatically. Upload the file, and this time choose Taxonomies where the workflow asks what you’re importing, with Product tags as the taxonomy. Click Start Automatic Setup and let it map the Name and Slug columns.

A file holding only names leaves every slug to be generated from the name, which works until two tags share a name. Add the slug column and check both fields before continuing.
Set the identifier to the tag name on the second screen, then run the import and open Products › Tags. The terms are there. None of them are attached to a product yet, and that is the difference worth understanding: a taxonomy import builds the vocabulary, while the product import from the section above is what puts the words on products.
Which Product Tag Pages Should You Let Google See?
Every tag the import creates becomes a page with its own URL, and nothing in WordPress asks whether that page deserves to exist. A store with forty supplier tags ends up with forty archive pages, most of them listing one or two products and repeating what a category already covers.
The default should be noindex for tags that are thin, temporary, or near-duplicates. A campaign code, a single-product descriptor, or a second version of something a category already owns does not need to rank. Keep it live for shoppers and out of the index.
Index the exceptions: the tags that cross categories, hold enough products to compare, and match something people actually search for. Those deserve a title, a short description, and a place in the sitemap.
In Yoast, you can configure the setting under SEO › Search Appearance › Taxonomies. In Rank Math, it’s under Rank Math › Titles & Meta. Whichever you use, remove noindexed tags from the sitemap and leave their links followable, since they still help people browse even when they’re not meant to appear in search.
Final Thoughts: Fastest Way to Import Product Tags in WooCommerce
The finished job of importing product tags looks simple from the outside. Someone clicks a tag, sees a set of products that belong together, and carries on shopping. Getting there is mostly about the list you wrote before the import, because the import itself only follows that column.
For most stores, importing tags alongside the products is the right way. One pass handles both jobs, and a saved import can be scheduled so the catalog keeps pace with the sheet. WP All Import makes that repeatable: Automatic Setup reads the header row and pairs the tag column with the Product tags field inside the Taxonomy group, so no mapping is left to guesswork. The plugin reads CSV, Excel, XML, and Google Sheets files, matches incoming names against the terms already in your store so tags are reused rather than duplicated, and updates by SKU on every later run. Set the schedule and the tag list stops being a task anyone has to remember.
Common Questions About Importing Product Tags in WooCommerce
Can I import product tags without reimporting the products?
Yes. Import the terms into Taxonomies › Product tags with a name and slug column, and WooCommerce creates them without touching any product. The terms land unattached, so you still need a product import to put them on products. WP All Import handles both jobs: the taxonomy import builds the vocabulary, and the product import assigns it.
Why did my import create duplicate tags?
An import creates duplicates when a tag’s spelling differs from the term already in the store, since matching works on the name. One row with Eco-Friendly and another with Eco Friendly produces two terms. Check Products › Tags after each run, and keep a single approved spelling in your file. WP All Import reuses an existing term whenever the incoming name matches it exactly.
Do WooCommerce product tags create their own pages?
Yes. Each tag generates an archive at /product-tag/term/, listing every product carrying it. On a Breakdance site those archives inherit the Shop Page & All Product Archives template, so they match the rest of the store without separate design work.
Can I delete a tag after importing it?
Yes. Delete the term under Products › Tags and the products stay where they are, because the tag relationship is removed rather than the product. If the tag came from a scheduled import, remove the value from the file too, or the next run will recreate it.
How do I keep tags current when the supplier file changes?
Schedule the import. A saved WP All Import template re-runs against an updated file, matches products by SKU, and adds any new tag values that pass your naming rules, so the tag list stays aligned with the catalog instead of drifting between manual uploads.