
How to Export WooCommerce Products on a Schedule
A supplier wants last week’s stock counts. A marketplace wants this week’s prices. Someone on your team builds a CSV on Monday, renames it, and sends it, and the whole routine depends on one person remembering.
WooCommerce produces that CSV on request. It does not produce it again next Monday, because the Export button on the Products screen has no recurrence setting behind it.
In this guide, we’ll cover how to export WooCommerce products on a schedule. We’ll build the export once, choose the columns, and set the run times so the export repeats on its own.
What We’ll Cover
What a Scheduled WooCommerce Product Export Does
A scheduled product export is a saved export with a schedule attached. The columns and filters are set once, and the product export plugin runs the export again at the times you choose. Each run builds the file from the current products, so the prices, stock levels and sale dates in it are the ones in the store that day.
WooCommerce cannot create scheduled product exports by itself. Products › All Products has an Export button that generates a CSV when you click it, and nothing on that screen repeats the export.
So a file that leaves without you comes either from a plugin or from a scheduled task on your server.
How to Export WooCommerce Products on a Schedule
WP All Export lets you export WooCommerce products on a schedule into CSV, Excel, or XML files. We can build the export once with custom filters and columns, then repeat it automatically without running it by hand.
To schedule product exports, you need WP All Export Pro and the WooCommerce Export Add-On active on your site.
Download both ZIP files from your Customer Portal. In your WordPress admin dashboard, go to Plugins › Add New Plugin › Upload Plugin › Choose File › Install Now › Activate for WP All Export Pro. Repeat the same path to install and activate the WooCommerce Export Add-On.
1. Start a New WooCommerce Product Export
Go to All Export › New Export and select WooCommerce Products from the post type list. WP All Export displays the total number of matching products below the dropdown.

If you only need part of your catalog, expand Add Filtering Options and set rules for fields such as product category, stock status, or product type. The record count updates as each rule is added. WP All Export saves those rules with the export, so every scheduled run picks up new products that match.
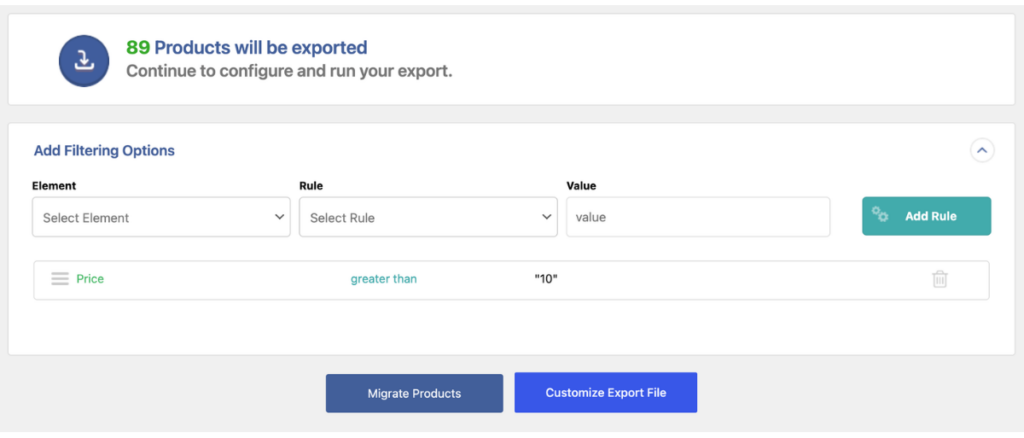
Click Customize Export File to continue.
2. Choose Your Product Fields and File Format
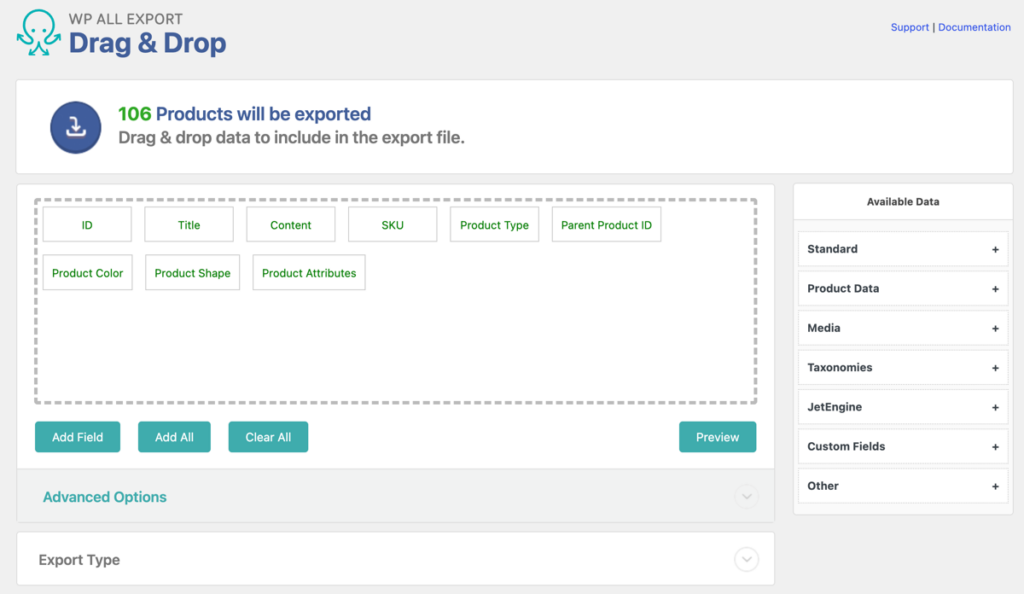
On the Drag & Drop screen, drag the fields your recipient needs from Available Data on the right into the column selection area. Fields such as SKU, Price, and Stock sit under Available Data › Product Data. Drag any column out of the selection area to remove it.
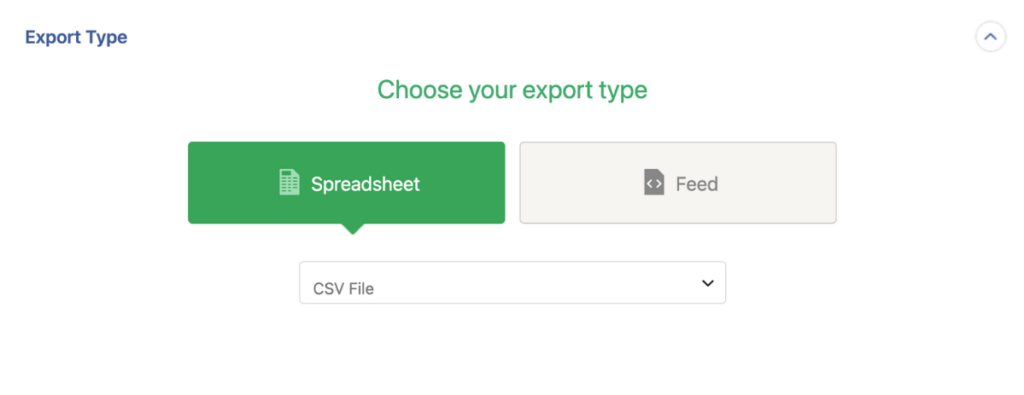
Under Export Type, CSV File is selected by default. Choose Excel File under Spreadsheet if your recipient uses workbooks, or select Feed for an XML file. If your store sells sizes or colors, our guide on exporting variable products from WooCommerce covers how to set up those columns.
Click Continue to open the Export Settings screen.
3. Enable Automatic Scheduling in Export Settings
Expand Scheduling Options on the Export Settings screen. Do Not Schedule is selected by default, so leaving it untouched runs the export only once.
Select Automatic Scheduling to schedule exports inside WP All Export without setting up cron jobs. Choose whether the export runs weekly or monthly, then pick the days and times you want.
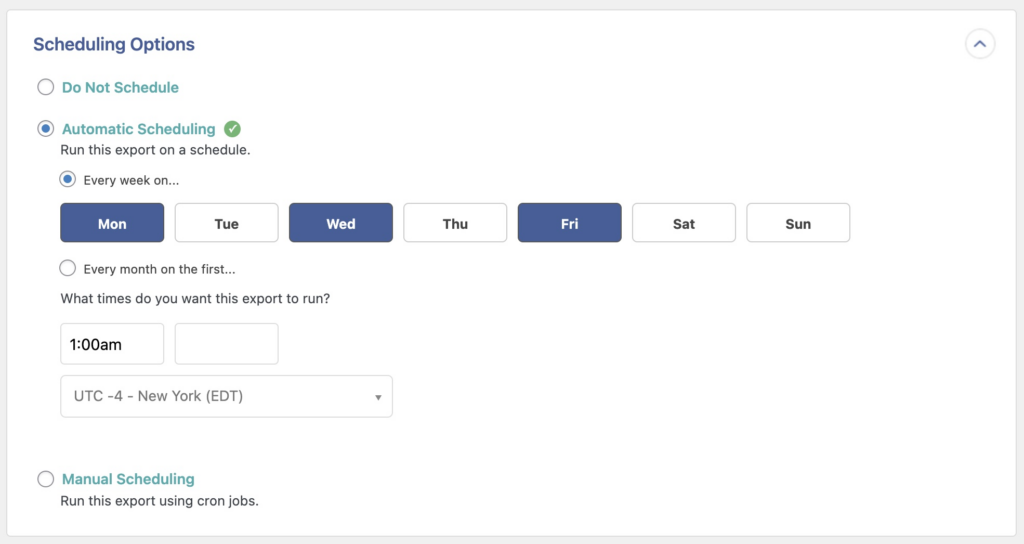
Automatic Scheduling is an optional paid service at $19 per month for unlimited sites, and the same license works in WP All Import and WP All Export. It contacts your site at the scheduled time, runs the export, and verifies that it finished.
If you would rather run cron jobs on your own server or need custom intervals without the monthly fee, select Manual Scheduling in the same panel, which we cover next.
4. Run and Verify the Scheduled Product Export
Click Confirm & Run Export at the bottom of the screen. WP All Export runs the export once right away, then repeats it on the schedule you set.
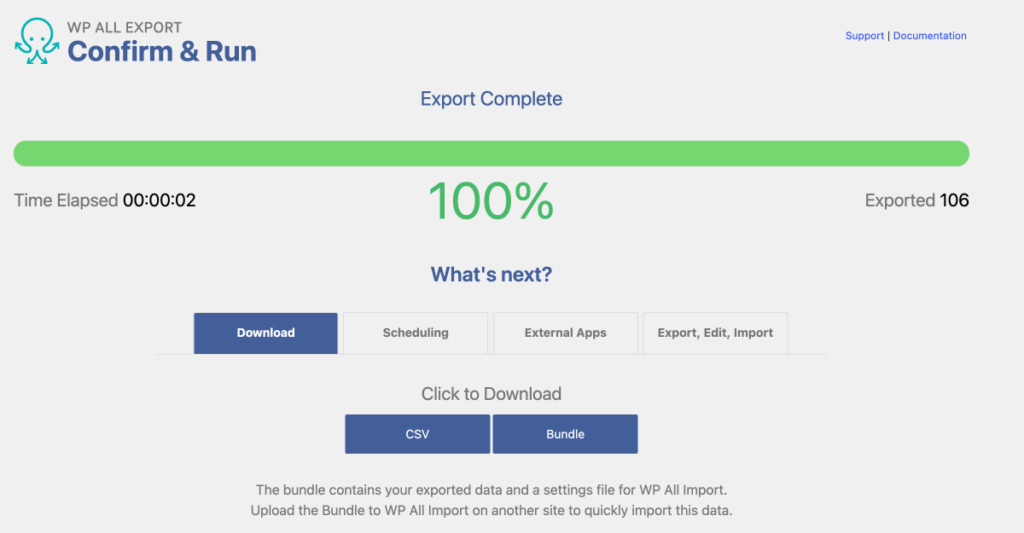
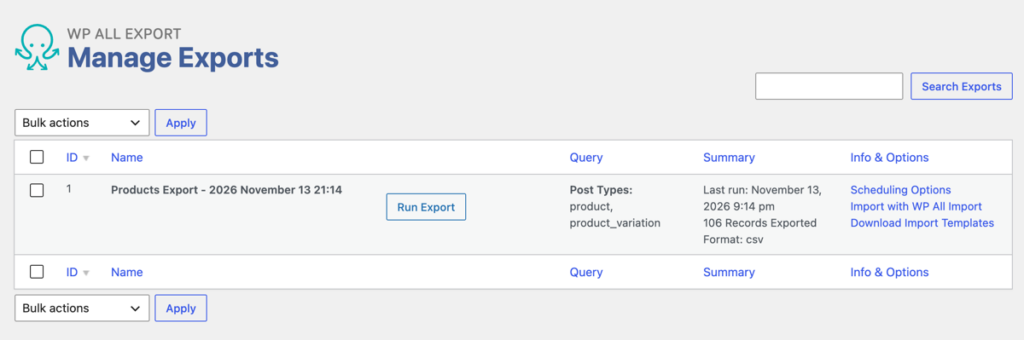
To check or adjust the schedule later, go to All Export › Manage Exports and open Scheduling Options or Settings for that export. Every filter, column, and schedule choice stays editable there without rebuilding the export.
Schedule the Product Export With Cron Jobs
If you want to export WooCommerce products on a schedule without paying for the Automatic Scheduling add-on, Manual Scheduling runs the same export through cron jobs on your server.
Open All Export › Manage Exports, click Scheduling Options next to your product export, and choose Manual Scheduling. That screen gives you a trigger URL and a processing URL, along with a File URL and Bundle URL for fetching completed files.
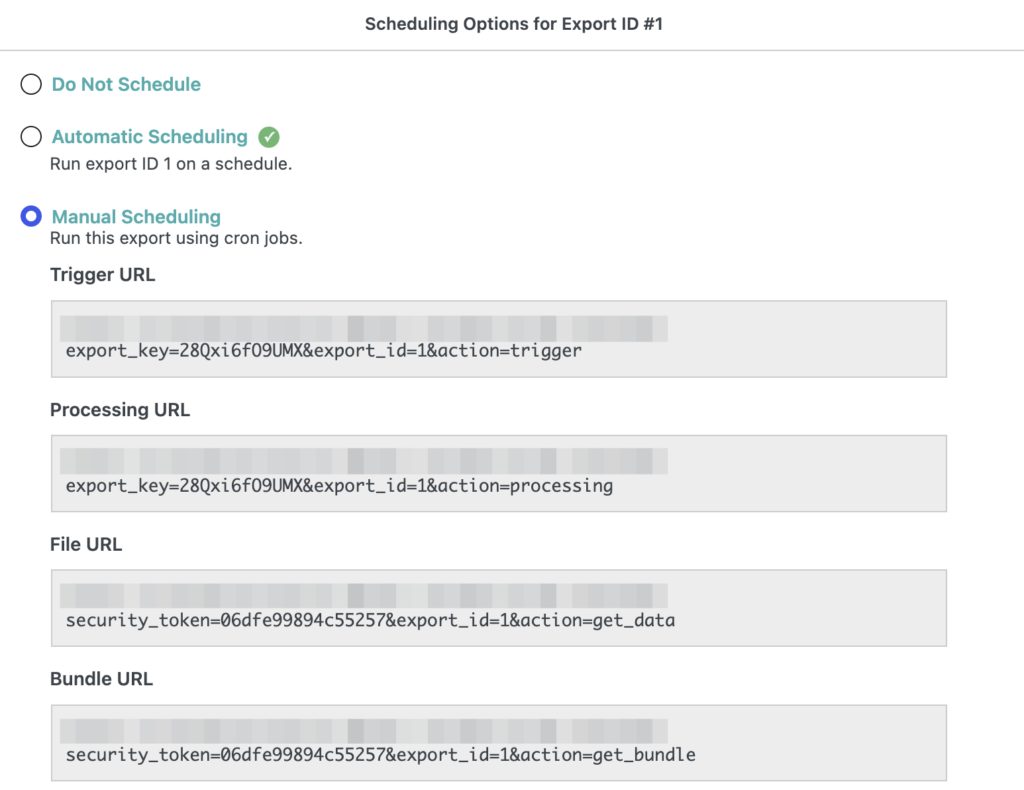
WP All Export splits cron execution into two jobs so large catalogs do not stall partway through. The trigger URL starts the export on whatever interval you configure in your hosting panel, such as daily or every few hours. The processing URL must run every two minutes so it can pick up remaining product batches whenever your server cuts off a long PHP script. When no records are left to process, that two-minute job exits right away without touching your store.
Both endpoints follow this structure using your export ID and the secret key stored under All Export › Settings.
- Trigger URL https://yoursite.com/wp-load.php?export_key=[KEY]&export_id=[ID]&action=trigger
- Processing URL https://yoursite.com/wp-load.php?export_key=[KEY]&export_id=[ID]&action=processing
Treat both addresses like passwords, because anyone holding your export_key can fire that export. If your host runs aggressive server caching, wrap the URL in quotes inside your wget or curl cron command and append &rand=$RANDOM so the server does not return a cached response. When your hosting plan hides cron controls, send both URLs and the two-minute interval rule to your host’s support team and ask them to create the jobs for you.
Here are the next three sections, along with the mid-article related links block placed right after Choose What Each Run Exports.
Choose What Products Each Run Exports
When you export WooCommerce products on a schedule, resending your entire catalog every run wastes bandwidth and clutters recipient folders. Open Advanced Options on the Export Settings screen, or reach it later through All Export › Manage Exports › Settings, to control what each run produces.
Tick Only export Products that have been modified since last export when a partner only needs price or stock updates since the previous file. Use Only export Products once if the feed should send newly published listings and skip anything exported before. Pair either rule with Do not generate an export file if there are no records to export so quiet weeks do not create empty spreadsheets.
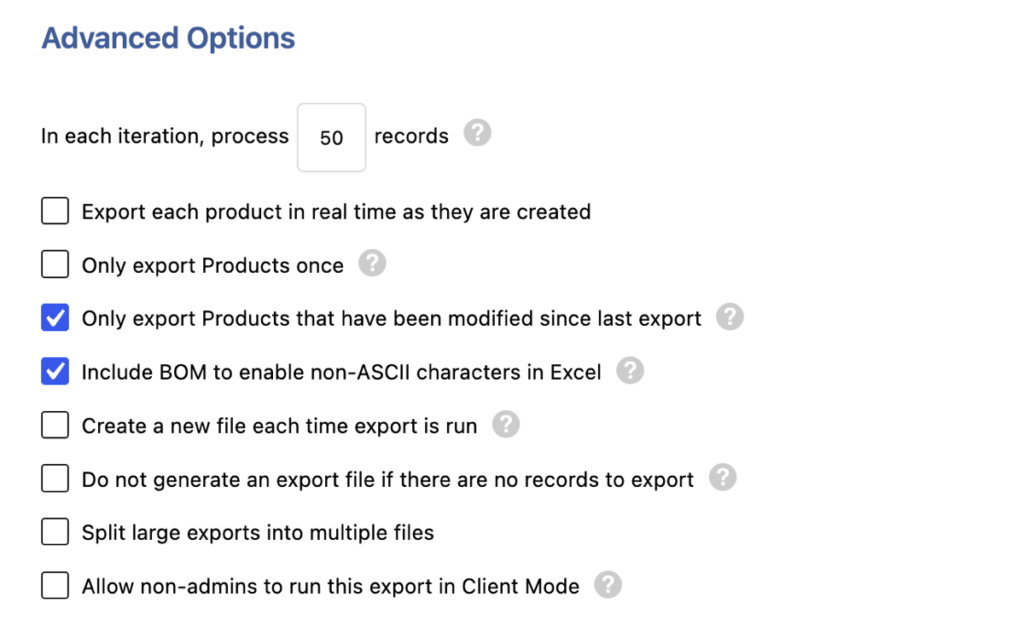
Leave Create a new file each time export is run unticked if an external tool fetches a fixed download link. Ticking it keeps older files on your server and appends a timestamp to each filename, which changes the address on every run.
If a large catalog hits server timeouts, lower the batch count in In each iteration, process X records or enable Split large exports into multiple files. Tell your recipient before switching on change-only rules, because a file of recent edits looks very different from a full catalog snapshot.
Send the Product Export File to the Recipient
WP All Export stores each finished file on your server rather than mailing it out by default. To reach it, open All Export › Manage Exports › Scheduling Options and copy the File URL. Any supplier portal, script, or team member with that link can pull the latest spreadsheet on demand as long as each run overwrites the same file.
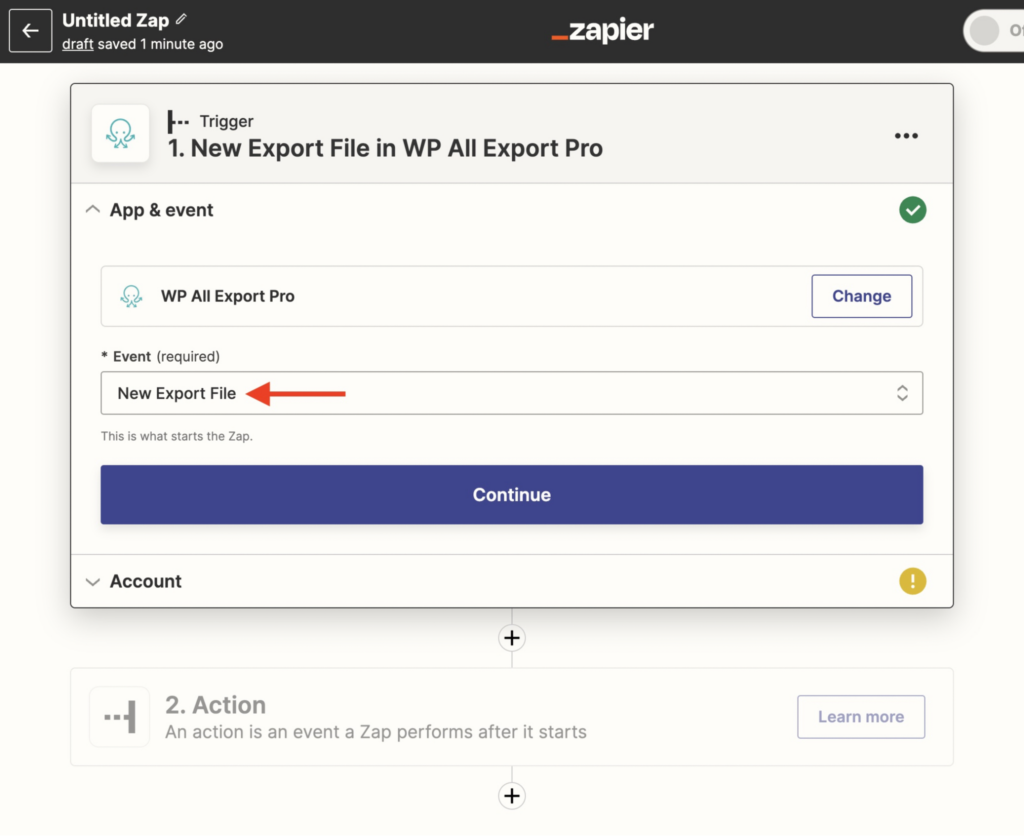
If you want automated delivery after each run, connect WP All Export to Zapier. Its New Export File trigger fires whenever a scheduled export completes and passes the file to Google Sheets, Google Drive, Dropbox, email, or an FTP folder.
For syncing a second WooCommerce store, copy the Bundle URL on the same screen. That bundle pairs your product data with an import template, so a scheduled WP All Import job on the destination store can fetch it automatically once the export finishes.
Because WP All Export does not include built-in SFTP upload or email sending on its own, any push outside your server runs through Zapier or relies on the recipient pulling the File URL.
Do You Need a Scheduled WooCommerce Product Export?
If your store only needs an occasional catalog backup or a one-time CSV, the free version of WP All Export handles manual product exports on its own without a schedule.
When a supplier, marketplace, or second store relies on current stock and price sheets, choosing to export WooCommerce products on a schedule removes the weekly manual work. We rely on WP All Export for those setups because filters, columns, and timing stay saved in one place.
The WooCommerce package with WP All Export Pro costs $169 per year for unlimited sites and includes Manual Scheduling through cron jobs. Adding the Automatic Scheduling service costs $19 per month across unlimited sites if you want point-and-click timing without server setup.
Common Questions About Scheduled Product Exports
Can WooCommerce export products on a schedule?
No, WooCommerce’s built-in Export button only creates manual CSV downloads on demand. To export WooCommerce products on a schedule, you need a plugin like WP All Export Pro with the WooCommerce Export Add-On, which runs recurring CSV, Excel, or XML exports through Automatic Scheduling or server cron jobs.
How often can a WooCommerce product export run?
WP All Export runs Automatic Scheduling weekly, daily by selecting all seven days, or monthly at set times. If your store needs hourly updates or custom intervals, WP All Export’s Manual Scheduling uses two server cron endpoints so exports run as often as your hosting schedule allows.
Do I need cron jobs to schedule WooCommerce product exports?
No, you can schedule WooCommerce product exports without cron jobs by using WP All Export’s Automatic Scheduling service. It connects to your store at the chosen time, runs the export, and verifies completion. Manual cron jobs remain available in WP All Export if you prefer server-side control.
Can I export only WooCommerce products that changed since the last run?
Yes, WP All Export includes an Only export Products that have been modified since last export option under Advanced Options. Turning it on keeps weekly or daily spreadsheets focused on recent price, stock, and catalog edits, while WP All Import can read those updates on a second store.
Where does a scheduled WooCommerce export file go?
WP All Export saves each scheduled export on your server and gives you a static File URL and Bundle URL under Manage Exports. You can also connect WP All Export to Zapier to push each new file to Google Sheets, Google Drive, Dropbox, email, or FTP.
How much does it cost to schedule WooCommerce product exports?
WP All Export with the WooCommerce Export Add-On costs $169 per year for unlimited sites and includes Manual Scheduling through server cron jobs. Adding WP All Export’s Automatic Scheduling service costs $19 per month for unlimited sites and covers both WP All Export and WP All Import.