
The Fastest Way to Import WooCommerce Products from CSV
The CSV file sitting in your downloads folder is finished work. A supplier sent it, or a previous store exported it, and now it needs to become your WooCommerce catalog.
Getting it there is the slow part. WooCommerce’s built-in importer expects its own column names and commas between every field, so most supplier files get rebuilt before the import even starts.
In this article, we’ll show you how to import WooCommerce products from a CSV file in six steps, using automatic mapping to map the catalog you already have. No column renaming, no re-saving.
What We’ll Cover
Why a Product CSV Import Takes Longer Than It Should
The upload is the quick part. Anyone who has imported a catalog will say the same, and the afternoon goes into making the file match what the importer expects. Three things get in the way:
- The file has to fit the tool. WooCommerce’s built-in importer recognises headers like ID, Type, SKU and Regular price, so a column called “Item Cost” gets skipped until someone renames it.
- Header names do not survive a change of supplier. One file says Item Name, the next says Description, and last month’s setup counts for nothing.
- Every new file asks for a new import. When each catalog refresh means rebuilding the setup, the work never gets cheaper.
Here is where the time goes:
| What the CSV arrives with | What the importer asks for |
|---|---|
| Headers like “Item Name” or “RRP” | Exact published column names |
| Semicolons, tabs or pipes | Commas only |
| Parents and variations in one file | Numbered attribute columns |
Here is the part worth sitting with. Reshaping one supplier’s file is an afternoon you can absorb. Doing it again for the next supplier, and the one after that, is where a catalog project stalls, and no amount of practice makes it cheaper. What you want is a setup that outlives the file it was built for.
How to Import WooCommerce Products From CSV in Six Steps
Step 1: Load the Product Import File As It Arrived
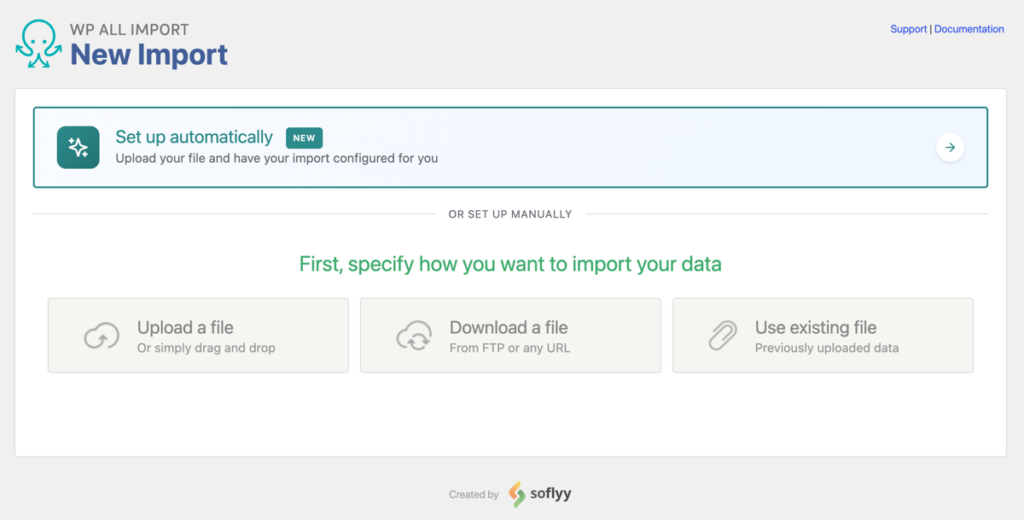
Open All Import › New Import and click the Set up automatically banner at the top of the screen. It sits above the older manual options, which stay available underneath.
Select Your Import File takes four sources:
- An upload from your computer, up to 256 MB per file.
- Download from URL, for a supplier feed or a published Google Sheets export.
- A file already on the server, under /wp-content/uploads/wpallimport/files/.
- FTP/SFTP, when the supplier hosts the catalog on their own storage.
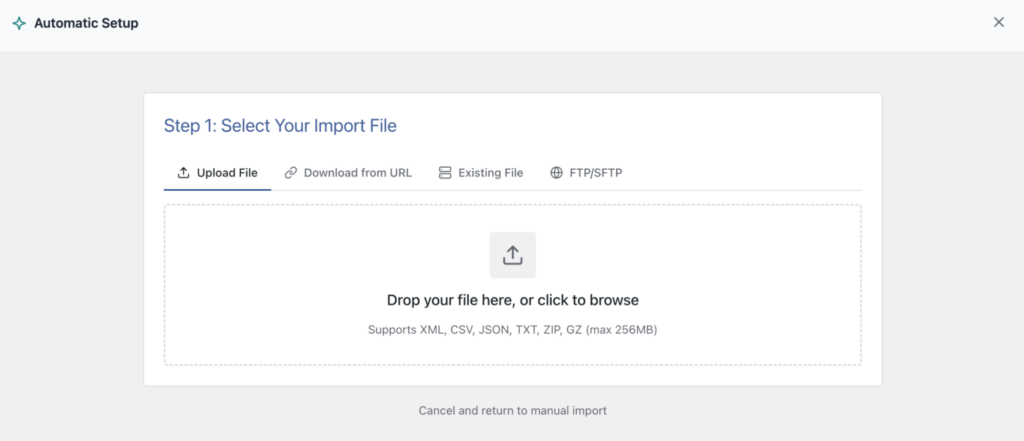
Nothing needs renaming, splitting or re-saving. A semicolon CSV out of a French or German Excel install uploads exactly as it was written.
Step 2: Tell the Product Importer What the File Holds
Choose What to Import lists the data types it can handle. Pick WooCommerce, and Products (Simple, Variable, Grouped) appear underneath it.
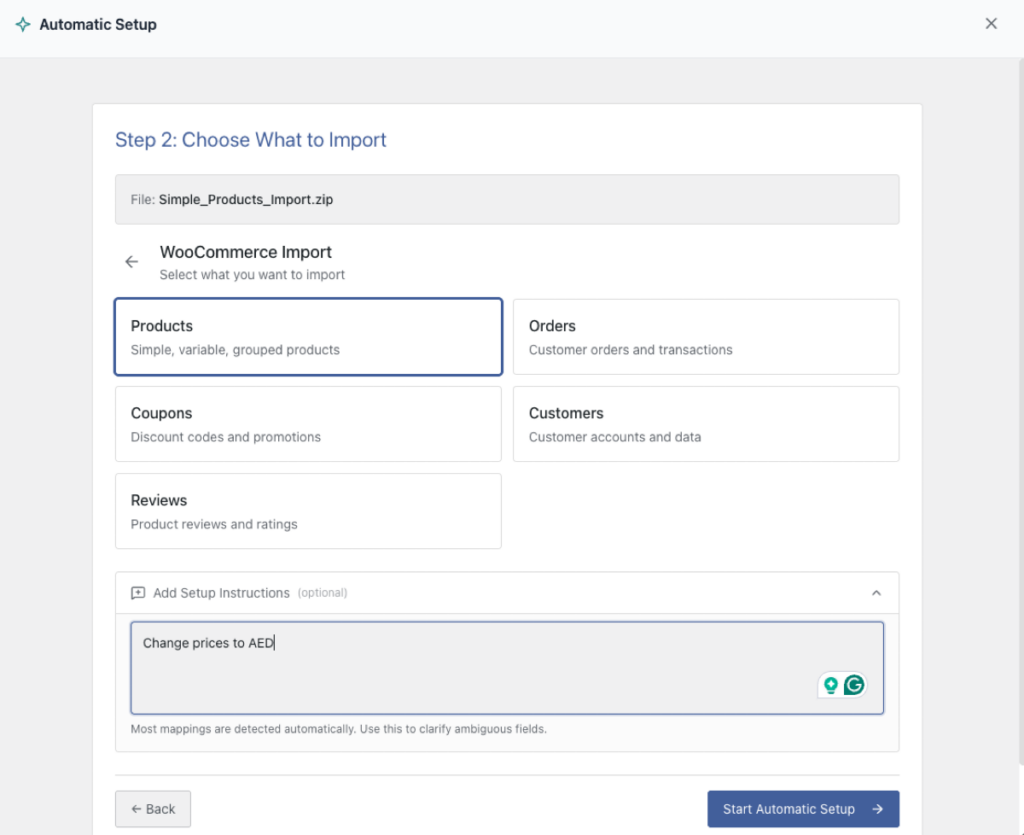
Some files need a sentence of explanation before the analysis starts, and Add Setup Instructions is where that goes. You write it in plain English, not code. “Fields are separated by semicolons” tells the importer how to split the rows. “Use the Item Cost column for regular price” settles a column whose purpose you can guess and the importer cannot.
Click Start Automatic Setup and a progress screen runs while it works. Automatic Setup reads how the file is structured and what sits inside each column, then pairs every column with a WooCommerce product field. Your supplier’s header names never get a vote.
Step 3: Review the Counts Product Field Mappings
Your Import Is Ready reports the number of records and the number of fields mapped. Compare both figures against the file before anything runs.
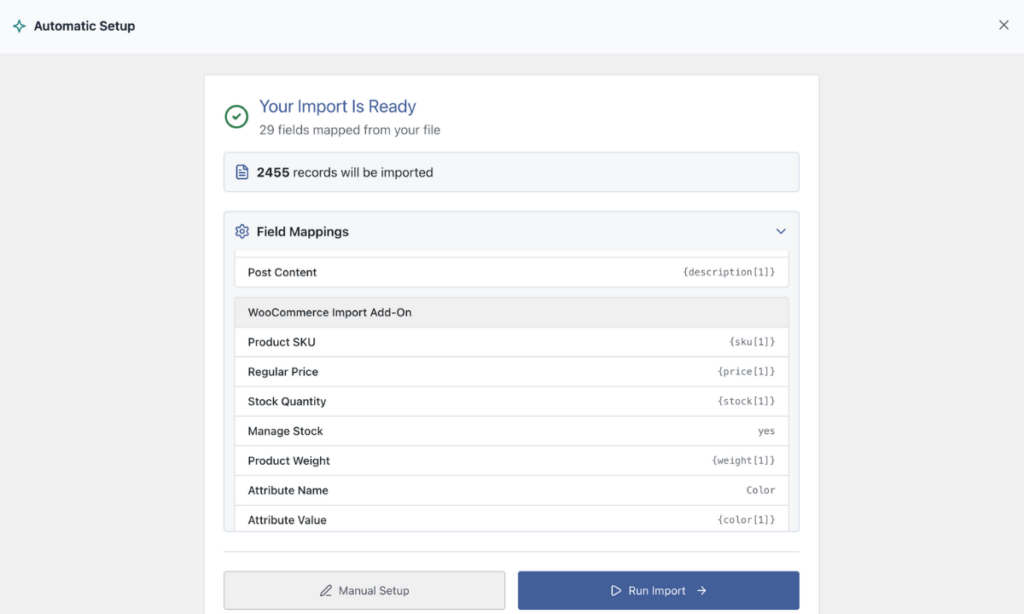
A record count above the product rows in your spreadsheet means the importer found more rows than you did. The usual cause is a broken line inside a description, from an unescaped quote or a stray line break.
A fields-mapped count far below the column count points at the delimiter instead. Correct that in Add Setup Instructions and start the analysis again, rather than re-saving the file to suit the plugin.
Field Mappings expands into every pairing, grouped under Core WordPress Fields and the WooCommerce Import Add-On. Skim titles, SKUs and price columns. Those three carry most of the weight in a catalog.
Step 4: Change Only the Fields That Need a Decision
Your Import Is Ready gives you three buttons, and Manual Setup is the one that opens the editor. Every pairing Automatic Setup made comes along with you, so nothing needs remapping by hand just to get in.
WP All Import’s drag-and-drop editor lives here. The automatic route never asks you to drag a column, which is rather the point of it, but this is the screen you open when something has landed where it shouldn’t have.
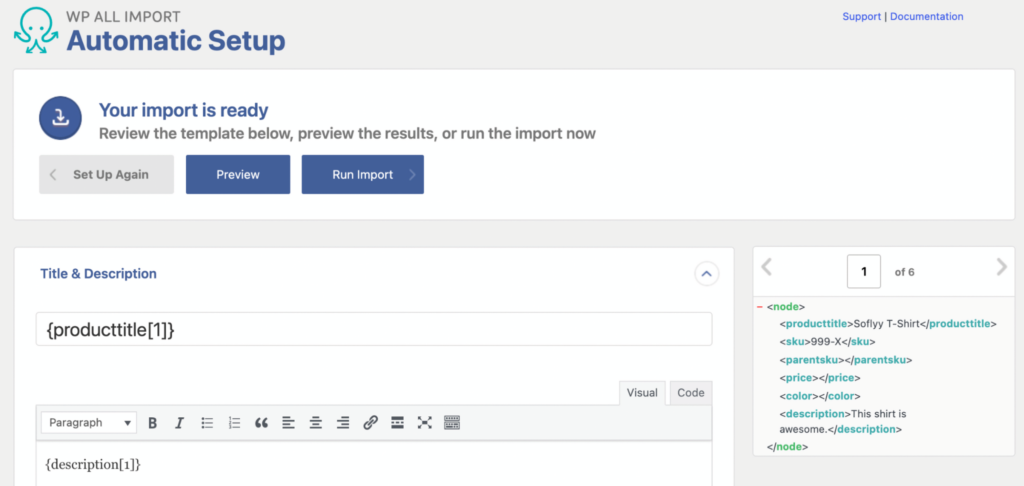
The editor keeps source columns on the right and WooCommerce fields on the left, split into Title & Description, WooCommerce Add-On, Images, Custom Fields and Taxonomies, Categories, Tags.
Three settings are worth a look on a product CSV import:
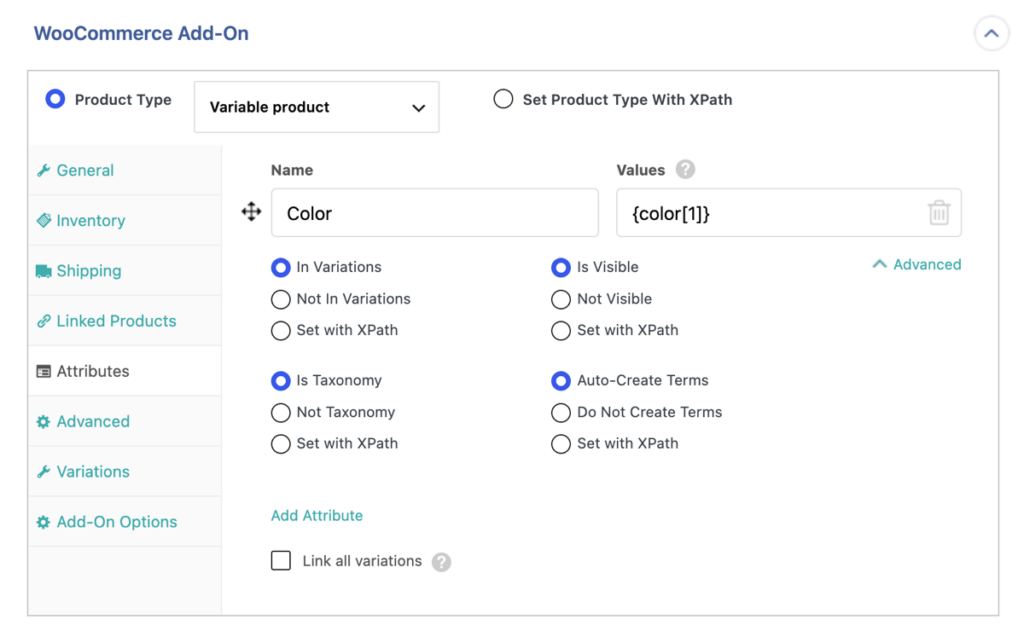
- WooCommerce Add-On › Product Type. Automatic Setup applies a product type only when the file carries a column for it. Without one, every row lands as a simple product.
- An element in my file contains the entire hierarchy, for category columns that use > between parent and child.
- PHP functions inside a mapping field. [ucwords(strtolower({title[1]}))] repairs an all-caps title, and {brand[1]} {model[1]} builds one from two columns.
Step 5: Preview the Product Import and Set the Unique Identifier
On the same page, click Preview and a panel opens beside the mappings. WP Admin View renders the WooCommerce product edit screen, so you can watch the data land under Product data › General, Inventory and Attributes. Frontend View renders the product page in your active theme, with the price and gallery as a shopper meets them.
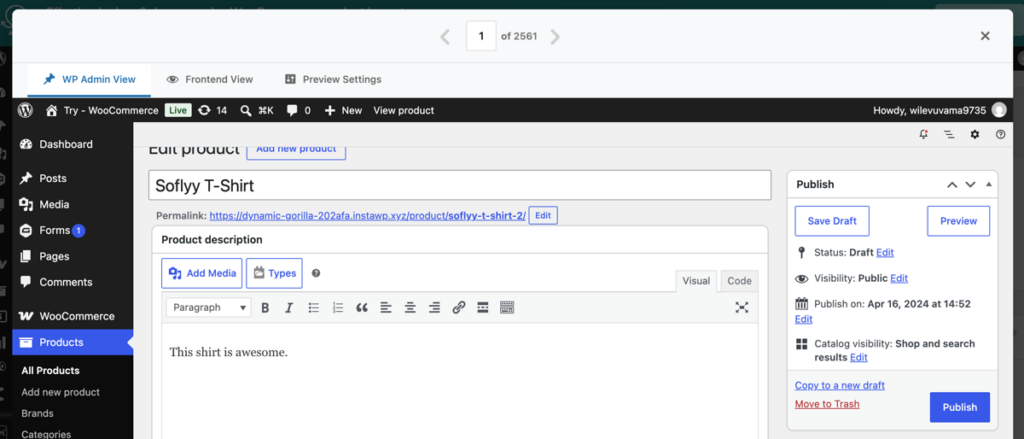
Step through rows with variable products or several image URLs. Those two structures break quietly, and both surface fast in a preview.
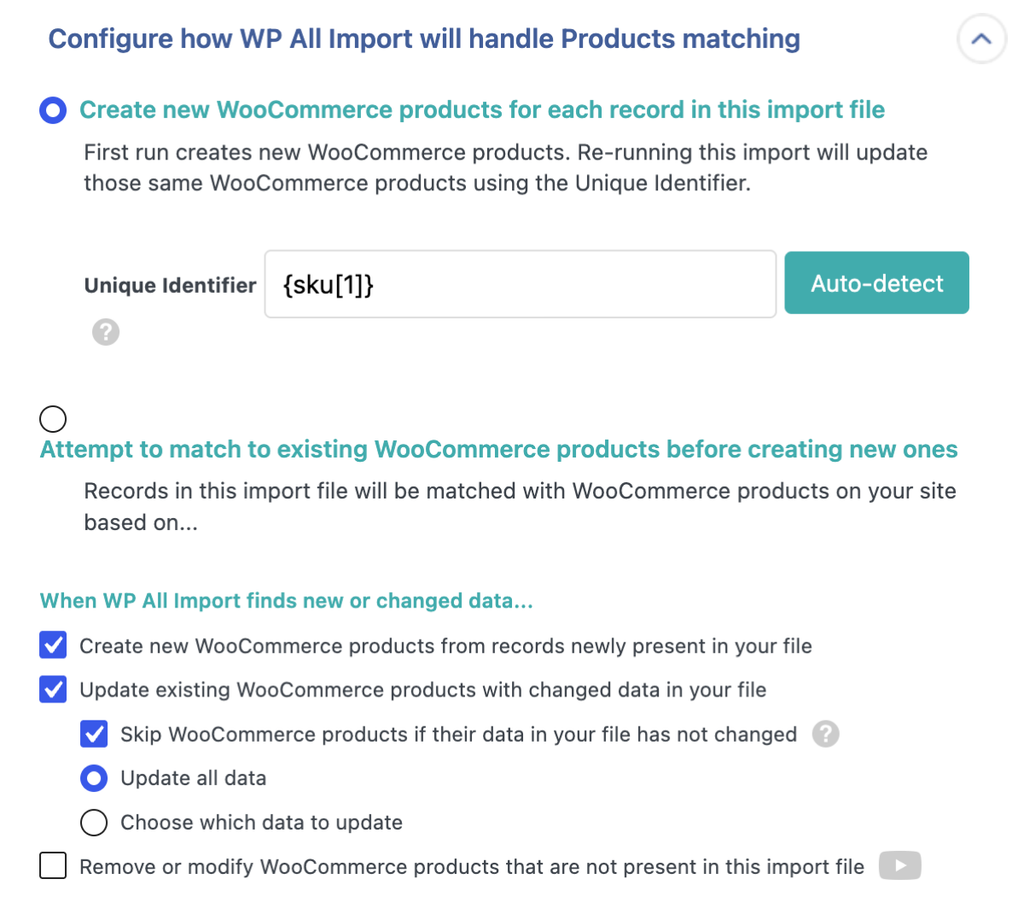
Once the rows look right, close the preview and continue. The next screen is Import Settings, where import picks up the rule for recurring product import. Set the Unique Identifier to SKU. This is the field WP All Import matches on the next time the same import runs, and the reason a revised file updates products instead of duplicating them. The same screen decides whether a run creates new products, updates the ones this import created, or updates existing products.
Step 6: Confirm and Run the Product CSV Import
Confirm & Run Import processes the CSV in background batches, which is what keeps a large catalog from hitting a server timeout partway through.
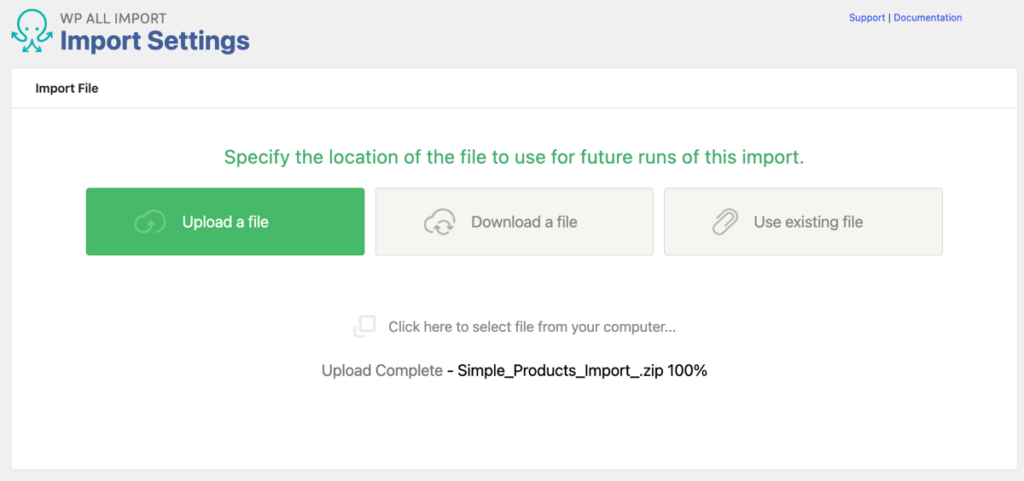
The completion summary reports what ran and what did not. When the count and the result disagree, the import log holds the row-level detail.
Then open Products › All Products and compare two or three products against the spreadsheet. Pick one with multiple images and a nested category, since those are the two structures most likely to arrive wrong.
Why the Second CSV Product Import Is Faster Than the First
Everything above is setup, and setup is the part you only do once. When the supplier sends their next catalog, you are not starting from an empty screen. You can directly start the import under Manage Imports with every mapping, product type and setting exactly where you left it.
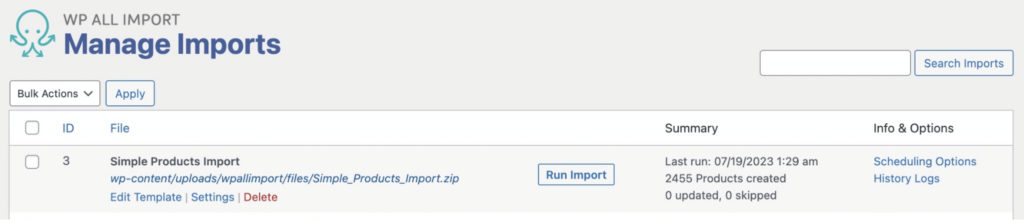
Click Settings, upload the new file and run it again. Each row finds its product by the SKU you set as the Unique Identifier, and Import Settings decides how much of that product a run is allowed to touch, so prices and stock can move while descriptions stay as they are. Keep the SKU column unchanged between file versions and the matching holds.
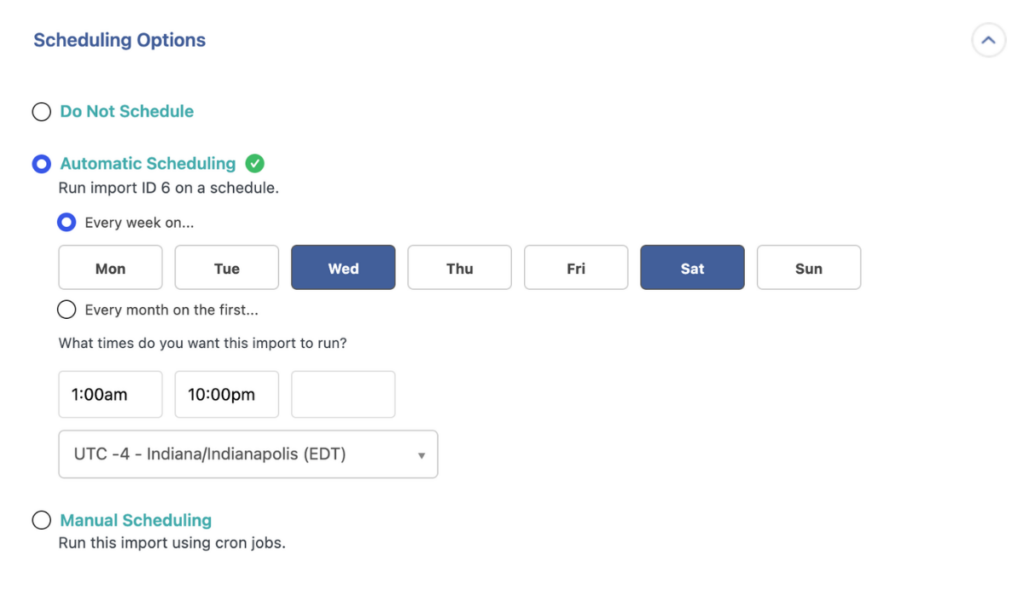
You can skip the upload entirely, too. Point the source at Download from URL and the import fetches the current catalog itself, then Scheduling Options runs it daily, weekly or monthly through Automatic Scheduling, a paid service at $19 per month covering unlimited sites. The free cron URLs on your server do the same job. Either route needs a URL or FTP/SFTP source, so a file you upload by hand stays a manual import.
Is WP All Import the Fastest Way to Import WooCommerce Products from CSV?
WooCommerce’s built-in importer is not slow because of your server. It is slow because of the file. The importer requires its published column schema, so a header it does not recognise gets skipped, and every field has to be comma separated. A catalog that already matches the template imports fine. A supplier’s file means renaming columns before you start.
WP All Import does not require a schema. Its Automatic Setup reads the values inside each column and pairs them with WooCommerce product fields, so a file with headers like Item Name and RRP imports without being renamed or re-saved. The first import takes six steps. The second takes one, because the import is saved under Manage Imports, the SKU is the Unique Identifier, and a new catalog is a re-run rather than a rebuild. Point the source at a URL and Scheduling Options can run it daily, weekly or monthly without you.
The speed comes from the setup being reusable. One mapping covers the first file and every file after it.
The WooCommerce Import Package is $169 a year, and the free plugin with its free add-on handles simple products.
Common Questions About Importing WooCommerce Products From CSV
How fast is a WooCommerce product import from a CSV file?
Speed comes down to the file, not the button. Once mapping is settled, WP All Import processes the catalog in background batches so a large CSV does not time out halfway. Images take the longest, since every URL is downloaded into the Media Library, and a file needing repair before upload costs more than the import itself.
Do I have to rename my CSV columns to match WooCommerce’s?
No. WP All Import’s Automatic Setup matches each column to a WooCommerce product field by reading the values inside it, so a column headed Item Cost lands in Regular Price without being renamed. WooCommerce’s built-in importer works the other way round and skips headers it does not recognise.
Why do accented characters break after importing a CSV into WooCommerce?
Encoding is nearly always the cause. WP All Import reads CSV files as UTF-8, since the format cannot declare its own encoding, so a file saved in Windows-1252 turns é and € into garbled text. Save as CSV UTF-8 in Excel or export from Google Sheets, then run the import again.
Can the same CSV update products that already exist?
Yes. Set the Unique Identifier to SKU on Import Settings and each row matches the product carrying that SKU, so keeping SKUs unchanged between versions is the only requirement. That screen also controls how much of each product a run may overwrite.
Can I import variable products from a CSV file?
Yes. WP All Import builds variable products from a flat CSV that lists each variation on its own row, with a column tying it to the parent. Add a product type column marking parent rows as variable, because Automatic Setup assigns a type only when the file carries one. Our guide to importing WooCommerce variable products covers the attribute side.