
How To Import Products From Shopify to WooCommerce
Importing products from Shopify to WooCommerce requires transferring product data such as titles, descriptions, prices, and more from the Shopify catalog into the corresponding WooCommerce fields. Variable products require additional care because Shopify variants must be recreated as WooCommerce variations and connected to the correct parent products.
WP All Import simplifies this process with Automatic Setup, which analyzes the exported Shopify product data and maps it to the appropriate WooCommerce fields. You can also use its drag-and-drop interface to modify these mappings before running the import.
In this guide, we’ll walk you through how to export your catalog from Shopify and import it cleanly into WooCommerce using these techniques.
Why Choose WooCommerce Over Shopify
While Shopify provides a convenient hosted environment, WooCommerce powers over 4 million online stores because it offers complete operational control with zero ongoing platform fees.

Migrating your store from Shopify to WooCommerce comes with a long list of valuable benefits, including:
- Zero Added Transaction Fees: Unlike Shopify, which charges an additional 0.5% to 2% fee when using third-party payment gateways, WooCommerce charges 0% platform transaction fees regardless of the payment processor you choose.
- True Data Ownership: Your product catalogs, customer histories, and order data live on your own self-hosted WordPress database rather than a proprietary closed ecosystem.
- Native Content and Commerce Integration: WooCommerce pairs your product listings with WordPress’s CMS and visual site builders like Breakdance, giving you total control over landing page layouts, SEO metadata, and checkout flows.
- Unlimited Custom Fields: You can extend product data using plugins like Advanced Custom Fields (ACF) or Meta Box without paying for expensive Shopify app subscriptions.
How To Import Products From Shopify to WooCommerce
Now that you are ready, let’s look at the step-by-step process in detail.
1. Manually Export Products From Shopify
Before setting up your WooCommerce import, export your product catalog from the Shopify admin. To do this:
- Log into your Shopify dashboard and go to Products.
- Click the Export button in the top-right corner.
- Under Export, select All products.
- Under Export as, choose CSV for Excel, Numbers, or other spreadsheet programs.
- Click Export products to download the file (or have it emailed for large stores).
For more detailed information, see the comprehensive guide for exporting products from Shopify.
Please note that Shopify does not include actual image files in its CSV export; instead, it provides public links to photos hosted on its Content Delivery Network (CDN) in the Image Src column. Your Shopify store must remain active until your WooCommerce import finishes so WP All Import can fetch and download those full-resolution images directly into your WordPress Media Library.
2. Install WP All Import and Its WooCommerce Import Add-On
To import the exported Shopify product data into WooCommerce, we’ll be using the WP All Import plugin. It lets you natively parse Shopify’s Handle-based variant structure without requiring you to reformat the CSV in Excel.
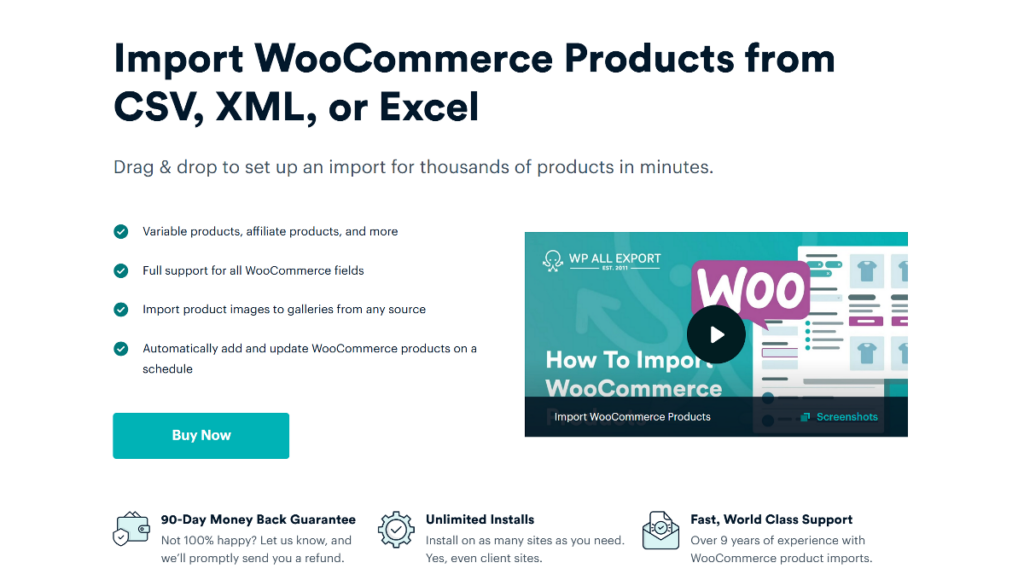
The plugin combines zero-configuration Automatic Setup for rapid migrations with an advanced template editor for custom data adjustments.
Some of the most exciting features that WP All Import offers include:
- Automatic Setup that inspects Shopify CSV columns and maps handles, prices, inventory, and images on upload.
- Full support for variable products, multi-tier options (e.g., Size, Color, Material), and SKU matching.
- Direct image downloads from Shopify CDN links into the WordPress Media Library with duplicate prevention.
- Compatibility with custom post meta and SEO plugins like Yoast and Rank Math.
- Background batch processing to prevent server timeouts on catalogs with thousands of items.
To get started, purchase the WooCommerce Import Package from the WP All Import website.
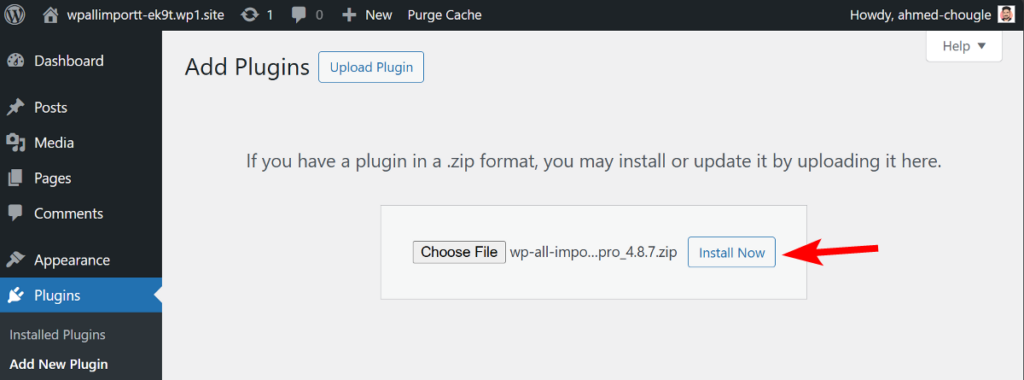
Once downloaded, go to your WordPress admin dashboard and navigate to Plugins › Add New › Upload Plugin, choose the WP All Import zip file, and click Install Now › Activate. Repeat the same steps for the WooCommerce Import Add-On.
3. Start Shopify to WooCommerce Product Import
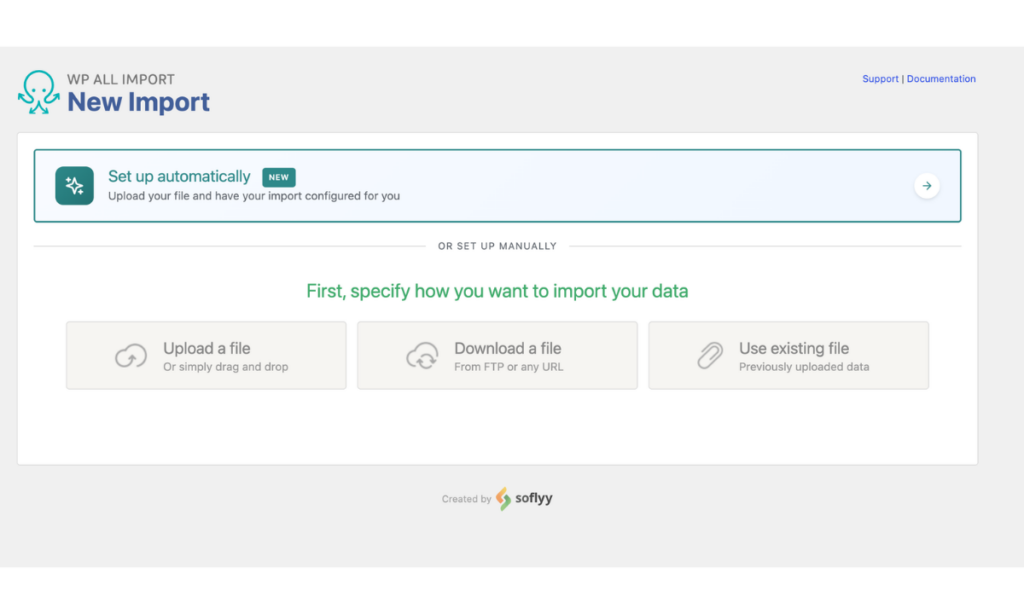
Navigate to All Import › New Import from your WordPress admin dashboard.
At the top of the screen, click the Set up automatically banner to launch the migration wizard.
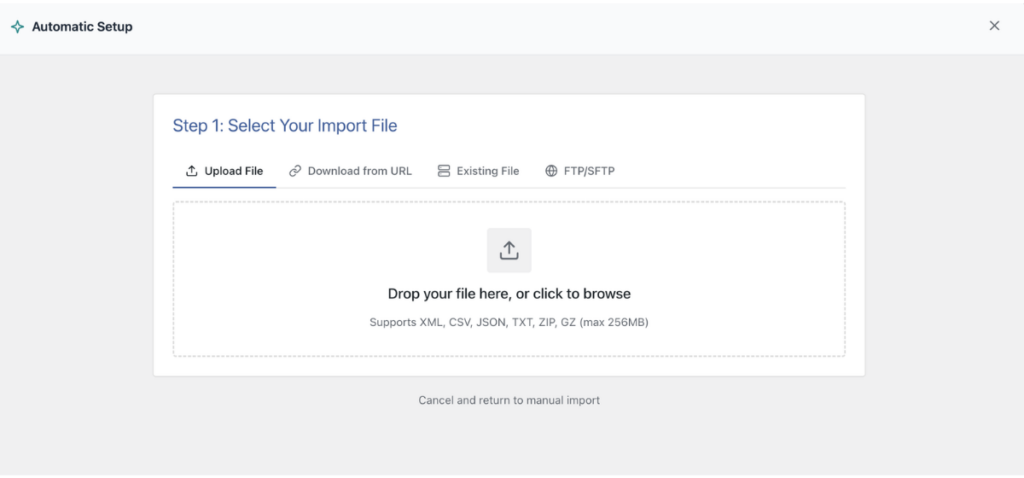
Under Upload File, select the raw product CSV you downloaded from Shopify.
Under Choose What to Import, select WooCommerce, then choose Products (Simple, Variable, Grouped).

You can also expand the optional Add Setup Instructions field to give the wizard extra context about your Shopify catalog. For example, you can tell it how to handle specific data rules, such as “Map Variant Compare At Price to regular price and Variant Price to sale price” or “Import the Vendor column as a product attribute”. This ensures that your pricing logic and custom Shopify tags are interpreted accurately right from the start.
Once everything is ready, click Start Automatic Setup. WP All Import analyzes Shopify’s column conventions, recognizes parent items and child variant rows via the Handle column, and builds your field mappings automatically.
4. Review the Migration Summary Card
When the analysis completes, WP All Import presents the Your Import Is Ready summary card, displaying the total detected records and the number of mapped fields.
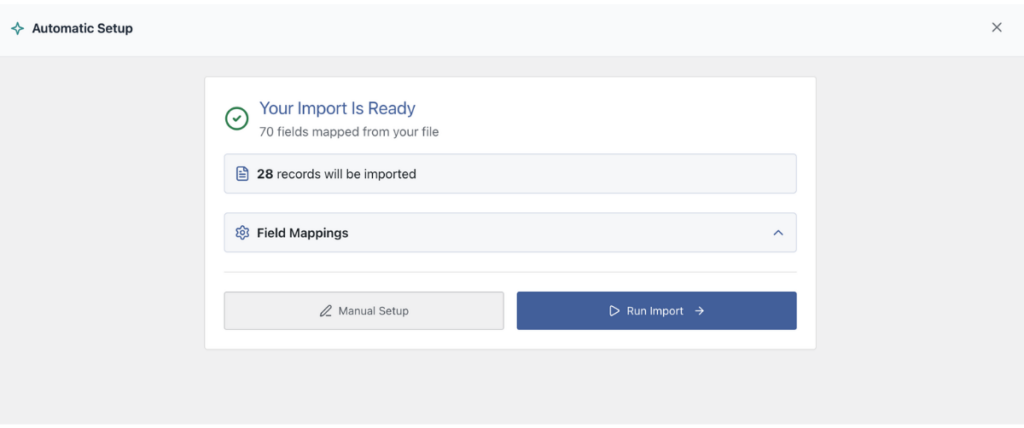
Scroll through the Field Mappings list below the card to verify that product names, prices, SKUs, and image links were correctly assigned.
If you want to migrate your entire catalog as-is, click the Run Import button to proceed directly to running the import.
If you only want to migrate a specific collection or product category, click Manual Setup and select Back to Create Filters at the bottom of the screen. For example, you can create a rule where the Type element equals Apparel to import only clothing items.

After applying filters, click Continue to Setup Import.
5. Review Auto-Mapped Shopify Fields in the Template Editor (Optional)
As Automatic Setup pairs Shopify columns to WooCommerce fields on upload, manual column mapping is optional. However, WP All Import’s template editor lets you verify how Shopify attributes are mapped across your catalog.
Title & Description
Automatic Setup maps Shopify’s Title column to Post Title and routes the Body (HTML) column into the main WooCommerce Product Description.

WooCommerce Add-On Panel
Open the WooCommerce Add-On panel to review your core product data. The wizard automatically sets the Product Type and pre-populates the Variant SKU, Variant Price, and Variant Compare At Price (mapped to Sale Price).

In the Attributes tab, WP All Import automatically pairs Shopify’s Option1 Name, Option2 Name, and their corresponding values (like Size and Color) to WooCommerce product attributes and enables them for variations.
Images Panel
In the Images panel, WP All Import selects “Download images hosted elsewhere” and populates the field with Shopify’s Image Src column.
The plugin downloads each image from Shopify’s CDN, adds it to the WordPress Media Library, assigns the primary image as the WooCommerce featured image, and places secondary angles into the product gallery.

You will find other options for image import settings within the Images panel. You can leave the default settings or change them as needed.
Custom Fields Data
WP All Import provides the Custom Fields panel to enable you to import custom data of your Shopify products. If you have previously manually added a product with custom fields to your WooCommerce store, WP All Import will auto-detect these custom fields and will display a button to See Detected Fields.
However, if you have not added any products to your WooCommerce store, you can manually create the custom fields. To do this, add a Name and drag and drop the element for that custom field into the Value input box.

Taxonomies, Categories & Tags
Automatic Setup routes your Shopify “Type” column into WooCommerce Product Categories and maps the comma-separated “Tags” column directly into WooCommerce Product Tags.

Once you’ve confirmed that the mappings reflect your catalog structure, scroll to the bottom of the screen and click Continue to Import Settings.
6. Configure Additional Product Import Settings
The Import Settings screen controls how WP All Import creates records and prevents duplicate products.
Click Auto-detect to generate a Unique Identifier. For Shopify imports, WP All Import typically uses a combination of the product Handle and Variant SKU to distinguish individual items.

Under the update settings, you can define how the plugin behaves if you ever re-run this migration file in the future, such as updating prices and stock without overwriting customized descriptions.
Scroll down to reveal panels for Scheduling Options and Configuring Advanced Settings. From the Scheduling Options panel, you can set up automatic product imports that run on a schedule or manually create cron jobs on your server to automate imports.
The Configure Advanced Settings panel contains settings to optimize the speed of your import. You can leave the default settings or modify them as needed.
Click Continue to proceed to the final confirmation screen.
7. Run Shopify to WooCommerce Product Import
On the Confirm & Run screen, WP All Import provides a summary of your import settings so you can review them and confirm that there will be no issues with your import. If you notice any errors, you can return to the previous steps to fix them before you run the import.

If you are satisfied with the import settings, click the Confirm & Run Import button to start the import.
WP All Import processes your Shopify file, downloads all media assets, establishes parent-child variation links, and displays an Import Complete summary.

Navigate to Products › All Products in your WooCommerce dashboard to see a list of all your imported products. You can check the product data tabs of a few products at random to double-check that all their data is imported successfully.

Import Products From Shopify to WooCommerce – FAQs
How Do I Import a CSV File From Shopify to WooCommerce?
To import a CSV file from Shopify to WooCommerce, install WP All Import alongside its WooCommerce Import Add-On. Go to All Import › New Import, click the Set up automatically banner, and upload your Shopify export file. Select WooCommerce Products, click Start Automatic Setup to map catalog fields and variant structures automatically, and click Run Import to publish your products.
How Do I Migrate Shopify Products to WooCommerce with Images?
You can migrate Shopify products with images by uploading your Shopify CSV export directly into WP All Import. The plugin reads the image URLs hosted on Shopify’s CDN, downloads the image files directly into your WordPress Media Library, sets the primary photo as the featured image, and organizes secondary images into the WooCommerce product gallery.
Can WP All Import Handle Shopify Variable Products?
Yes. WP All Import automatically parses Shopify’s variant row structure during Automatic Setup. It links child variation rows to their parent products using the Shopify Handle column and converts Shopify option columns (such as Option1 Name and Option1 Value) into functional WooCommerce variation attributes in a single import pass.
Do I Need to Keep My Shopify Store Open During the Import?
Yes. You must keep your Shopify store active until your WooCommerce import finishes. Shopify export files do not contain image files—they contain external links pointing to Shopify’s image servers. If you cancel your Shopify plan before importing, those image URLs will stop working, preventing WP All Import from downloading your product photos.
How Do I Import Shopify Orders Into WooCommerce?
To import Shopify orders into WooCommerce, export your order history from Shopify as a CSV file. In WP All Import, create a new import, select WooCommerce Orders as the target post type, and map customer billing, shipping, line items, and payment details using the visual template editor before running the import.